How To Make Sourdough
Beginner Path System
Start Here Starter First Loaf Troubleshooting Get Guided Version

admin

How to Know When Sourdough Starter Is Ready to Bake With: 5 Signs That Actually Tell You (Not Just the Float Test) — Why Starter Readiness Matters So Much — 5 Signs Your Sourdough Starter Is Ready to Bake With — The Float Test: When It Works and When It Doesn’t

March 2, 2026 by admin Leave a Comment


Quick answer: Your sourdough starter is ready to bake with when it has doubled in size since its last feeding, the top is domed (not flat or collapsed), it smells like mild yogurt or beer, the texture is bubbly and webby throughout, and it’s at peak activity — not past it. The float test alone is not reliable.

The float test is everywhere. Drop a spoonful of your starter in water. If it floats, it’s ready. If it sinks, keep waiting.

Here’s the problem: the float test lies. Regularly.

A starter can float and be past its peak — depleted, acidic, and not strong enough to leaven bread. A starter can sink and be at perfect peak activity — just not airy enough to float yet. Bakers who rely on the float test alone end up confused when their bread doesn’t rise even though their starter “passed.”

Here’s what I’ve learned after 2,973+ loaves testing every variable: your starter tells you what it needs in clear, consistent signals. Each time you want to try something new, you’re starting from scratch without a framework connecting the pieces. The float test picks up one of those signals — gas production — and ignores the rest. Once you know all five signs, you’ll never need to guess.

Let me save you the frustration of baking with a starter that looked ready but wasn’t.


Why Starter Readiness Matters So Much

Your starter is the only leavening agent in your bread. There’s no commercial yeast as backup. No baking powder. The wild yeast and lactic acid bacteria you’ve been cultivating.

If your starter goes into the dough at anything other than its peak of activity, you’re starting behind. Underactive starter = underfermented dough = dense, flat bread. Overripe starter = acidic, depleted, weakened rise = flat bread with a harsh sour taste.

Peak activity is a window, not a moment. It lasts 1-3 hours depending on your starter’s health and your kitchen temperature. Your job is to catch it in that window.

Here are the five signs that tell you exactly when you’re in it.


Your starter is a living thing. It responds to your kitchen, your flour, your timing. After 2,973+ loaves, I can tell you there’s no single right answer

— but there is a method that works for your life.”

5 Signs Your Sourdough Starter Is Ready to Bake With

Sign 1: It Has Doubled in Size (the Volume Test)

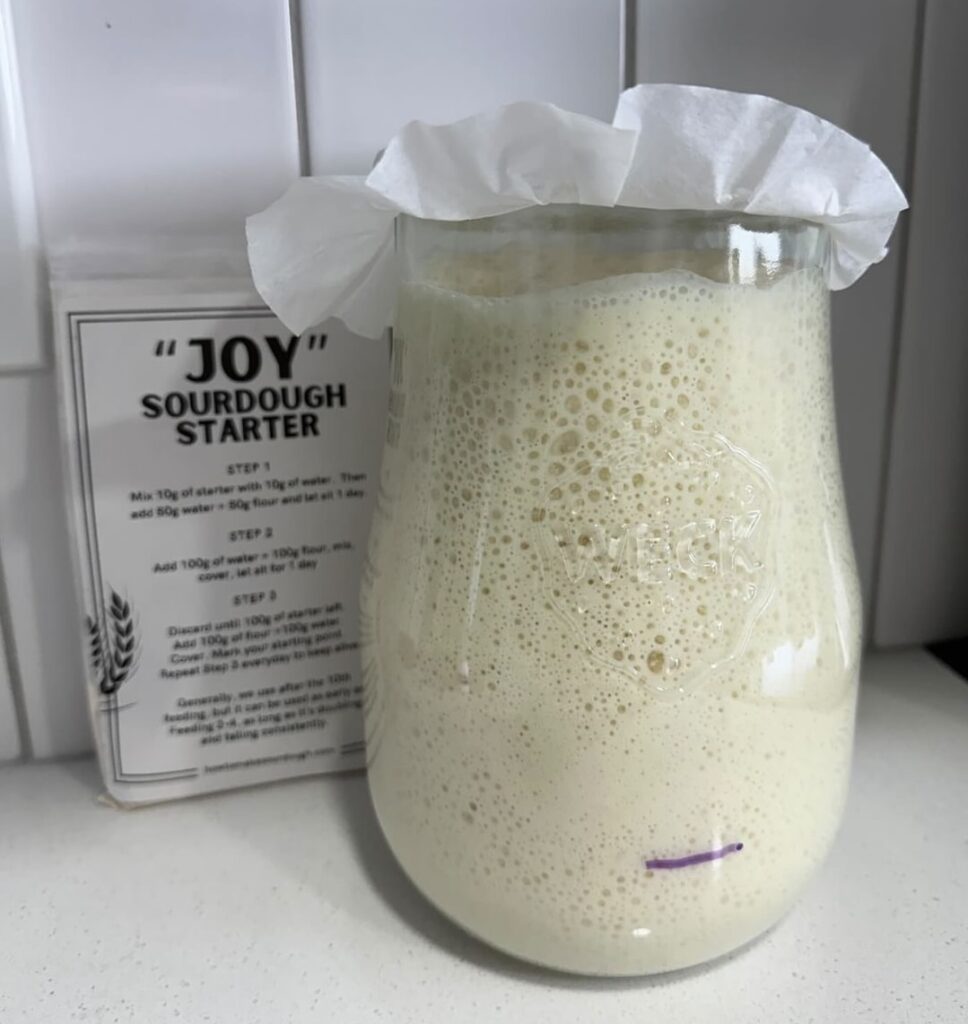
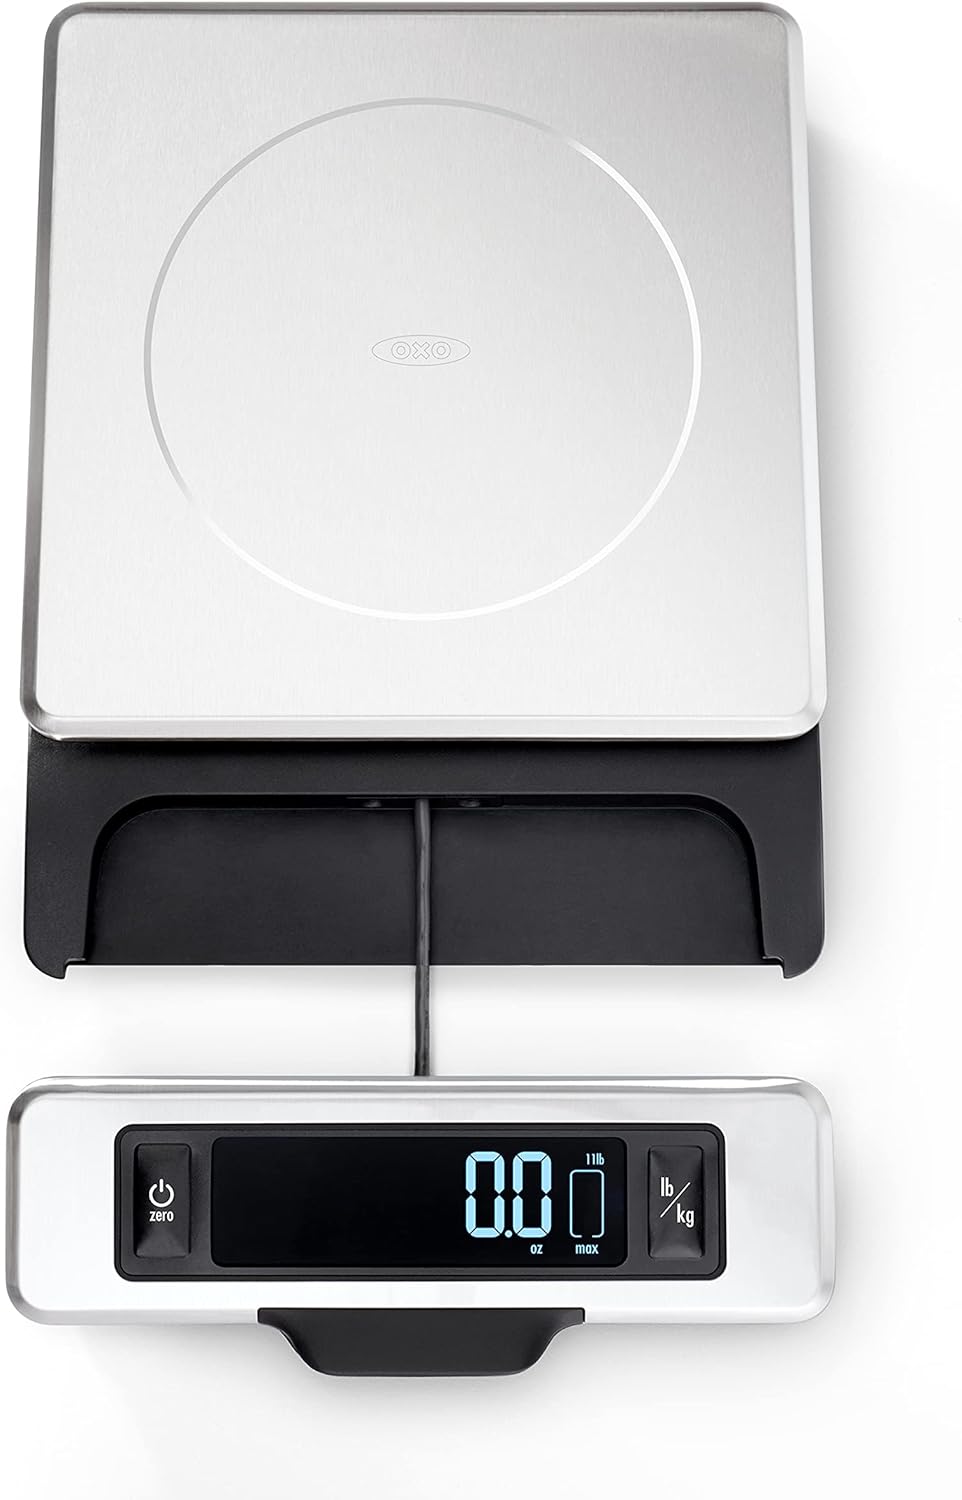
Here’s the thing: after a feeding, a healthy starter will rise significantly — roughly doubling in volume. Mark the level right after you feed it with a rubber band or tape. When the starter has risen to twice that mark, it’s in its active window.

Here’s the thing: how fast this happens depends on your kitchen temperature. In a warm kitchen (75-78°F), it might take 4-6 hours. In a cooler kitchen (68-70°F), it can take 8-12 hours. That’s normal.

What you don’t want: a starter that barely moved at all (under-established or overly cold) One that rose dramatically and then collapsed back down before you noticed. If yours keeps collapsing before you use it, feed it more frequently or use it earlier in the rise.

This is your most reliable baseline sign. Track it every time.

Sign 2: The Top Is Domed or Slightly Peaked

At peak activity, the surface of your starter will dome slightly upward — like a hill, not like a crater. This dome tells you the yeast is still producing CO2 and the culture is in its active phase.

When the dome starts to flatten or the surface looks concave (curving inward like a bowl), your starter has passed peak. It’s still alive — it just burned through its food supply and is now in the decline phase. You can still use it, but your results will be less reliable.

Here’s what matters: watch the dome. It’s a more accurate gauge than any timer.

Sign 3: It Smells Like Mild Yogurt, Beer, or Fresh Bread

Smell is one of the most useful and least-talked-about starter readiness signals.

At peak activity, a healthy starter smells pleasantly tangy, like plain yogurt, mild beer, or the yeast-forward smell of bread dough. It’s an appealing, fermented smell, not an aggressive one.

Smells that tell you something is off:

  • Sharp nail polish or acetone smell = too much acetic acid, starter is hungry or stressed (normal in young starters, feed it more regularly)
  • Very strong vinegar smell = overripe, past peak, needs a feeding
  • No real smell at all, flour = starter may be too cold or not yet active

The yogurt-beer smell is your target. Trust your nose, it picks up fermentation chemistry your eyes can’t.

Here’s the thing: once you know what a healthy active starter smells like, you won’t forget it.

Sign 4: The Texture Is Bubbly and Webby Throughout

Here’s why this works: scoop a small spoonful of your starter and look at the texture. At peak activity, it should be full of bubbles, not just on the surface but throughout the whole culture. Stir it and you’ll see it’s stringy and slightly gelatinous, with a web-like structure.

This webby texture is the gluten structure in the flour, developed by bacterial activity over the feeding cycle. It’s a sign of a well-developed, active culture.

Contrast this with a starter that looks soupy and liquid One that looks dense and heavy with no bubbles, both indicate it’s either overly hungry or not yet mature.

Upgrade hint: Understanding the bacterial activity inside your starter, what the different microorganisms do and when they peak, is part of what I cover in the Starter Science section of Bread ASAP. It makes the timing make sense instead of feeling like guesswork.

Sign 5: It Passes the Spoon Drag Test (Better Than the Float Test)

Here’s a better version of the float test: drag a spoon through the surface of your starter. At peak activity, it should feel slightly resistant and spring back a little, like a loose gel. The surface should hold a brief trace of the spoon’s path before settling.

Contrast this with:

  • Starter that’s very liquid, spoon drags through with no resistance, overripe or very hungry
  • Starter that’s very thick and heavy, barely moves, may be too cold, or needs more water in the feeding

If your starter passes the spoon drag test, has the dome, the bubbly texture, and the right smell, you can skip the float test entirely. You already have four stronger data points.


The Float Test: When It Works and When It Doesn’t

The float test works when your starter is very, vigorous, so full of CO2 bubbles that it’s literally lighter than water. This is a valid sign of peak activity. But it’s not the only valid sign, and it’s not always achievable.

Starters that are slightly earlier in the rise cycle may not have enough trapped gas to float, but they’re still in their active window and will work beautifully in bread.

Starters that are past peak but still have residual gas may float, but they’re in decline and will give you weaker results.

Use the float test as one of five signs, not as the definitive answer.


How Old Does a Starter Need to Be Before It’s Ready?

A newly made starter needs 10-14 days of consistent feedings before it’s strong and predictable enough to leaven bread. In the first week, it may show some activity but isn’t yet established. By day 10-14, if you’ve been feeding regularly (once or twice daily), you’ll see consistent doubling and the signs above reliably.

If you’ve been making a starter for two weeks and still can’t see reliable rise and dome, consider these possibilities:

  • Your kitchen is too cold (below 65°F consistently, move it to a warmer spot)
  • Your water is heavily chlorinated (switch to filtered water or water left out overnight)
  • You’re feeding with bleached flour (switch to unbleached, or add 10% whole wheat)
  • Your feeding ratio is off (try 1:1:1 by weight, equal parts starter, flour, water)

For more on the full cultivation process, the 7-day starter guide walks you through exactly what to expect each day.


What Happens If You Bake With Starter That Isn’t Ready?

Too early (before peak): Your bread will rise slowly or not at all. Dense crumb. You might see some oven spring if the starter is close, but the final loaf will be tighter than it should be.

Too late (past peak, collapsed): The starter is acidic and depleted. It can still produce some rise, but the flavor will be sharper and more sour. The gluten development in your dough may be weaker because the acids have been breaking down protein for too long.

At peak: Maximum rise, best flavor balance (mildly tangy, not sharp), strongest gluten development in your final dough.


Still Fighting With Your Starter After Weeks of Trying?

The truth is, this is one of the most common places beginners get stuck. You’ve been feeding consistently. You’re watching for the signs. But something’s still not clicking, the rise is inconsistent, the timing is unpredictable, and you don’t fully trust what you’re seeing.

There’s a shortcut: skip the cultivation entirely.

Here’s what matters: my Proven Starter ($19.99) ships dehydrated for safe transit. It’s already established, the wild yeast culture is strong, the feeding history is consistent You’re starting from a place of proven activity rather than building from scratch.

This is what I send to bakers who’ve been at this for weeks and can’t get their homemade starter to peak reliably. Sometimes the issue is chlorinated water. Sometimes it’s flour quality.

Real talk: sometimes the kitchen is just too cold. Sometimes You want to start baking bread without the two-week cultivation. All valid reasons.

The Proven Starter comes with a 60-day “It Works Or Free” guarantee and free US shipping. If it doesn’t perform, I’ll replace it or refund it, no questions.

Not ready for a starter buy? The Bread ASAP class ($47) includes a complete starter readiness module, video walkthrough, the full 5-sign framework How to time your feedings so your starter peaks exactly when you need it for your bake. 60-day guarantee.


Frequently Asked Questions About Sourdough Starter Readiness

How do I know when sourdough starter is ready to use?

Your sourdough starter is ready when it has doubled in size since its last feeding, the top is domed (not flat or collapsing), it smells like mild yogurt or beer, and the texture is bubbly and webby when you stir it. These four signs together are more reliable than the float test alone. Peak activity is a 1-3 hour window, aim to mix your dough when you see all four signs present.

How long after feeding is sourdough starter ready?

This depends on your kitchen temperature. At 75-78°F, your starter typically peaks 4-6 hours after feeding. At 68-70°F, it may take 8-12 hours. At 65°F or below, it can take even longer. Rather than watching the clock, watch for the dome: when it reaches its highest point and before it starts to flatten, you’re in the window.

Can I use sourdough starter straight from the fridge?

You can, but you’ll get weaker results. Refrigerated starter is dormant, the yeast and bacteria are slowed down significantly. To use fridge starter, pull it out, feed it, and let it come to room temperature and peak activity (4-12 hours depending on your kitchen) before mixing it into dough. Baking with cold, unfed starter out of the fridge will usually produce denser bread with a less predictable rise.

Why does my sourdough starter float sometimes and sink other times?

The float test measures gas content, whether your starter has enough trapped CO2 to be buoyant. Whether it floats depends on how active the culture is AND how much time has passed since feeding. A starter can be at peak activity but not float (not enough gas yet). A past-peak starter can float briefly before deflating (residual gas). Use the five signs in this guide rather than relying on the float test alone.

My starter smells very sour or like vinegar, is it ruined?

No. A very sour or vinegary smell means your starter is hungry and past its peak, it hasn’t been fed recently enough, or you’re using a low feeding ratio. Feed it (1:1:1 by weight, 50g starter, 50g flour, 50g water), let it come back to peak activity, and the sharp smell will mellow significantly. Only discard your starter if you see actual mold (fuzzy, colored growth, not the normal gray liquid called “hooch” that sits on top of an unfed starter).


You’ll Know Your Starter

Once you know these five signs, you stop guessing. You start reading. That shift, from following instructions to reading your dough and your starter, is the difference between baking that works and baking that doesn’t.

If you’re building your starter from scratch, the 7-day guide to making sourdough starter gives you the full day-by-day process with what to expect at each stage. And for the complete beginner bake, the first loaf guide walks you through everything after your starter is ready.

Happy baking. Roselle


What does your starter smell like right now? Leave a comment. I can help you diagnose where it’s at and what it needs.


Filed Under: Sourdough Bread Recipe With Starter

Why Is My Sourdough Bread Dense? 7 Real Causes and How to Fix Each One (Troubleshooting Guide) — Why Sourdough Bread Gets Dense (The Short Science Version) — The 7 Causes of Dense Sourdough Bread — Quick Diagnosis: What Does Your Dense Bread Look Like?

March 2, 2026 by admin Leave a Comment


Quick answer: Dense sourdough bread is almost always a fermentation or shaping issue — not a recipe problem. The seven most common causes are: inactive starter, underproofing, overproofing, wrong flour, poor shaping, wrong baking temperature, and dough that’s too cold when it goes in the oven. Each cause has a specific fix.

Here’s the thing: dense sourdough bread is the most common complaint I hear from beginners. You follow a recipe step-for-step. You use good flour.

You time everything right. And you still pull a brick out of the oven.

It’s demoralizing. Especially when the recipe made it look so achievable.

Here’s the truth: dense bread is almost never a recipe problem. It’s a diagnosis problem. There are specific causes, specific signs for each one, and specific fixes.

Once you know what you’re looking for, you can almost always trace dense bread back to one of seven things. And most of them are correctable before your next bake.

I’ve baked 2,973+ loaves. I’ve had dense loaves at every skill level. I’m not going to tell you this is easy to master overnight. But I’m going to tell you exactly where to look, because that’s what most guides skip.

You didn’t fail at sourdough. You haven’t found the cause yet.


Why Sourdough Bread Gets Dense (The Short Science Version)

Sourdough bread rises because of two things working together: the CO2 bubbles produced by active wild yeast, and the gluten network that traps those bubbles and holds the structure as it bakes.

Dense bread means either there weren’t enough bubbles (fermentation failure) or the gluten couldn’t hold them (structural failure). Both lead to the same result — a tight, heavy crumb instead of an open one.

That’s the lens for all seven causes below. Every one of them is either killing bubble production, weakening your gluten network, or both.


After 2,973+ loaves and teaching 459+ home bakers, I’ve learned that sourdough success isn’t about following the perfect recipe

— it’s about understanding the method behind it.”

The 7 Causes of Dense Sourdough Bread

Cause 1: Your Starter Wasn’t Active Enough

This is the most common cause of dense bread for beginners, and it’s the one most recipes gloss over.

Your starter needs to be at its peak before you use it in dough. Peak means it’s doubled in size since its last feeding, the top is domed (not flat or collapsing) It smells like mild yogurt or beer. A starter that’s past its peak has exhausted its food supply — the yeast is still alive but sluggish. An immature starter (not fully established, fewer than 10-14 days old) may not have enough wild yeast activity to leaven a full loaf.

Signs this is your problem: Your dough didn’t grow much during bulk fermentation. Your bread is consistently dense across multiple loaves, not just occasionally.

Fix: Time your bake around your starter’s peak. Feed your starter 4-8 hours before you mix your dough (at room temperature — less in a warm kitchen, more in a cool one). Mix when the starter is domed and at peak, not when the recipe says to.

If your starter is weak or young, give it a week of consistent twice-daily feedings before using it for bread. Or skip the cultivation entirely — a Proven Starter ($19.99) ships dehydrated for safe transit, with the wild yeast culture already established. It’s what I send to bakers who’ve been fighting this problem for weeks.

Cause 2: Underproofing (The Most Common Fermentation Mistake)

Underproofing means you shaped and baked before the dough had enough time to ferment. The yeast didn’t have time to produce enough CO2, so there wasn’t enough gas to create an open crumb.

Signs this is your problem: Your score didn’t open up in the oven. The crumb is dense and tight all the way through, not just in some spots. The bread looks squatter than it should. It may have a slight doughy taste.

Fix: Stop baking by the clock. Start baking by the dough’s signals. During bulk fermentation, you’re looking for:

  • 50-75% increase in volume (not doubled — that’s often overproofing)
  • A domed surface with small bubbles
  • Dough that jiggles like firm jello when you shake the bowl
  • A slightly webby texture when you pull a small piece

These signs matter more than time. In a cool kitchen (65-68°F), bulk fermentation can take 10-12 hours. In a warm kitchen (76-78°F), it can be done in 4-5 hours. The dough tells you, not the clock.

This is the part most recipes skip — and it’s where most beginners go wrong.

Cause 3: Overproofing (The Opposite Problem)

Overproofing is when fermentation goes too long. The yeast has consumed all the available food. The gluten structure has weakened and can no longer hold gas bubbles. The dough spreads instead of rising.

Signs this is your problem: Your shaped dough spread very flat in the fridge or before it went in the oven. Your bread baked flat, not round. The crumb has large irregular holes in some spots and dense areas in others. The bread may taste overly sour.

Fix: Shape and refrigerate earlier. If your bulk-fermented dough feels very slack, almost liquid, and doesn’t hold its shape, it’s overproofed. Watch for the signs at the 50-75% mark and shape before the dough gets too active.

The cold fridge proof slows fermentation significantly — you have a wide window there (8-16 hours is fine). The problem usually happens in the bulk ferment, not the cold proof.

Cause 4: Wrong Flour (Low Protein Content)

Bread flour has 12-14% protein. All-purpose flour has 10-11%. That 2-3% difference matters more than you’d expect.

Higher protein flour builds a stronger, more extensible gluten network. That network can trap more CO2 bubbles, support more oven spring, and hold its structure as it bakes. Lower protein flour produces weaker gluten that tears or collapses under pressure.

Signs this is your problem: You switched flour brands or types and your results changed. Your dough tears when you try to shape it or doesn’t hold the shape you create.

Fix: Switch to bread flour. King Arthur Bread Flour is widely available and consistent. For even more gluten strength, add 5-10% rye flour, it’s high in minerals that feed the wild yeast and produces more active fermentation.

Upgrade hint: Understanding flour protein percentages and how to use different flour blends is something I dig into in Bread ASAP, along with which flours are worth the money and which ones are marketing noise.

Cause 5: Poor Shaping (Not Enough Surface Tension)

Shaping isn’t just cosmetic. A properly shaped loaf has surface tension on the outside, the gluten is stretched taut like a drum skin. That tension holds the loaf’s shape during the proof and oven spring. Without it, the loaf spreads outward instead of rising up.

Signs this is your problem: Your loaf spreads flat before and during baking. The crumb is dense near the bottom and more open near the top. The loaf looks wide and squat rather than round and tall.

Fix: Practice building tension during the final shape. After you fold the dough, use your hands or a bench scraper to drag the shaped loaf toward you on an unfloured counter, the friction pulls the bottom of the dough tighter. You’re looking for a taut surface that springs back slowly when you poke it.

If your dough is too sticky to shape, use very light flour on the counter (not too much, flour inhibits the friction that builds tension). Wet hands can also help if the dough is sticking.

Cause 6: Oven Temperature Too Low (The Sneaky One)

Your oven dial says 500°F. Your oven might actually be running at 460°F. And that gap matters a lot for sourdough.

Insufficient oven heat means inadequate oven spring, the final rise from heat activation of the yeast. It also means the steam phase isn’t intense enough to keep the surface pliable for expansion. You can get a well-fermented, well-shaped loaf and still end up with disappointing results if your oven isn’t actually hot.

Signs this is your problem: Your bread doesn’t seem to rise much in the oven even though your fermentation looked right. The crust is pale. The score didn’t open dramatically.

Fix: Get an oven thermometer. Preheat your Dutch oven for 60 minutes, not 30. If your oven runs cool, increase the dial temperature to compensate. See the complete guide to sourdough baking temperatures for the full oven calibration process.

Cause 7: Dough Was Too Cold Going Into the Oven (or Too Warm)

There’s a difference between taking your dough straight from the fridge and letting it sit at room temperature first Baking it at different stages of its cold proof.

Some bakers swear by baking straight from the fridge. Others let the dough warm up for 30 minutes first. Both approaches can work, but if your cold-proofed dough is very dense after baking, it may have been so cold that it couldn’t spring.

Signs this is your problem: Dense bread even though your fermentation, shaping, and oven temperature were all correct.

Fix: Try baking your cold dough straight from the fridge without warming up. The contrast between cold dough and a scorching Dutch oven is actually what drives intense oven spring in most methods. If you’ve been letting it warm up and getting dense results, go colder.


Quick Diagnosis: What Does Your Dense Bread Look Like?

What you see Most likely cause
Tight, uniform crumb throughout Underproofing or inactive starter
Flat, wide loaf with no rise Overproofing or poor shaping
Dense at bottom, more open at top Poor shaping (not enough tension)
Pale crust + dense crumb together Low oven temperature
Very dense + very sour taste Significant overproofing
Consistent results across multiple loaves Starter activity is the root cause

The Thing About Fixing Dense Bread

Once you understand the underlying principles, fermentation produces gas, gluten traps it, structure holds it, you can diagnose any problem. You’re not guessing. You’re tracing cause to effect.

That’s the difference between following a recipe and understanding the system.


Ready to Stop Guessing and Start Understanding?

Here’s the thing: knowing one approach is different from understanding the complete system that makes every recipe work.

Here’s the thing: now you know the seven causes of dense sourdough bread, how to identify which one you’re dealing with. Exactly what to fix.

But here’s what I’ve learned after 2,973+ loaves testing every variable: reading a troubleshooting guide is one thing. Each time you want to try something new, you’re starting from scratch without a framework connecting the pieces. Watching your dough and knowing what action to take in the moment, that’s something else. Bulk fermentation looks different in every kitchen.

Starter activity varies with your flour and your climate. These things need a trained eye and a system, not just a checklist.

Here’s what matters: that’s what Bread ASAP gives you. It’s a beginner class built specifically around the real problems beginners face, including this exact one. You’ll see what properly fermented dough looks like on video.

You’ll see shaping in close-up detail. You’ll have a framework for diagnosing problems before they turn into dense bread.

Inside Bread ASAP:

  • Video walkthroughs of fermentation, shaping, and scoring, so you know what you’re looking for
  • The 5-question diagnosis process for dense bread
  • How to read your starter before you mix your dough
  • Schedule-flexible timelines that work around your real life
  • What to do when something looks off mid-bake, in real time
  • Direct Q&A access so you’re not troubleshooting alone

Dense bread is a solvable problem. Get Bread ASAP for $47, 60-day guarantee.

Not ready for the full class? A weak or young starter is often the root cause of persistent dense bread. Get a Proven Starter for $19.99, live, active, and established, with a 60-day “It Works Or Free” guarantee and free US shipping. Skip the 2-week cultivation and start baking with something that’s actually ready.


Frequently Asked Questions About Dense Sourdough Bread

Why is my sourdough bread dense even though I followed the recipe exactly?

Following a recipe exactly doesn’t guarantee the right result because the most critical variables, starter activity, dough temperature, fermentation progress, aren’t captured in time measurements. A 6-hour bulk ferment means something very different in a 65°F kitchen versus a 78°F kitchen. The recipe gives you a framework; your dough’s visual and tactile signs tell you when each stage is actually done.

Is dense sourdough bread still safe to eat?

Yes. Dense sourdough bread is a quality issue, not a safety issue. The fermentation process makes sourdough bread very safe regardless of how it rose. Dense bread is fully edible, it may taste a bit more sour or have a chewier texture than intended, but it won’t harm you.

How do I know if my sourdough is underproofed or overproofed?

Underproofed dough is tight and holds its shape very well, sometimes too well. It doesn’t jiggle, the surface is flat, and it may feel stiff. Overproofed dough is slack and spreading, with a sticky surface that doesn’t hold shape after you poke it. A properly proofed loaf jiggles gently when you shake the pan and springs back slowly (not immediately) when you poke it lightly.

Can I fix dense sourdough bread after it’s already baked?

No. Once the bread is baked, the structure is set. There’s no way to re-proof or re-bake it to get a more open crumb. What you can do is analyze the loaf, look at the crumb, taste it, note what the fermentation looked like, and use that information to adjust your next bake. Dense bread is information. Use it.

Does hydration affect how dense my sourdough bread is?

Yes, but less than most beginners think. Higher hydration dough can produce a more open crumb, but only if the fermentation and shaping are right. A poorly fermented high-hydration dough will still be dense and will also be harder to shape. For beginners, nail the fermentation and shaping at lower hydration (75%) before experimenting with higher hydration levels.


You Can Fix This

Dense bread is one of the most common beginner problems, and one of the most solvable. You know the seven causes, you know how to read your dough, and you know what to change on your next bake.

If you’re still building your starter or suspect your starter is the root cause, read the starter readiness guide before your next bake. And for the complete first-loaf walkthrough, the beginner guide to making sourdough bread has every step with the visual cues built in.

Happy baking. Roselle


Which of the 7 causes do you think applies to your dense bread? Leave a comment below, describe your crumb and I’ll help you narrow it down.


Filed Under: Overproofed Sourdough

Sourdough Not Rising: 5 Reasons Your Bread Dough Won’t Rise During Bulk Fermentation or in the Oven | And the Exact Fix for Each One

March 2, 2026 by admin Leave a Comment


Quick answer: Your sourdough bread not rising is usually caused by one of five things: your starter wasn’t at peak activity when you mixed, your kitchen is too cold during bulk fermentation, your dough over-fermented past its peak, you didn’t develop enough gluten with stretch and folds, or your Dutch oven wasn’t hot enough for oven spring. Each cause has a specific fix.

Your dough has been sitting there for hours and it looks exactly the same as when you started. Or your shaped loaf went into the oven and came out flat. Either way, something went wrong between mixing and baking, and you need to figure out what happened.

Here’s the first thing for you to understand: sourdough bread not rising is different from a sourdough starter not rising. Different problem, different causes, different fixes for you. If your starter itself isn’t active, that’s a separate issue. This article is about your bread dough, the actual loaf, that won’t rise during bulk fermentation or fails to spring in your oven.

Five things cause this for you. Once you know which one hit, your fix is straightforward.

This isn’t Instagram baking. This is real life. Let’s troubleshoot your bread.


Reason 1: Your Starter Wasn’t at Peak When You Mixed

This is the number one cause of sourdough dough that won’t rise for you. And it’s the most frustrating because you did everything else right. You followed the recipe, the timing, the technique. But your starter wasn’t strong enough to leaven your bread.

Your sourdough starter is the only leavening agent in your dough. There’s no commercial yeast as backup for you. If your starter goes in underactive (not yet peaked) or overripe (past peak and declining), your yeast population is too weak to ferment the full amount of flour in your recipe.

How You Tell This Was Your Problem

If your dough showed almost no rise during bulk fermentation (minimal expansion over 4-6+ hours), your starter was the issue. A healthy starter at peak activity will ferment a standard dough noticeably within 3-4 hours at room temperature for you.

Your Fix

Use the dome test before you mix. Your starter needs to be:

  • Doubled in size since its last feeding
  • Domed on top (not flat, not sunken)
  • Bubbly throughout (not just the surface)
  • Smelling like mild yogurt or beer

If the dome has collapsed and your surface is flat or concave, you missed the peak. Feed again and wait. Read the full guide to knowing when your starter is ready for all five signs you need to check.

I mixed dough with a past-peak starter exactly once. It sat on my counter for 8 hours with barely any movement. I baked it anyway out of stubbornness and got a loaf that could’ve been used as a doorstop. Lesson learned. Now I don’t mix until the dome is still rising.


After 2,973+ loaves and teaching 459+ home bakers, I’ve learned that sourdough success isn’t about following the perfect recipe

— it’s about understanding the method behind it.”

Reason 2: Your Kitchen Is Too Cold During Bulk Fermentation

Here’s the thing: temperature controls everything in your sourdough. Your dough is a living system. The yeast and bacteria metabolize at rates directly tied to temperature.

Cold slows them down. Warm speeds them up for you.

At 75-80°F, your bulk fermentation takes 4-6 hours for a standard loaf. That’s the sweet spot where your yeast is active and productive.

At 68-70°F, your same fermentation can take 7-10 hours. Your dough IS rising, but so slowly that after 5 hours you think nothing is happening.

Here’s what matters: below 65°F, your fermentation nearly stalls. Your dough looks dead to you. It’s not. It’s crawling along at a pace that makes a sloth look ambitious.

Your Fix

Find a warm spot for your dough. Your oven with only the light on creates a consistent 75-78°F environment in most kitchens. This is the single most useful trick for you as a sourdough baker in a cool climate.

Other options for you:

  • Top of your fridge (usually warmer than the counter)
  • Near a warm appliance
  • Inside your microwave (off, door closed) for an enclosed warm space
  • A proofing box if you bake regularly (worth the investment for you)

Monitor with a thermometer. You don’t need to guess. A $10 kitchen thermometer next to your dough bowl tells you exactly what environment your yeast is working in.

Upgrade hint: Temperature management is one of the core principles I teach you in Bread ASAP because it affects every single step of your process. When you understand temperature, you control timing. When you control timing, you control your schedule.


Reason 3: Your Dough Over-Fermented (Went Past Peak)

This one is counterintuitive for you. Your dough DID rise. You watched it expand. But then it collapsed or went flat. And when you baked it, there was no oven spring. Your loaf came out dense and flat.

What happened: your yeast ate through all the available sugars, produced all the gas it could, and then your gluten network weakened from excess acid production. The gas escaped. Your structure collapsed.

Over-fermentation is the opposite of under-fermentation for you, but the result looks similar: flat, dense bread. The difference is timing. Under-fermented dough never rose enough for you. Over-fermented dough rose and then fell.

How You Tell This Was Your Problem

  • Your dough was bubbly and expanded significantly, then the surface went flat or started to pull away from the bowl edges
  • It smelled very sour or alcoholic (hooch on top)
  • When you tried to shape it, it was slack, sticky, and wouldn’t hold tension for you
  • Your baked loaf spread sideways instead of springing up

Your Fix

Watch for 50-75% volume increase during your bulk, not a full double. Most same-day recipes that say “let it double” are overshooting for a standard home kitchen timeline. A 50-75% increase with a slightly domed, bubbly surface is your sweet spot.

Use a clear, straight-sided container with a rubber band marking your starting level. Check every hour after the 3-hour mark. When you see 50-75% expansion and the surface looks gently domed with visible bubbles, that’s your window.

If your dough routinely over-ferments, either your kitchen is warmer than you think, you’re using too much starter, or you’re leaving it too long. Dial back one variable at a time.

If you’re trying to understand the difference between under-proofed, properly proofed, and over-proofed sourdough, this article on why sourdough bread is dense covers the full spectrum for you.


Reason 4: You Didn’t Develop Enough Gluten (Not Enough Stretch and Folds)

Here’s why this works: gluten is the protein network that traps the gas your yeast produces. Without adequate gluten development, the gas escapes and your dough can’t hold its rise. It ferments, produces gas, but the gas leaves you.

Here’s the thing: this shows up as dough that feels loose and flat even after hours of bulk fermentation for you. It never gets that taut, jiggly, airy quality that well-developed dough has.

Your Fix

Do 4 sets of stretch and folds during the first 2 hours of your bulk fermentation, spaced 30 minutes apart.

Here’s your technique: wet your hands, grab one side of the dough, stretch it up as far as it’ll go without tearing. Fold it over the top. Rotate your bowl 90 degrees.

Repeat 4 times (all four sides). That’s one set for you.

Each set takes you about 30 seconds. After all 4 sets over 2 hours, your dough will feel noticeably different. Smoother.

Tighter. More elastic for you. When you pull on it, it stretches and bounces back instead of tearing.

If 4 sets isn’t enough for you (some flours need more), add 2 more sets at 30-minute intervals. But 4 is your standard starting point.

What you’re looking for: After your last set of folds, the dough holds its shape in the bowl instead of spreading flat. It feels like a smooth, slightly springy pillow.

Here’s the thing: I skipped stretch and folds for my first dozen loaves because the recipe I was following barely mentioned them. My bread was flat every time. The day I added proper stretch and folds, the difference was immediate. Same recipe, same flour, same starter. The only change was building the gluten network. That’s when I realized structure matters as much as fermentation.


Reason 5: No Oven Spring (Your Dutch Oven Wasn’t Hot Enough or You Removed the Lid Too Early)

Your dough rose during bulk. Your shaped loaf looked good going into the oven. But your baked bread came out flat, with no ear, no rise, and a dull, tight crumb.

This is an oven spring failure for you. Oven spring is the final burst of rising that happens in the first 10-15 minutes of your baking. It requires two things: an extremely hot Dutch oven and trapped steam.

Your Fix

Preheat your Dutch oven for 60 minutes at 500°F. Not 30 minutes for you. Not 45. A full 60 minutes ensures your cast iron has absorbed enough heat to blast the dough with the thermal shock it needs for spring. Many bakers preheat for 30 minutes and wonder why their bread is flat. The Dutch oven wasn’t actually at temperature yet for them.

Keep the lid on for the full 20 minutes of Phase 1. Steam trapped inside your Dutch oven keeps the crust moist and pliable so your dough can expand. If you remove the lid too early (or your Dutch oven doesn’t seal well), your crust sets before the dough finishes rising.

Bake from cold if you can. If your dough has been proofing overnight in the fridge, bake it straight from the fridge. Don’t let it warm up on the counter first. The temperature differential between cold dough and your blazing-hot Dutch oven creates more dramatic oven spring for you.

Score with confidence. A shallow, timid score restricts where your bread can expand. One single slash, 1/4 inch deep, at a slight angle across the top gives your dough a clear path to open up.

For your full breakdown on oven temperatures, phases, and how to calibrate your specific oven, read what temperature to bake sourdough bread.

You don’t need a better kitchen. You need better methods.


Your Diagnostic Checklist (Find Your Problem Fast)

The truth is, when your sourdough doesn’t rise, work through these questions in order:

  1. Was your starter at peak? Doubled, domed, bubbly, smelled like yogurt. If not, that’s your problem.

Real talk: 2. What was your kitchen temperature during bulk? Below 70°F means slow fermentation for you. Use a thermometer.

  1. How much did your dough rise before you shaped? Over 100% increase means you over-fermented. Under 30% means under-fermented (cold kitchen or weak starter).

Look, 4. Did you do stretch and folds? At least 4 sets in your first 2 hours. If you skipped them, your gluten was underdeveloped.

  1. How long did you preheat your Dutch oven? Under 45 minutes at 500°F and your oven spring suffers. Hit 60 minutes.

Most sourdough rising problems for you trace back to question 1 or question 2. Start there.

Built for your schedule, your kitchen, your chaos.


From Troubleshooting to Confident Baking: What Comes Next

Now you know the five reasons sourdough won’t rise and the exact fix for each one. If you identify which cause hit your loaf and apply the right fix, your next bake will rise.

But here’s what I’ve learned after baking 2,973+ loaves testing every variable: troubleshooting one problem at a time is different from understanding the full system. Each time you want to try something new, you’re starting from scratch without a framework connecting the pieces. You fix the rise, then your crumb is off. You fix the crumb, then your crust is wrong. Each fix solves one symptom without connecting the steps into a method that works every time.

Knowing one approach is different from understanding the full system. That’s why I created Bread ASAP — a focused beginner class that teaches you the complete method from starter to slicing, so every step connects. Instead of fixing symptoms one by one, you’ll learn the FLEX system that makes rising problems disappear because you understand temperature, timing, gluten development, and oven setup as one integrated process.

Inside Bread ASAP, you’ll get a complete first-loaf method with visual cues at every stage, temperature and timing guidance for any kitchen, a bulk fermentation visual guide showing what 50%, 75%, and 100% actually look like, stretch and fold technique with close-up references, oven setup and baking phases explained step by step, and direct access to ask questions when something looks wrong.

Stop fixing symptoms. Start understanding the system. Get Bread ASAP for $47 — 60-day guarantee. Bake your first confident loaf in 7-10 days or your money back.

No starter yet? The Proven Starter ($19.99) ships dehydrated, free in the US, ready to bake after two feedings. And when you’re ready for the complete sourdough education — principles, timing mastery, backup approaches for every step, master recipes, and schedules for any lifestyle — the FLEX Sourdough System ($397) is the full foundation. Lifetime access. Bake Or Don’t Pay 60-day guarantee.


Frequently Asked Questions About Sourdough Not Rising

What’s the difference between sourdough not rising and sourdough starter not rising?

Honestly, sourdough starter not rising means the culture in your jar isn’t producing gas for you. It’s a feeding, flour, temperature, or water issue. Sourdough bread not rising means the dough you mixed won’t expand during bulk fermentation or in your oven. Your causes are different: bread issues usually trace back to starter readiness, kitchen temperature, fermentation timing, gluten development, or oven setup.

How long does it take for your sourdough dough to rise?

Here’s what matters: at 75-80°F, your bulk fermentation takes 4-6 hours. At 68-72°F, it can take you 7-10 hours. Watch for 50-75% volume increase rather than relying on the clock. Every kitchen is different for you and temperature is the primary variable.

Can you rescue sourdough dough that didn’t rise?

If your dough has been sitting for hours with no rise, check if your starter was truly active. If your starter was weak, you can add a small amount (30-50g) of freshly peaked starter to the dough, mix it in. Restart your bulk fermentation clock. This doesn’t always work for you, but it’s worth trying before discarding your batch.

Why did your sourdough rise during bulk but collapse after shaping?

The reality is, two common causes for you. First, your dough over-fermented during bulk (went past 100% rise and started declining). Second, you degassed it too aggressively during shaping.

Your pre-shaping and final shaping need to be gentle. You’re building tension, not squeezing out all the air. Handle your dough like you’re tucking in a baby, not wringing out a towel.

Why does your sourdough spread sideways instead of rising up?

Sideways spread usually means your dough is over-fermented (weak gluten from acid breakdown), you have underdeveloped gluten (not enough stretch and folds) Your dough was too warm and slack during shaping. Proper tension during your final shaping plus adequate gluten development gives your loaf the structural support to rise up instead of out.


Stop Guessing. Start Understanding Your Dough.

Sourdough that won’t rise isn’t a mystery for you. It’s a signal pointing to a specific fix. Starter readiness, temperature, fermentation timing, gluten development, oven setup. Identify which one failed for you and fix it.

When you’re ready to stop fixing one problem at a time and understand the whole system, Bread ASAP gets you there in 7-10 days.

Drop a comment below — I read every one.

Happy baking, Roselle


Schema Markup


Filed Under: Overproofed Sourdough

Sourdough Pretzel Bites: Soft, Chewy, Kid-Friendly Snack — Easy Shape, No Braiding Required | How to Make Sourdough Pretzel Bites at Home | Boil-Then-Bake Sourdough Pretzels That Taste Like the Mall (but Better) — Sourdough Pretzel Bites Recipe Card — How to Make Sourdough Pretzel Bites Step by Step — How to Know Your Pretzel Bites Are Done

March 2, 2026 by admin Leave a Comment


Quick answer: Sourdough pretzel bites use active starter, bread flour, butter, brown sugar, and salt. Bulk ferment 4-6 hours, roll into ropes, cut into bite-size pieces, boil in a baking soda bath for 30 seconds, then bake at 425°F for 12-15 minutes. Brush with melted butter and sprinkle coarse salt. Soft, chewy, and kid-approved.

Jump to Recipe

Here’s the thing: if you’ve ever paid $6 for a cup of pretzel bites at the mall, you already know how good these are. Now you can make them at home for the cost of your flour and butter.

Sourdough pretzel bites are the recipe that gets your kids excited about sourdough. No braiding. No twisting into pretzel shapes. You roll the dough into ropes, you cut them into pieces, you boil for 30 seconds, you bake for 12 minutes You hit them with melted butter and coarse salt.

Here’s what matters: your sourdough starter adds a subtle tang that regular pretzel dough can’t match. Combined with the baking soda bath that gives pretzels their signature dark, chewy exterior, you get a snack that tastes like it came from a professional bakery.

This recipe is forgiving for you. Your shapes don’t need to be perfect. Your timing has flexibility built in. And the result disappears faster than anything else you’ll bake this month.

Tested in a 27×30 inch kitchen with 7 people in the house. They were gone in 20 minutes.


Sourdough Pretzel Bites Recipe Card

Prep Time: 30 minutes Cook Time: 15 minutes Total Time: 7 hours (includes bulk ferment) Yield: 48 pretzel bites Difficulty: Beginner

Ingredients

For the dough:

  • 1/2 cup (113g) active sourdough starter, at peak
  • 3 cups (360g) bread flour
  • 3/4 cup (180ml) warm water
  • 3 tablespoons (42g) softened butter
  • 2 tablespoons brown sugar
  • 1 1/2 teaspoons salt

For the baking soda bath:

  • 8 cups water
  • 1/3 cup baking soda

For topping:

  • 3 tablespoons melted butter
  • Coarse salt or pretzel salt

Instructions

  1. Mix the dough. Combine active starter, warm water, brown sugar, and bread flour in a large bowl. Mix until no dry flour remains. Let rest 15 minutes.
  2. Add butter and salt. Work the softened butter and salt into the dough by squeezing and folding. Knead in the bowl or on a counter for 3-5 minutes until smooth and elastic.
  3. Bulk ferment. Cover the bowl and let the dough rise at room temperature for 4-6 hours. The dough is ready when it’s puffy, risen about 50-75%, and feels light and airy.
  4. Shape into ropes. Divide the dough into 8 equal pieces. Roll each piece into a rope about 1/2 inch thick and 12 inches long. Cut each rope into 1-inch pieces. You’ll get about 48 bites total.
  5. Prepare the baking soda bath. Bring 8 cups of water and 1/3 cup baking soda to a rolling boil in a large pot.
  6. Boil the bites. Drop 8-10 pretzel bites into the boiling baking soda water. Boil for 30 seconds. Remove with a slotted spoon and place on a parchment-lined baking sheet. Repeat with remaining bites.
  7. Bake. Preheat oven to 425°F. Bake the boiled pretzel bites for 12-15 minutes until deep golden brown.
  8. Finish. Brush immediately with melted butter and sprinkle generously with coarse salt. Serve warm.

Notes

  • Active starter required. This recipe needs fed, peaked starter for leavening. Check the starter readiness guide if you’re unsure.
  • Don’t skip the baking soda bath. It’s what gives pretzels their dark, chewy crust and signature flavor. Without it, you get dinner rolls, not pretzels.
  • Dipping sauces: Cheese sauce, honey mustard, or plain yellow mustard. All work.

After 2,973+ loaves and teaching 459+ home bakers, I’ve learned that sourdough success isn’t about following the perfect recipe

— it’s about understanding the method behind it.”

How to Make Sourdough Pretzel Bites Step by Step

What Makes Your Pretzels “Sourdough”

Here’s why this works: regular pretzel recipes use commercial yeast. This recipe uses your sourdough starter instead. The difference shows up in two places for you.

Here’s the thing: first, flavor. Your sourdough starter adds a mild tang that plays off the salt and butter beautifully. It’s not sour like sourdough bread. It’s more like a depth that commercial yeast can’t create for you.

Second, texture. The slow fermentation from your sourdough produces a chewier, more developed dough structure. When you pair that with the baking soda bath, you get a pretzel bite that’s soft and chewy on the inside, dark and slightly crispy on the outside.

If you’re new to sourdough baking, this is one of the best recipes to start with. The shapes are forgiving for you, the timing is flexible, and your results will be impressive. Your first sourdough bread loaf can wait until you’ve built some confidence with these. And when you’re ready, the beginner’s guide to sourdough bread walks you through the full process.

Your Bulk Ferment

The truth is, your dough needs 4-6 hours at room temperature to rise for you. Your warmer kitchen (75-80°F) pushes it to the faster end. Your cooler kitchen (65-70°F) takes longer.

What you’re looking for: your dough has puffed up, looks airy, and has visible bubbles on the surface. If you poke it with a floured finger, the indent slowly fills back in. That’s your signal.

Here’s a scheduling tip that works for your real life. You mix the dough in the morning before work or school. You come home 6 hours later and it’s ready to shape.

Or you mix it after lunch and shape before dinner. Built for your schedule, your kitchen, your chaos.

Real talk: if the dough isn’t ready when you want it to be, don’t rush it. You move the bowl to a warmer spot (top of your fridge, near a heat vent, inside the oven with the light on) and you check again in an hour.

Your Rolling and Cutting

This is the fun part, especially if you have kids who want to help you.

You divide the dough into 8 pieces. You roll each piece into a rope about 1/2 inch thick. Don’t worry about making them perfectly even.

Your pretzel bites are rustic by nature. Some of yours will be slightly bigger, some slightly smaller. They all taste the same to you.

Look, you cut each rope into 1-inch pieces. A bench scraper makes this fast, but your regular knife works too. You’ll end up with about 48 bites. Give or take.

Here’s what matters: my kids fight over who gets to cut the ropes. Last Saturday, I had three kids at the counter with dough ropes and a plastic knife each. The kitchen was a mess.

The pretzel bites were gone before the counter was clean. This isn’t Instagram baking. This is real life.

Your Baking Soda Bath (Don’t Skip This)

This is the part most recipes skip on you. The baking soda bath is what separates a pretzel from a dinner roll.

You bring 8 cups of water and 1/3 cup baking soda to a boil. Yes, that’s a lot of baking soda. The alkaline water does something specific for you: it gelatinizes the outside of your dough, creating that dark, shiny, chewy pretzel crust when it bakes.

Honestly, you drop 8-10 bites into the boiling water at a time. Don’t overcrowd your pot. Boil for exactly 30 seconds. Use a slotted spoon to fish them out and transfer to your parchment-lined baking sheet.

Real talk: The baking soda water will foam and bubble aggressively when you drop the dough in. Use a big pot. Don’t lean over it. The foam subsides in a few seconds.

Your boiled bites will look shiny and slightly puffed. That’s correct. They’ll look different from the raw dough to you, almost like they’ve already started cooking. They have.

Your Bake

425°F for 12-15 minutes. You want a deep golden brown, not pale gold.

Here’s how you know yours are done: the surface is dark, glossy, and firm when you touch it. If they’re pale and soft, they need more time from you. The color darkens fast in the last 2-3 minutes, so you watch them after the 10-minute mark.

Some of your bites will be slightly bigger than others. Your bigger ones may need an extra minute or two. If you’re unsure, you pull one bite off the sheet, break it open, and check the inside yourself. It should be fully cooked through with no raw dough in the center.

Your Butter Finish

You brush melted butter on the hot pretzel bites immediately after they come out of your oven. The heat helps the butter soak in. Then you hit them with coarse salt while the butter is still wet so the salt sticks.

This step is mandatory for you. The butter adds richness and the salt adds the flavor punch that makes your pretzel bites addictive.

If you want to get fancy, mix garlic powder and Parmesan into your melted butter. Brush that on instead. Garlic Parmesan pretzel bites are a different category of snack for you.


How to Know Your Pretzel Bites Are Done

Color and Texture Cues

Ready: Deep golden brown exterior. Firm when you squeeze gently. The baking soda bath already gave them a head start on browning, so they’ll look darker than regular bread at the same internal doneness.

Not ready yet: Pale gold color. Soft and squishy when squeezed. The surface looks matte instead of shiny.

Overdone: Very dark brown, almost black on edges. Hard exterior. They’ll still taste fine if they’re only slightly overdone, but the chewiness disappears and they become crunchy. Check the sourdough bread baking timeline for more on reading visual cues.


When Things Don’t Go as Planned

Your pretzel bites didn’t brown in the oven

The reality is, your baking soda bath was too weak or your boiling time was too short. The alkaline bath is what enables the browning for you. Make sure you’re using the full 1/3 cup of baking soda in 8 cups of water, and you boil for a full 30 seconds. Also check that your oven is actually reaching 425°F.

Your dough is too sticky to roll into ropes

Lightly flour your work surface and your hands. If your dough is extremely sticky, it may be over-hydrated. You add a tablespoon of flour and knead it in. Some stickiness is normal for enriched sourdough dough, but you need to be able to roll it without it clinging to your counter.

Your pretzel bites are dense and heavy

Here’s what I’ve seen: your bulk ferment was too short. Your dough needs to be fully risen (50-75% increase) before you shape it. Dense bites mean your dough didn’t develop enough gas during fermentation.

Give it more time on your next batch. Also make sure your starter was truly at peak when you mixed.

Your salt doesn’t stick to the surface

You brush with butter first, then apply salt while the butter is still wet. If you skip the butter, the salt slides off. If the butter has cooled and set, the salt won’t stick for you. Work fast when they come out of your oven.


Variations

Cinnamon Sugar Pretzel Bites

Skip the coarse salt. Instead, brush with melted butter and roll in a mixture of 1/4 cup sugar and 2 teaspoons cinnamon. These taste like a cinnamon sugar pretzel from the fair. Serve with cream cheese frosting for dipping.

Everything Bagel Pretzel Bites

After brushing with butter, sprinkle everything bagel seasoning generously over the top. The sesame, poppy, garlic, and onion combo pairs perfectly with the pretzel flavor. Serve with cream cheese.

Cheese-Stuffed Pretzel Bites

Before cutting the ropes, press a small cube of cheddar or mozzarella into each piece and pinch the dough closed around it. Boil and bake as normal. The cheese melts inside and creates a gooey center.


From Pretzel Bites to Confident Baking: What Comes Next

This is the part most guides skip: now you’ve got a recipe for soft, chewy sourdough pretzel bites that taste like the ones from the mall but cost a fraction of the price. Roll, cut, boil, bake, butter, salt. If you follow these steps, you’ll have a snack that disappears faster than anything else you bake this month.

But here’s what I’ve learned after baking 2,973+ loaves testing every variable: knowing one recipe is different from understanding the full system. Pretzel bites build confidence, and once you have that confidence, you’re ready for your first real sourdough loaf. The shaping is different.

The fermentation is longer. The stakes feel higher. And a recipe alone won’t prepare you for what the dough does when your kitchen is 68 degrees instead of 75.

Don’t overthink this. that’s why I created Bread ASAP — a focused beginner class that takes you from pretzel bites to a full sourdough boule in 7-10 days. Instead of guessing your way through bulk fermentation and shaping, you’ll learn the complete method that connects every step into one system that works in your kitchen.

Inside Bread ASAP, you’ll get video walkthroughs so you can see what properly fermented dough looks like at every stage, the schedule flexibility system so you bake around school runs, work Bedtime, a starter readiness section so you don’t start with a sluggish starter, real-time troubleshooting for when the dough doesn’t look like the video. Direct access to ask questions.

You made pretzel bites. Bread is your next move. Get Bread ASAP for $47 — 60-day guarantee. First loaf in 7-10 days or your money back.

Don’t have a starter yet? A Proven Starter ($19.99) ships dehydrated to your door — two feedings and you’re baking. Free US shipping, 60-day guarantee.

And when you’re ready for the complete sourdough education that makes every recipe work, the FLEX Sourdough System ($397) covers principles, timing mastery, master recipes. Schedules for any lifestyle. Lifetime access.


Frequently Asked Questions About Sourdough Pretzel Bites

Can I use sourdough discard for pretzel bites?

You need active, peaked starter for this recipe. The pretzel bites rely on the yeast activity in your starter for leavening during the bulk ferment. Discard won’t produce enough rise. If you want a discard-based snack instead, try sourdough discard crackers or sourdough discard pancakes.

Why do you boil pretzel bites in baking soda water?

The baking soda bath creates an alkaline environment on the surface of the dough. When the bites bake, that alkaline surface produces the dark brown color, shiny crust, and chewy texture that pretzels are known for. Without the bath, you get soft rolls, not pretzels. It’s the same process commercial pretzel shops use, with baking soda instead of food-grade lye.

Can I make the dough ahead of time?

Yes. After mixing, you can refrigerate the dough for 8-24 hours instead of bulk fermenting at room temperature. The cold slows the fermentation. Pull it from the fridge, let it warm for 30-45 minutes, then shape, boil, and bake. Cold-fermented pretzel dough has a slightly more developed flavor.

How do I reheat leftover sourdough pretzel bites?

Pop them in a 350°F oven for 5-7 minutes to warm through and restore the chewy texture. Microwave works in a pinch (20-30 seconds), but the exterior won’t be as crispy. Brush with another round of melted butter after reheating if you want them to taste fresh.

Are sourdough pretzel bites kid-friendly?

This is one of the most kid-friendly sourdough recipes. Kids can help roll the dough ropes and cut them into pieces. The shapes don’t need to be perfect. The taste is familiar (every kid loves a soft pretzel), and the bites are the right size for small hands. Adults supervise the boiling step, but kids can handle the rest.

What dipping sauces go with sourdough pretzel bites?

The most popular options: warm cheese sauce (melted cheddar with a splash of milk), honey mustard, plain yellow mustard, or marinara sauce. For a sweet version, try cream cheese frosting or Nutella. Pretzel bites are like french fries: they’re a vehicle for whatever sauce you’re craving.


Bake Something Fun This Weekend

You’ve got the recipe. You’ve got the technique. Forty-eight pretzel bites are 7 hours away (most of that’s waiting).

Get your starter ready today. Shape and boil tomorrow. The starter readiness guide shows you the five signs that tell you it’s go time.

Happy baking — Roselle


What dipping sauce won the vote at your house? Tell me in the comments. Cheese sauce vs. mustard is a debate I need settled.


Filed Under: Easy Sourdough Bread Recipe

Sourdough Discard Tortillas: Soft, Pliable Flour Tortillas From Your Leftover Starter | 4 Ingredients, No Special Equipment, Better Than Store-Bought

March 2, 2026 by admin Leave a Comment


Quick summary: Sourdough discard tortillas need four ingredients: 1 cup of your discard, 2 cups flour, 2 tablespoons oil or lard, and salt. You mix, rest for 30 minutes, divide into 8-10 balls, roll thin, and cook on a dry hot skillet 1-2 minutes per side. When you see bubbles, flip. Your family won’t go back to store-bought.

Jump to Recipe


Here’s the thing: store-bought tortillas have a shelf life measured in months. Think about that for a second. Something made from flour, water, and fat that lasts months on a shelf is held together by preservatives and industrial chemistry, not actual food.

Here’s the thing: you can make better tortillas in your kitchen with four ingredients and about an hour of your time. And if you’re already feeding a sourdough starter, you have the secret ingredient sitting in a jar on your counter right now.

Sourdough discard tortillas are soft, pliable, and have a subtle tang that makes everything from your tacos to your quesadillas taste noticeably better. Your family will notice the difference with the first bite. They won’t go back.

This isn’t Instagram baking. This is real life. Four ingredients.

No tortilla press needed. A hot skillet and a rolling pin are all you need.

Let me walk you through the recipe, the technique for rolling them thin enough, and the visual cues that tell you when to flip.


Sourdough Discard Tortillas Recipe Card

Prep Time: 15 minutes (plus 30 minutes rest) Cook Time: 20 minutes Total Time: 65 minutes Yield: 8-10 tortillas

Ingredients

  • 1 cup (227g) sourdough discard (unfed, from your fridge is fine)
  • 2 cups (240g) all-purpose flour
  • 2 tablespoons oil (vegetable, olive, or avocado) or lard
  • 1 teaspoon salt
  • 2-4 tablespoons warm water (if you need it)

Instructions

  1. Combine your ingredients. In a large bowl, mix the flour and salt. Add your sourdough discard and oil. Stir with a fork until a shaggy dough forms. If it’s too dry to come together, add warm water 1 tablespoon at a time.
  2. Knead briefly. Turn your dough onto a lightly floured surface and knead for 2-3 minutes until smooth and slightly tacky. It shouldn’t be sticky. Add flour a pinch at a time if it clings to your hands.
  3. Rest your dough. Shape it into a ball, cover with a damp towel or plastic wrap, and rest for 30 minutes at room temperature. This relaxes your gluten and makes rolling much easier. Don’t skip this step.
  4. Divide into balls. Cut your dough into 8-10 equal pieces. Roll each piece into a smooth ball between your palms.
  5. Roll thin. On a lightly floured surface, roll each ball into a thin round, about 7-8 inches across. Rotate your dough a quarter turn after every roll to keep it round. Thin is key. You want to almost see through them.
  6. Heat your skillet. Place a cast iron skillet or any heavy pan over medium-high heat. No oil. Your pan needs to be dry and hot.
  7. Cook each tortilla for 1-2 minutes per side. When you see bubbles forming on the surface, flip. The other side will develop light brown spots. Some bubbles will puff up dramatically. That means you’re doing it right.
  8. Stack and cover. Place your cooked tortillas in a clean towel-lined basket or wrap them in a towel. The steam keeps them soft and pliable for you.

Notes

  • Lard vs. oil: Lard gives you more traditional, slightly richer tortillas. Oil works great and keeps them plant-based if you prefer.
  • Storage: Stack your tortillas with parchment squares between them. Store in a zip-top bag at room temp for 2 days or freeze for up to 2 months. Reheat on a dry skillet for 30 seconds per side.
  • Why rest matters for you: Skipping the rest makes your dough fight you when you roll. The gluten tightens up from kneading and needs 30 minutes to relax.

Discard isn’t waste

— it’s an ingredient. Once you see it that way, your whole sourdough practice changes. I’ve tested discard in everything from pancakes to pizza dough across 2,973+ loaves.”

How to Make Sourdough Discard Tortillas, Step by Step

Getting Your Dough Right

Here’s what matters: your dough needs to feel smooth and slightly tacky after kneading. Not sticky. Not dry and crumbly. Think Play-Doh texture.

Your sourdough discard adds moisture, so the amount of extra water you need depends on how thick or thin your discard is. If your discard is more liquid (high hydration), you won’t need any extra water at all. If it’s thick and pasty, add warm water a tablespoon at a time until your dough comes together.

Two to three minutes of kneading is enough for you. You’re not developing a ton of gluten here. You want your dough pliable, not elastic and springy like bread dough. Over-kneading makes your tortillas shrink back when you try to roll them.

Why the Rest Period Changes Everything for You

Here’s what happens during those 30 minutes: the gluten strands you developed during kneading relax. Your flour fully absorbs the moisture. Your dough goes from tight and springy to soft and cooperative.

Here’s why this works: if you skip the rest, you’ll roll a tortilla out and watch it shrink right back to a smaller circle. That’s the gluten fighting you. Give it 30 minutes and the same dough rolls out effortlessly for you.

I made this mistake for months. I’d skip the rest because I was in a hurry, then spend twice as long fighting with the dough. Now I mix it, set a timer, and go do something else. Thirty minutes later, it’s ready and I’m not frustrated.

This works in real kitchens, not just perfect conditions.

Rolling Your Tortillas Thin

Thin tortillas are soft and pliable. Thick tortillas are chewy and stiff. You want thin.

The truth is, here’s your technique: start from the center of the dough ball and roll outward. Rotate your round a quarter turn after each roll. This keeps it circular instead of turning into a weird oval. If it sticks, add a light dusting of flour to your surface.

How thin do you go? You want to almost see the color of your countertop through your dough. Most beginners leave them too thick on the first try. If you think they’re thin enough, give them two more rolls.

Don’t stress about circles. Your real homemade tortillas are round-ish. The flavor is the same whether it’s a circle or an amoeba shape.

Your Hot Skillet Method

Real talk: your skillet needs to be hot before your first tortilla goes on. Medium-high heat. No oil. Dry skillet.

Place your rolled tortilla on the hot, dry surface. Within about 30-60 seconds, you’ll see bubbles start to form on the top surface. Some will be small.

Some will inflate dramatically and your tortilla will puff up like a balloon. That’s exactly what you want to see.

When you see the bubbles, flip. Cook the second side for another 60-90 seconds until you see brown spots on the bottom.

Your sourdough discard contributes to the bubbling. The residual fermentation gases in your discard expand rapidly on the hot surface. This is the same process that gives sourdough bread its open crumb, applied to a tortilla format.

If you’re also learning to make sourdough bread for beginners, these tortillas use the exact same discard you generate from your daily starter feedings.


How You Know They’re Ready (Not What the Clock Says)

Forget precise timing. Every skillet heats differently. Here’s what you watch for:

  • Bubbles forming on your top surface: That’s your flip signal. No bubbles after 90 seconds means your pan isn’t hot enough.
  • Light brown spots on your underside: Lift a corner and check. Spotty brown is what you want. Solid dark brown means your heat is too high.
  • Puffing up like a balloon: Not every one of your tortillas will do this, but when one does, it means your dough and heat are right. Don’t press it down. Let it puff.
  • Pliable when you pick it up: A done tortilla bends without cracking. If it snaps, you overcooked it.

Built for interruptions, not ideal conditions. You can pause between tortillas if your kid needs something. Your dough balls sit happily on the counter.


Common Sourdough Discard Tortilla Problems (And How You Fix Them)

“My tortillas are stiff and chewy”

Look, two possible causes for you. Either they’re too thick (roll thinner next time) or you cooked them too long. Your tortillas go from soft to stiff quickly if you leave them on the heat an extra 30 seconds. Pull them the moment you see brown spots.

“My dough keeps shrinking when I roll it”

Here’s what matters: you didn’t rest it long enough. Give it the full 30 minutes. If it’s still fighting you after 30 minutes, cover it and wait another 15. Your gluten needs time to relax.

“They’re tearing when I pick them up to put on the skillet”

Your dough is too wet. Dust your surface with more flour, and dust the top of your tortilla lightly before lifting. You can also use a flat spatula or bench scraper to peel them off your surface.

“My skillet is smoking but the tortillas aren’t cooking evenly”

Honestly, your heat is too high. Back it down from high to medium-high. Cast iron holds heat well.

Once it’s hot, it stays hot. You need less flame than you think.

Try sourdough discard pizza dough if you want another way to use the same dough concept on a larger scale. And sourdough pretzel bites use a similar technique with a completely different result for you.


Variations Worth Trying

Whole Wheat Sourdough Tortillas: Replace half your all-purpose flour with whole wheat flour. They’ll be slightly denser with a nuttier flavor for you. Roll them a bit thinner to compensate.

Herb Tortillas: Add 2 tablespoons of finely chopped fresh cilantro or green onion to your dough. Great for your wraps and quesadillas.

Lard Tortillas (Traditional): Swap your oil for an equal amount of lard. Your texture becomes silkier and the flavor is richer. This is the traditional Northern Mexican method.

Larger Burrito-Size: Divide your dough into 6 balls instead of 8-10. Roll larger and thinner. Same cook time for you.


This Recipe Proves Your Discard Has Value. A System Takes You Further.

The reality is, you’ve got a tortilla recipe that uses four ingredients and makes store-bought irrelevant for you. That’s the power of your sourdough discard. What most people throw away becomes something your family asks for by name.

But here’s what I’ve learned after baking 2,973+ loaves testing every variable: knowing one recipe is different from having the full picture. How often do you feed your starter? How much discard do you keep?

What do you do when your starter seems sluggish? These questions all connect for you.

That’s why I built Bread ASAP. It walks you through the complete beginner sourdough process, from your first starter feeding to your first loaf in 7-10 days. And along the way, you’ll understand exactly how your starter works, which means every discard recipe gets better too.

What you get with Bread ASAP ($47):

  • Step-by-step first loaf method designed for total beginners like you
  • Starter feeding rhythm that keeps your culture strong
  • Visual cue guides so you know what “ready” looks like at every stage
  • Scheduling flexibility built around your real life
  • Troubleshooting for the problems that trip up every new baker

Get Bread ASAP for $47 with a 60-day guarantee. Bake bread you’re proud of or get your money back.

No starter yet? The Proven Starter is $19.99, dehydrated, ships free in the US. Two feedings and you’re making these tortillas.


Frequently Asked Questions About Sourdough Discard Tortillas

Can you use active (fed) starter instead of discard?

You can, but there’s no advantage for your tortillas. Active starter adds more leavening power, which you don’t need here since tortillas aren’t meant to rise. Discard works because you want the flavor and the binding properties, not the lift. Save your active starter for bread.

How long does your dough keep before cooking?

Your dough keeps in the fridge for up to 48 hours, covered tightly. Let it come to room temperature for 15-20 minutes before you roll, or it’ll be too stiff. You can also divide into balls, refrigerate, and roll them fresh each day.

Why do your tortillas puff up like balloons?

That’s a good thing for you. The heat causes rapid steam expansion inside your thin dough. It means your skillet is the right temperature and your dough is rolled thin enough. The puff collapses when you take it off the heat, leaving you with a layered tortilla.

Do sourdough discard tortillas taste sour?

Mildly for you. The sourdough flavor is subtle in tortillas because the cooking time is so short. You’ll notice a pleasant tang compared to plain flour tortillas, but it won’t overpower your fillings. Older discard (a week or more in your fridge) gives you stronger tang.

Can you use a tortilla press instead of a rolling pin?

Yes. A press works great for getting you consistent thickness. You may still need a rolling pin to thin them out a bit more after pressing, depending on your press. Flour the plates to prevent sticking.

How do you reheat leftover sourdough tortillas?

Place them on a dry hot skillet for 20-30 seconds per side. Your microwave works in a pinch (wrap in a damp paper towel, 15 seconds) but the skillet method restores the texture and slight char for you. Never reheat in a toaster. They’ll dry out and crack on you.


Four Ingredients. Real Tortillas. No Excuses.

Sourdough discard tortillas take your leftover starter and turn it into something your family will request by name. Four ingredients, a hot skillet, and about an hour of your time.

Once you’ve made these, you’ll start looking at your discard jar differently. It’s not waste. It’s the beginning of your dinner.

When you’re ready to connect your starter, your bread, and your discard recipes into one confident system, Bread ASAP gets you there.

Drop a comment below — I read every one.

Happy baking, Roselle


Schema Markup


Filed Under: Easy Sourdough Bread Recipe

How to Make Sourdough Bread for Beginners: First Loaf Guide Without the Guesswork (Step-by-Step, Real Kitchen) — What You’ll Need to Bake Your First Sourdough Loaf — How to Make Sourdough Bread for Beginners — Step by Step — Common First-Loaf Problems (And What to Do)

March 2, 2026 by admin Leave a Comment


Quick answer: Making sourdough bread for beginners starts with an active starter, a simple 4-ingredient dough, and two rises — bulk fermentation (4-12 hours) then a cold proof (8-16 hours). Bake at 500°F in a covered Dutch oven for 20 minutes, then uncover for 20 more. Your first loaf takes about 24 hours total.

Here’s the thing: every sourdough recipe out there tells you what to do. Very few of them tell you what “ready” actually looks like in your kitchen.

That’s the gap that stops most beginners. You follow the recipe exactly — same flour, same times, same steps — and your bread still comes out flat or dense or gummy. So you wonder what you did wrong.

You probably didn’t do anything wrong. The recipe just assumed you already knew what to look for.

Here’s what I’ve learned after 2,973+ loaves testing every variable: the steps aren’t the hard part. The signs are. Knowing when your dough is done bulk fermenting, knowing when it’s shaped correctly, knowing when your oven is actually hot enough. Those are the things that decide whether your first loaf works.

This guide doesn’t skip that. You’re going to know exactly what to look for at every stage.

Real schedules. Real kitchens. Real bread.


What You’ll Need to Bake Your First Sourdough Loaf

Ingredients

  • 400g bread flour (bread flour over all-purpose — the extra protein gives you more structure)
  • 300g water (room temperature, about 75% of the flour weight)
  • 100g active sourdough starter (fed and at peak — more on this in a moment)
  • 9g fine sea salt

That’s it. Four ingredients.

Equipment

  • A large mixing bowl
  • A kitchen scale (you need one — volume measurements don’t work reliably for sourdough)
  • A Dutch oven with a lid (cast iron is ideal — the lid traps steam and gives you that crackling crust)
  • A proofing basket (banneton) or a bowl lined with a floured kitchen towel
  • A bench scraper if you have one (a butter knife works in a pinch)
  • Parchment paper

What “Active Starter” Actually Means

This is the part most recipes skip — and it’s the most important part.

Your starter needs to be fed and at its peak before you use it. That means it should have roughly doubled in size since its last feeding, have a domed top (not collapsed), and smell like mild yogurt or beer. Not sharp vinegar. Not flat.

The float test (dropping a spoonful in water to see if it floats) gets mentioned everywhere. Don’t rely on it. A starter can pass the float test and still be past its peak. A starter can fail the float test and still make great bread. Use the dome and the rise instead.

If your starter doesn’t pass the visual test, wait. That’s the whole game.


After 2,973+ loaves and teaching 459+ home bakers, I’ve learned that sourdough success isn’t about following the perfect recipe

— it’s about understanding the method behind it.”

How to Make Sourdough Bread for Beginners — Step by Step

Step 1: Mix Your Dough (Day 1, Morning or Afternoon)

Here’s what matters: add your water to your mixing bowl first. Then add your starter and mix until it’s mostly dissolved — a few lumps are fine. Add your flour and mix until no dry flour remains.

It’ll look rough and shaggy. That’s correct.

Here’s the thing: cover the bowl with a damp cloth or plastic wrap and let it rest for 30-45 minutes. This rest is called autolyse, the flour is absorbing the water and the gluten is starting to develop without any kneading from you.

After the rest, add your salt. Sprinkle it over the dough, then use your wet hand to squeeze and fold it in until fully incorporated. This takes about 2 minutes.

Step 2: Bulk Fermentation With Stretch and Folds (4-12 Hours)

Now the dough needs to ferment and develop structure. Here’s the thing: bulk fermentation time varies a lot based on your kitchen temperature. In a warm kitchen (75-78°F), you might be done in 4-5 hours. In a cooler kitchen (68-70°F), it can take 8-12 hours.

For the first 2 hours, perform stretch and folds every 30 minutes. That’s 4 sets total.

How to stretch and fold: Wet your hand. Grab one edge of the dough, pull it up until you feel resistance, fold it over to the opposite side. Rotate the bowl 90 degrees. Repeat four times. That’s one set.

After your 4 sets, leave the dough alone to finish fermenting. Don’t touch it.

How do you know bulk fermentation is done? Look for these signs, not just the clock:

  • The dough has grown 50-75% (not doubled, that’s overproofing)
  • The surface looks puffy with a few bubbles on top
  • The edges of the dough are domed slightly upward from the bowl
  • When you gently shake the bowl, the dough jiggles like firm jello, not liquid, not tight

I baked my first 20 loaves by the clock. They were all inconsistent. Once I learned to read the dough instead of the timer, everything changed.

This is the part most recipes skip, and it’s exactly what Bread ASAP covers in detail.

Step 3: Pre-Shape and Bench Rest (15-20 Minutes)

Turn your dough out onto an unfloured counter. Use a bench scraper or your hands to gently fold the edges under the dough to build surface tension. You’re not kneading, you’re just gathering it into a rough round.

Let it rest for 15-20 minutes, uncovered. It’ll relax and spread slightly. That’s normal.

Step 4: Final Shape

Flour your counter lightly. Flip the dough so the smooth side is down. Gently pull the top edge toward you, fold it over to the center.

Fold the left and right edges in. Then roll the whole thing away from you, using the counter to build tension on the bottom. You want the surface to feel taut but not torn.

Transfer your shaped loaf into your floured banneton or lined bowl, seam side up.

Upgrade hint: The shaping step is where most beginner loaves go wrong, not because the technique is hard, but because the feel takes practice. In Bread ASAP, I walk you through shaping on video with close-up detail so you can see exactly what “enough tension” looks like before your first bake.

Step 5: Cold Proof (8-16 Hours in the Fridge)

Cover your banneton loosely with plastic wrap or a shower cap and place it in the fridge. The cold slows fermentation way down and gives you flexibility.

The cold proof makes your schedule workable. You can bake the next morning, or the morning after, anywhere from 8 to 16 hours is fine.

This is the Flex part: your bread works around your life, not the other way around.

Step 6: Preheat Your Oven and Dutch Oven

The next morning (or whenever you’re ready), place your Dutch oven inside your oven and preheat to 500°F. Let it preheat for at least 45-60 minutes. The Dutch oven needs to be scorching hot.

Don’t skip the full preheat. This is where most home bakers underestimate their oven, your bread goes from fridge-cold to extreme heat It needs that thermal shock to get proper oven spring.

Step 7: Score and Bake

Pull your loaf from the fridge. Cut a piece of parchment paper and set it on your counter. Tip your dough out onto the parchment, seam side down. Score the top with a sharp knife or bread lame at a 30-45 degree angle, one confident slash, about half an inch deep.

Use the parchment paper as a sling to lower the loaf into your screaming hot Dutch oven. Put the lid on.

Bake covered: 20 minutes at 500°F (steam phase, the lid traps moisture, lets the bread rise before the crust sets)

Bake uncovered: Lower to 450°F, remove the lid, bake another 20-25 minutes until deep golden brown.

How do you know it’s done? The crust should be dark, darker than you think. Tapping the bottom should sound hollow. Internal temperature of 205-210°F if you’re using a thermometer.

Let it cool on a wire rack for at least 1 hour before cutting. I know. It’s hard to wait. But cutting too soon gives you a gummy interior because the steam is still working.


Common First-Loaf Problems (And What to Do)

The dough won’t hold its shape when I try to transfer it

Your bulk fermentation probably went too long, the dough has over-fermented and lost structure. Next time, look for the signs earlier (50-75% rise, jiggle test) and shape sooner. A shorter bulk time at a warmer temperature, or a longer time in a cooler kitchen.

My bread didn’t rise much in the oven

Either your starter wasn’t active enough, your dough was underproofed (didn’t ferment long enough), or your Dutch oven wasn’t hot enough. Check all three. The most common culprit for beginners is an underactive starter.

The inside is gummy even though the outside looks done

You cut it too soon, or it was underproofed. Wait the full cooling time. If you’re consistently getting gummy bread, add 5 more minutes of uncovered baking time next loaf.

My score didn’t open up

Either the scoring angle was too steep (you want 30-45 degrees, not straight down), or the dough was over-fermented and had lost its strength. Also check your blade, a dull knife drags instead of cuts.

The crust is pale, not dark brown

Your oven temperature may be lower than the dial says. Oven thermometers are cheap and worth it. Most home ovens run 25-50°F cooler than displayed.


From Your First Loaf to Confident Baking: What Comes Next

Here’s why this works: now you have the full roadmap for your first sourdough loaf, from mixing to scoring to pulling golden bread out of a screaming-hot Dutch oven. If you follow these steps and read your dough instead of just the clock, you’ll get bread you’re proud of.

But here’s what I’ve learned after baking 2,973+ loaves testing every variable: knowing one recipe is different from understanding the full system. When something looks off at hour 6 of bulk fermentation, you need to know whether to wait longer or shape now. When your oven runs hot, you need to adjust on the fly.

When your kitchen is cold one week and warm the next, the same recipe gives you different results. That takes a framework, not just a set of steps.

The truth is, that’s why I created Bread ASAP, a focused beginner class built specifically for your first real loaf. Instead of piecing together blog posts and hoping for the best, you’ll learn the complete method that connects starter readiness, bulk fermentation timing, shaping Baking into one system that works in your kitchen.

Inside Bread ASAP, you’ll get video walkthroughs of every stage (including close-up shaping and scoring), the starter readiness framework so you stop guessing whether it’s active, a schedule flexibility system so you bake around your real life, troubleshooting guides for the 10 most common first-loaf problems Direct access to ask questions when something looks wrong.

Your first loaf doesn’t have to be a guessing game. Get Bread ASAP for $47, 60-day guarantee. If your first loaf doesn’t work, I’ll make it right.

Not ready for the class yet? Start with the starter. A Proven Starter ships to your door for $19.99, live, active, ready to bake with after two feedings.

Free US shipping, 60-day guarantee. Or if you want the complete sourdough education, principles, timing mastery, backup approaches for every step, master recipes Schedules for any lifestyle, the FLEX Sourdough System ($397) is the full foundation. Lifetime access.

Bake Or Don’t Pay 60-day guarantee.


Frequently Asked Questions About Making Sourdough Bread for Beginners

How long does it take to make sourdough bread for the first time?

Your first sourdough loaf takes about 24-36 hours total, but most of that is hands-off waiting. Active prep time is about 45-60 minutes spread across two days. The main steps are: mix the dough (Day 1 morning), bulk ferment 4-12 hours, shape, cold proof overnight in the fridge, then bake the next morning. You’re not standing over it the whole time.

Can I make sourdough bread without a Dutch oven?

You can, but your results will be less consistent. The Dutch oven traps steam during the first 20 minutes of baking, which lets the bread rise fully before the crust sets. Without it, you can try a covered roasting pan, or place a tray of boiling water in the bottom of your oven to create steam. A cast iron Dutch oven is the single most useful piece of equipment for beginner sourdough bakers.

Why does my sourdough bread keep coming out dense?

Dense sourdough bread is almost always a fermentation issue. Either your starter wasn’t active enough before you used it, your dough was underproofed (bulk fermentation didn’t go long enough), or it was overproofed (went too long and the structure collapsed). Less commonly, it’s a shaping issue, not enough surface tension means the loaf spreads instead of rising up. See the full troubleshooting guide at Why Is My Sourdough Bread Dense?.

What is the best flour for beginners making sourdough bread?

Bread flour is the best starting point for beginners. It has more protein than all-purpose flour (12-14% versus 10-11%), which builds stronger gluten structure. That structure gives your dough more tolerance for beginner mistakes like slightly over- or under-proofing. Once you’re comfortable, you can experiment with adding 10-20% whole wheat or rye for more flavor.

Do I need to knead sourdough bread dough?

No. Sourdough bread uses a stretch-and-fold method instead of traditional kneading. Over the first two hours of bulk fermentation, you do 4 sets of stretch and folds (about 30 seconds each, every 30 minutes). The long fermentation time develops the gluten without the need for intensive kneading. This is one of the reasons sourdough is actually more hands-off than commercial yeast bread once you understand the process.

How do I know if my sourdough starter is active enough to bake with?

Your starter is ready when it has roughly doubled in size since its last feeding, the top is domed (not collapsed or flat), and it smells like mild yogurt or beer, not sharp vinegar. The float test (dropping a spoonful in water) is unreliable, use the visual signs instead. For a complete guide to reading your starter, see How to Know When Sourdough Starter Is Ready.


Start Your First Loaf Today

Making sourdough bread for beginners is genuinely doable, once you know what to look for instead of just what to do. You’ve got the steps, the signs, and the troubleshooting to handle your first bake with confidence.

Your next step: read the sourdough bread timeline guide to plan your first bake around your actual schedule. And when you’re ready to bake with a starter you can trust, the Proven Starter ships ready to go.

When you’re ready for the class that makes all of this click, Bread ASAP is waiting.

Happy baking. Roselle


Got a question about your first loaf? Leave a comment below. I read every one. Tell me where you’re at in the process and I’ll help you troubleshoot.


Filed Under: Easy Sourdough Bread Recipe

Baking Sourdough Bread: How To Shape Sourdough “The Right Way”

November 3, 2024 by admin 8 Comments

Mindblower, game changer ⤵️

Okay, so last November when I started to grow in followers, I shared this bit of sourdough baking advice that I couldn’t believe no other sourdough baker was teaching

And I WAS SHOCKED because surely, I didn’t invent this, I just stumbled upon it…

And when I shared this back then, SO MANY of you told me it’s how you plan on baking sourdough bread from now on

SO WHAT IS IT?  WHAT DO I DO DIFFERENTLY?

Well, it’s the way I shape my sourdough bread!

NO, this isn’t about using 

the tri-fold method vs 

the envelope method …or even vs 

the new trendy caddy clasp method I see now…

My sourdough baking CHANGED when I realized I could shape my sourdough bread with WATER instead of FLOUR

Yes, you read that right☝️

You see, I have a really very small kitchen, 

With an even smaller counter space

So kitchen real estate is very previous

And so doing things this way has SO MANY BENEFITS:

  1. LESS MESS to clean up —no flour everywhere
  2. No eating raw flour (more on this below)
  3. Less flour used = more money saved

💡How does this work? ⤵️

The whole point of folding is to build the gluten network so the dough holds its shape. 

And Shaping is really just a series of rapid folding/kneading.

While you are building this gluten network through your folding and shaping, the surface of the dough starts to get SMOOTH and TAUT. 

This is the gluten network building right before your eyes. 

THIS IS WHAT STOPS THE DOUGH FROM STICKING to you, your liner, your banneton, etc.

As long as you are building surface tension in your dough, the dough doesn’t get sticky.

💡So what do I do EXACTLY?

Instead of dusting my table with flour, I wet my hands and wipe the table with a tiny layer of water and then I shape my sourdough dough

And instead of dusting my banneton with flour, I simply just place my dough in my banneton that’s lined with a cotton tea towel

As long as you are building surface tension in your dough, the dough doesn’t get sticky.

VIDEO TUTORIALS:

In this ☝️ video, I’m shaping my soft white sourdough —a LOW hydration dough (67%). It’s a stiff dough, but once fermented, it acts like a blob. It is one of the easiest doughs to shape —so it has always perplexed me why so many people shape this kind of dough with so much excess raw flour.

⭐️ COUNTRY SOURDOUGH ⭐️
In this ☝️ video, I’m shaping my country sourdough —a HIGH hydration dough (74%). It’s a wetter dough, so will be a bit sticky. No worry, the method is the same as in part 1.

All you need is your trusty metal bench scraper. Simply wet it down with some water and you’re good to go. Follow along with me in the video!

It also helps to wet your hands and work surface lightly before you dump the dough on your work surface.

⭐️ WHOLE WHEAT SOURDOUGH ⭐️
In this ☝️ video, I’m shaping my whole wheat sourdough —a VERY HIGH hydration dough (84%). It’s a much, MUCH wetter dough than the last two doughs so it can be very sticky. Not to worry, the method is the same as in part 1 and 2!

All you need is your trusty metal bench scraper. Simply wet it down with some water and you’re good to go. Follow along with me in the video!

It also helps to wet your hands and work surface lightly before you dump the dough on your work surface.

In this ☝️ video, you see the final reveal of each three of the sourdough breads in this shaping tutorial.

My opinion, conclusion:

The industry standard of using flour to dust your dough for shaping and proofing, is unnecessary –you’re only just introducing raw flour so late in the game.  This is why some people get gassy and bloaty when eating sourdough –because all that excess raw flour is not fermented!  So guess what’s fermenting it?  YOU!

Filed Under: Sourdough Bread Tips, Sourdough Tutorials

The Ultimate Sourdough Bread Baking Tools List

September 19, 2024 by admin 24 Comments

If you buy through my link, I get a little commission. These are tools I use daily in my own kitchen, so I can personally confirm that they are the best tools for the job and helps me a great deal!

Sourdough Starter Kit

Essential Tools for Creating and Maintaining Your Sourdough Starter

Sourdough Starter

The living culture of wild yeast and bacteria that ferments your dough and gives sourdough its distinctive flavor and leavening.

Get it here: https://starter.howtomakesourdough.com

Sourdough Starter Kit

Here are my #1 favorite and preferred tools for Sourdough Starters. These are the winners of three years of comparison shopping, research and testing.

Sourdough Starter

Thermometer and Hygrometer

My Favorite Kitchen Scale

Weck Jars

Off-set metal spatula 4.25″

Bread Flour

Dark Rye Flour

Brod & Taylor Proofer

Dough Mat

Use Code ROSELLE10 for 10% OFF

Rubber Bands

Dry Erase Marker

Sourdough Bread Kit

Here are my #1 favorite and preferred tools for baking Sourdough Bread. These are the winners of 3 years comparison shopping, research and testing. This is everything I use from start to finish.

Sourdough Starter

Thermometer and Hygrometer

Plastic Bench Scrapers

Metal bench scraper

My Favorite Kitchen Scale

Brod & Taylor Proofer

Stainless Steel Mixing Bowl 10 in

KitchenAid 8q – 4 loaves

Pyrex 11 cup glass

Banneton

“Banneton” $1.25

Flour Sack Towels (better)

Magnetic Bread Lame

Feather Razor

Parchment Paper

The Best Dutch Oven

Bread Knife

Kitchen Scales

Here are my Top picks for kitchen scales

22lb Kitchen Scale

Etekcity Food Kitchen Scale

My Favorite Kitchen Scale

Ingredients

Here are my Top picks for ingredients in each category. A more detailed explanation can be found here

Bread Flour

Whole Wheat Flour

All Purpose Flour

White Rice Flour

Dark Rye Flour

Super Fine White Rice Flour

Diastatic Malt Powder

Mixers

Here are my Top picks for stand mixers. As a busy mom, with a very little kitchen, I need my mixer to be multipurpose. A more detailed explanation of the best mixer for bread dough can be found here

KitchenAid 8q – 4 loaves (what I have)

KitchenAid 7qt – 2 to 3 loaves

KitchenAid 5qt – 1 loaf

Stainless Steel Mixing Bowl 10 in

Silicone Jar Spatula

Proofing Boxes

Here are my Top picks for folding containers (where you will fold your dough while it proofs)

Holds 1 loaf

Holds up to 8 loaves

Holds up to 12-16 loaves

Proofing Baskets / Bannetons

Here are my Top picks for proofing baskets (for maintaining dough shape as it goes through its final proofing)

Dollar Tree Find

Fruit Basket

Banneton

Flour Sack Towels (better)

Scoring Tools

Here are my Top picks for proofing baskets (for maintaining dough shape as it goes through its final proofing)

Magnetic Bread Lame

Curved Bread Lame

Thumb Bread Lame

Feather Razor

Astra Razors

Bread Art Tools

Here are my Top picks for making decorative art on my sourdough bread

Embroidery Scissors

Skewers

Flour Duster

Dental Floss

Pastry Brushes

Cake Stand Turntable

Super Fine White Rice Flour

Misc Baking Tools

Parchment Paper

Bread Mat (many sizes available)

Water Spray Bottle

Dutch Ovens

I prefer to bake sourdough bread in Dutch Ovens. Here are my top picks

The Best Dutch Oven

The Best Dutch Oven (knockoff)

Dutch Oven Oval

Round Dutch Oven

Le Creseut Round

Baking Pans

Here are my favorite baking pans

Stainless Steel Bread Pans

8 x 4 x 4

Pullman Loaf Pan – Standard

8 x 4 x 4

Pullman Loaf Pan – Large

13 x 4 x 4

Baking Sheet With Rack

16 x 12 x 1

Stainless Steel Focaccia Pan

11 x 9 x 2

Misc. Must Haves

Don’t forget these useful and helpful tools that are often overlooked

Thermometer and Hygrometer

Plastic Bench Scrapers

Metal bench scraper

Effortlessly clean your hands of dough

Code ROSE for 15% OFF

Bread Cutting Tools

Here are the best bread cutters I’ve found

Bread Knife

Meat Slicer/Bread Slicer

Hi Quality Cutting Boards – use code ROSELLE to get 10% OFF

Cute Packaging

Here are my top picks

Bread Bag

Long Bread Bag

Flour Mill

Here are my top picks

Mockmill 200

Flour Sifter

150 Mesh Sieve

Flour Bins

Here’s what I use to hold my flour (I buy in 50-80lb bags)

Flour Bin 25lb

Flour Bin 100lbs

Flour Bin 100lbs

Temp Control

(to control and manipulate starter or dough temperature)

Brod & Taylor Proofer

Dough Mat

Use Code ROSELLE10 for 10% OFF

Starter Glass Dome

Starter Heating Belt

Filed Under: Sourdough Baking Tools

Is the type of flour I use important? And how does it affect my sourdough baking?

August 20, 2024 by admin Leave a Comment

Now let’s talk about flour

General Rules of Thumb

White / Light

  • means commercially sifted flour, 
  • extracted to get most of the bran out of the flour
  • less protein than whole
  • Less bran = you need add less water
  • Less bran = gives you more ovenspring
  • Less bran = gives you lighter, bigger, fluffier bread
  • Gives you white bread

Whole / Dark

  • Still sifted but not as much as white, 
  • Bran left in the flour, gritty
  • More protein than white
  • Bran = you need to add more water
  • Bran = gives you less ovenspring
  • Bran = gives you more dense bread, a meal within a slice
  • Gives you brown bread

Different Flours and what it means

White Bread Flour

  • Gold standard in bread baking
  • Gives you a really beautiful sourdough bread with a great ovenspring, great ear, great belly
  • It’s got high protein, high gluten and no bran to cut the gluten down
  • Hydration is capped at around 72%
  • But you can force it to accept more water through autolyse and bassinage

Whole Wheat Flour

  • The “whole” version of ANY wheat flour
  • Any flour that is not sifted, contains the bran of that flour
  • Whole wheat sourdough needs to be high hydration
  • At the minimum, 84% hydration

Attention:  

  • To check what type of whole wheat flour you have, see the ingredients list.  
  • HARD/WINTER wheat = high gluten (bread flour) and 
  • SOFT/SPRING wheat = low gluten (AP flour)

All Purpose Flour

  • Low gluten flour = less water
  • Made for cookies, cakes, pies, muffins —anything that doesn’t need to be chewy
  • Can still make bread, but will be cake-like instead of bread-like, meaning
  • It gives you bread that is less chewy, more soft like cake

Ancient Grain Flour

  • Flours like Einkorn, Spelt, Rye, Kamut, etc.
  • They’re very nutritious and tasty 
  • —but have LOW GLUTEN content and HIGH fiber
  • It will NOT behave like white bread flour
  • FLAVORFUL, but much, much denser
  • Will not have a great ovenspring unless you cut it with AP or Bread flour and/or
  • Add sweeteners to aid in taste and speeding up fermentation

Home Milled / Fresh Milled Flour

  • Behaves like whole wheat flour –but even denser because even the whole wheat flour you find at stores is sifted a little
  • even if you sift it yourself at home, you will never, NEVER be able to extract all of the bran
  • I have tried with a medical-laboratory-grade mesh sieve of 180 microns and it is so tedious and impossible, it’s not worth the money and effort to do this
  • ALL Sourdough bread made with Fresh milled flour will ALWAYS behave like whole wheat
  • Needs to be high hydration (min 88%)
  • Faster fermentation because of the high hydration

Filed Under: Sourdough Bread Tips

How To Feed Your Sourdough Starter

August 20, 2024 by admin Leave a Comment

The key to exceptional sourdough bread is a strong, well-fed starter. At the heart of it all is understanding the relationship between your starter and its feeding regimen.

Your sourdough starter is a living, breathing organism that requires the right nourishment to thrive. It needs to be fed regularly to stay happy and vibrant. Skimp on the feeding, and your starter will become weak, sluggish, and unresponsive.

Sourdough Starter FeedingInstructions

Here’s a simple, step-by-step guide to feeding your sourdough starter like a pro:

Before feeding, discard ⅔ of your starter. Keep ⅓.

Example: 150g starter → discard 100g → keep 50g

Feed what’s left with equal parts flour and water—same weight as your starter.

Example: To the 50g you’re keeping → add 50g flour + 50g water = 150g starter

After feeding, your starter will rise, peak, and fall back down. Repeat these steps to feed and keep your starter alive.

We can keep doing this indefinitely, see below:

What do we do with the discard?

Now, back to the 100g of starter we discarded –you have a few options on what to do with this:

  1. Use it right away to bake sourdough bread (using it as a leavening agent)
  2. Add it to a discard jar in the fridge to save for future baking (using it to add flavor/texture to recipes, but not to leaven it)
  3. Simply discard/throw it away if you don’t have an immediate use for it

What are starter feeding ratios?

A sourdough starter feeding ratio refers to the proportions of starter, flour, and water used when “feeding” or replenishing an active sourdough starter.

The 1 : 1 : 1 sourdough starter feeding ratio

1 part starter1 part flour1 part water
50g50g50g

The most common sourdough starter feeding ratio is 1:1:1. This means:

1 part starter
1 part flour
1 part water

For example, if you have 50g of active sourdough starter, you would feed it with:

50g flour
50g water

This 1:1:1 ratio provides the starter with the right balance of food (the flour) and water to keep it healthy and active. The starter consumes the flour, produces carbon dioxide, and becomes bubbly and ready for baking.

Other common sourdough starter feeding ratios include:

1:2:2 (1 part starter, 2 parts flour, 2 parts water)
1:5:5 (1 part starter, 5 parts flour, 5 parts water)

The 1:1:1 ratio is often recommended for general starter maintenance, as it keeps the starter at a manageable size. The higher flour and water ratios (like 1:5:5) can be used when you need to build up a larger volume of starter quickly for baking.

Regardless of the specific ratio, the key is maintaining a consistent, balanced approach to feeding your sourdough starter. This ensures it stays strong, active, and ready to leaven your homemade sourdough breads.

How often do you need to feed your sourdough starter?

For most home bakers, feeding the sourdough starter once a day is the sweet spot when storing it at room temperature (around 70°F). This keeps the starter active, healthy, and ready to use for regular baking.

At room temperature, the starter is consuming the available food (flour and water) fairly quickly, so it needs that daily refresh to maintain peak performance.

However, if you don’t need to bake with the starter very frequently, storing it in the refrigerator at around 36-40°F can work well. In the cooler fridge environment, the starter’s metabolism slows way down, so it only needs to be fed about once a week to stay viable.

Feeding a refrigerated starter just once a week is usually sufficient to keep it alive and ready for use. The cooler temps put the starter into a semi-dormant state, greatly reducing its need for frequent feedings.

This makes refrigerator storage a convenient option for bakers who don’t need their starter on a daily basis. It minimizes waste and upkeep while still preserving a healthy, usable starter for whenever you’re ready to bake.

Discarding Before Feeding

The reason why we discard sourdough starter before feeding it is because the starter needs to be fed its own weight in flour.

If we didn’t discard any of the existing starter, and just kept adding new flour and water on top of it, the total volume would grow exponentially with each feeding.

What would happen if we didn’t discard?

See This 50g Sourdough Starter Turn Into 241lbs In Just 7 Feedings (1:1:1)

Feeding 1Feeding 2Feeding 3Feeding 4Feeding 5Feeding 6Feeding 7
Starter50g150g450g1,350g4,050g12,150g36,450g
Flour50g150g450g1,350g4,050g 12,150g36,450g
Water50g150g450g1,350g4,050g 12,150g36,450g
Total150g450g1,350g4,050g12,150g36,450g109,350g

NOTE: If you’re viewing on your phone/tablet, you can use your finger to gently move the table left to right to see the entire table

For example, let’s say we start with a 50g sourdough starter. If we feed it 50g of flour and 50g of water, the total volume is now 150g.

Then for the next feeding, since we are not discarding, and we have to feed the starter at least its body weight it flour, now we add 150g of flour and 150g of water to the 150g starter. That makes it 450g total.

And if we continued this pattern without discarding, in just 7 feedings the 50g starter would balloon up to a massive 241 pounds!

That’s why the discarding step is so critical – it prevents the starter from growing out of control.

By removing a portion before each feeding, we can maintain the proper 1:1:1 ratio and keep the total volume at a manageable size.

What to do with discard

Discard is simply the portion of the sourdough starter that you remove before feeding the remaining starter. It’s the excess starter that you don’t need to feed at that particular time.

You have three options for what to do with the discard:

If the starter was just fed, use the discard to bake sourdough bread, adding leavening power

If the starter was not recently fed, store discard in a discard jar that lives in your fridge. Use occasionally in discard recipes, where it adds flavor but no leavening

Discard it completely and throw it away

Filed Under: Sourdough Starter Tips, Sourdough Tutorials

  • « Go to Previous Page
  • Page 1
  • Page 2
  • Page 3
  • Page 4
  • Go to Next Page »

© 2026 How To Make Sourdough by Roselle Blore

About Contact Privacy Terms Refund