How To Make Sourdough
Beginner Path System
Start Here Starter First Loaf Troubleshooting Get Guided Version

Here, you’ll find important Sourdough Bread tips and recommended articles about baking sourdough bread.  Most of Sourdough Beginners’ questions are answered by reading these posts first.

How To Make A Sweet Stiff Sourdough Starter

December 17, 2022 by admin 8 Comments

Print

The Sweet Stiff Sourdough Starter Recipe

Print Recipe

5 Stars 4 Stars 3 Stars 2 Stars 1 Star

No reviews

Ingredients

Ingredients / Starter Composition

starterflourwatersugars
Feeding
Ratio
1130% – 50%16% – 50%
120g120g40g – 60g20g – 60g

When you want to leaven something you really don’t want to be sour (like, let’s say, burger buns or croissants), you need to transform for regular starter it into a sweet starter.

Most of you are using a liquid starter –which is a starter that’s fed equal parts flour and water.

A sweet stiff starter is something different –you use less water to flour and add sugar as well.

This has many benefits, bigger ovenspring, longer fermentation –but really, we use a Sweet stiff sourdough starter because it results in a sourdough bread that isn’t sour.

Let’s make a Sweet Stiff Sourdough Starter

Let’s use a starter feeding ratio that has the minimal amount of sugar. Once you get the hang of this, you can increase your sugar ratio if you want. The more sugar you add, the stickier and tackier your stiff starter will be

starterflourwatersugars
Feeding
Ratio
13.33.16
40g120g40g20g
Here’s a beginner friendly sweet stiff starter

REMEMBER:

With baker’s percentages, we are not comparing the ingredients in relation to each other, we are comparing it to the FLOUR!!!

How To Make The Sweet Stiff Starter

Simply combine all the ingredients and wait for it to triple in size. This takes 8-12hrs for me at 77F –longer if you are feeding a very small amount of starter.

A totally different kind of gluten-network

👀 Wow, just look at the gluten-network of this sweet stiff starter.

It’s totally different from the sourdough starter you would normally use to leaven an artisanal sourdough bread.

The gluten network of a sweet stiff sourdough starter looks exactly like the gluten network of an enriched dough. Because, that’s exactly what it is.

Take a moment and think with me here…

Your dough is essentially one gigantic sourdough starter. When you make a sourdough dough –what do you do? You mix the ingredients together to make the dough right?

Well another way to think about it is, that you are taking those dough ingredients and feeding the sourdough starter with it.

And so your dough is really one gigantic feeding.

And when you think about it that way, that the sourdough dough IS a sourdough starter, then it’s easy to think that, duh, the starter has the same gluten network as the dough.

In this case, the sweet stiff starter is so webby, so sticky, JUST LIKE an enriched dough (ie. sourdough brioche)

Normal Sourdough Dough

Flour, Water, Salt

Enriched Sourdough Dough

Flour, Water, Salt PLUS

  • Fats (eggs, milk, butter, yogurt, oil, etc.), and
  • Sugars (sugar, honey, syrup, juice, etc.)

This is the gluten network that makes brioche so fluffy and pillowy.

Sweet stiff starter
Sweet stiff starter

It’s so webby and sticky and cool to play with.

Kind of a hassle to scrape out.

Best to work with wet hands and wet tools.

How to use a Sweet Stiff Sourdough Starter in recipes

Generally, we use a Sweet Stiff Sourdough Starter for enriched doughs

But you can use a Sweet Stiff Starter in ANY sourdough bread recipe,

You can swap the regular sourdough starter and use your sweet stiff starter instead.

Why would you want to do it?

IF you really didn’t want that bread to be sour, you’d use a sweet stiff starter.

However much regular starter that bread recipe calls for, you would need to use the same amount of sweet stiff starter

Important:

Since we are using a STIFF starter, the fermentation time will be different. Pay attention to your dough. Here are some recommended readings that talk more about that…

How to really master baking sourdough bread

Why Are Flour Type and Hydration Ratios Important? And What Does It Mean For Your Sourdough Bread?

Filed Under: Sourdough Bread Tips, Sourdough Starter Recipes

How To Make Gluten-Free Sourdough Bread

December 16, 2022 by admin Leave a Comment

Making Gluten-free sourdough is so easy, it’s crazy.

In fact, it’s actually following the “no-knead” or “overnight” method:

You mix everything together, shape, wait and then bake. Done.

Gluten Free Sourdough Bread Recipe

For this GF Sourdough Bread tutorial, we’re going to use my GF Sourdough Bread Recipe Version 1.0 –it’s most similar to whole wheat sandwich bread.

Follow the steps below…

Ingredients / Dough Composition

Flours

PercentagesIngredientsMeasurements
19%Rice100g
28%Millet150g
19%Buckwheat100g

Starches

PercentagesIngredientsMeasurements
14%Tapioca75g
14%Potato75g

Other Dry Ingredients

PercentagesIngredientsMeasurements
2%Salt10g

Starter Gel Mixture

PercentagesIngredientsMeasurements
4%Psyllium Husk20g
2%Ground Flax Seed10g
37%Gluten-free starter200g
100%Water540g

Stage 1 – Preparation

Step 1 – Prepare your starter

Make sure you’re using a very active gluten-free starter, you might need to feed it 3x before using it.

Step 2 – Prepare your starter gel mixture

Mix all the ingredients very well.

It helps if you use a stick blender.

Work quickly, both psyllium husk and flaxseed gel pretty fast.

Do I need a stick blender?

You want to mix this as evenly as you can. That’s why I use a stick blender. A regular blender is good too.

When I didn’t use a blender, the starter gel came out sooooo clumpy. I gave up breaking up the clumps and proceeded anyway. It’ll still work, but you wont get the best outcome.

The blender (stick or regular) also adds air into the starter gel mixture, so that’s always a good thing with anything gluten-free.

Step 3 – Prepare your dry ingredients

Mix all of your dry ingredients together.

Watch out for the starches, they tend to clump together and jump out of their containers, so be careful dumping them into your bowl.

Also, remember the salt!

Stage 2 – Bulk Fermentation

Step 1 – Mix your dry ingredients into your wet

Combine everything, making sure there are no dry clumps of flour.

I mix in a big stainless steel bowl, using a plastic bench scraper to “chop in” the dry flour into hydrated dough.

Step 2 – Knead the dough

There will come a time where it wont mix together comfortably in your bowl anymore, so flip the whole thing out on your counter.

Knead the dough by folding it into itself a few times.

Then, leave it alone for 30 min.

Step 3 – Shape your dough, oil your pan

Shape the dough into a log by folding it into itself a few times.

It will be incredibly sticky —it’s a 100% hydration dough, after-all, so you want to work fast.

And it’s helpful if you wet your hands while you’re doing this.

Just follow what I’m doing in the video. Let me know in the comments below if you I should upload a video of me doing it in real time.

Step 4 – Proof your dough ~4 hrs

Gluten-free sourdough ferments rapidly.

You’re not looking for double the volume. You only want a slight increase in size. In a 70F room, this takes me around 4-5hrs —this is a ballpark time frame!

If it’s colder, it’ll take longer. Shorter if warmer.

Take note of the pictures and captions below…

You can start baking at this point
But I like to push it further to find the fermentation sweet spot —hit that bullseye.

Stage 3 – Baking Time

Okay, it’s baking time!

Notice what I’m doing here in this video.

Everything about the baking process is intentional.

I’m baking in a dutch oven because I need a great conductor of heat and I need to trap in steam.

The steam stops the crust from cooking, hardening and burning before the dough can cook thoroughly.

Steam helps the dough cook more evenly.

I’m putting my loaf pan on a rack inside my dutch oven because I don’t want to burn the bottom. The dutch oven is a mini oven, rack and all.

I’m spraying the surface of the dough with water and adding ice cubes on the bottom of my dutch oven because I want to increase steam.

Steam, steam, steam.

Bake this at 425F for roughly 45-50 minutes.

I helps if the dutch oven is screaming hot, so if you have time, pre-heat your oven with your dutch oven inside, for at least 1hr.

NOTE: It’s best to let this dry out for at least 2hrs if not more, out on your counter or in your oven. If you cut into this too soon, then your bread might be a little dense.

Final Reveal

Alright, moment of truth. How does it look?

Filed Under: Sourdough Bread Tips, Sourdough Tutorials Tagged With: Gluten-Free

The Gluten-Free Sourdough Starter Recipe

December 16, 2022 by admin 2 Comments

Believe it or not, the gluten-free starter is arguably the best starter.

A few weeks ago I posted on here a “battle of the starters” experiment.

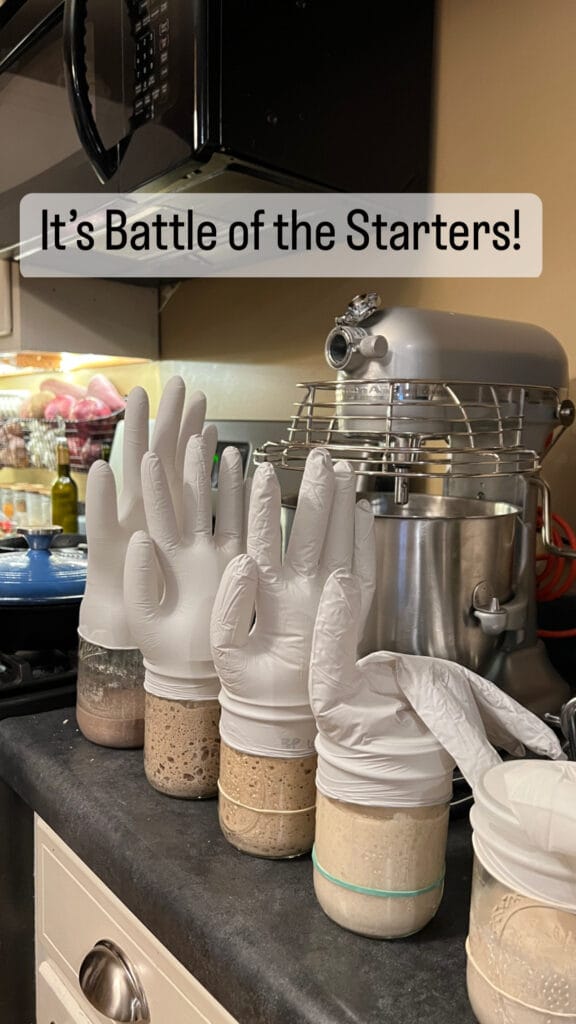
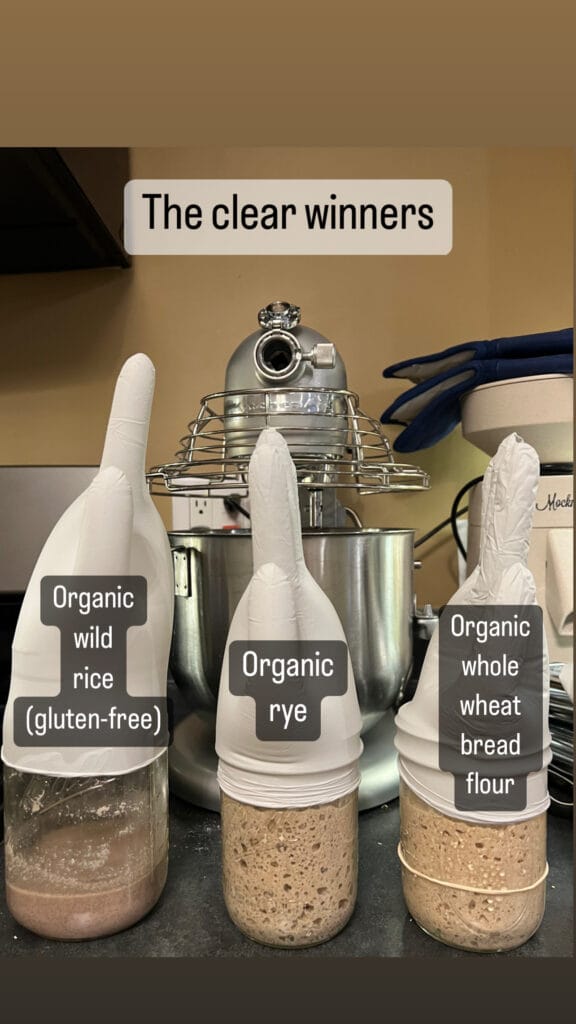
The winners were a tie between

1) the gluten free starter – organic wild rice, and

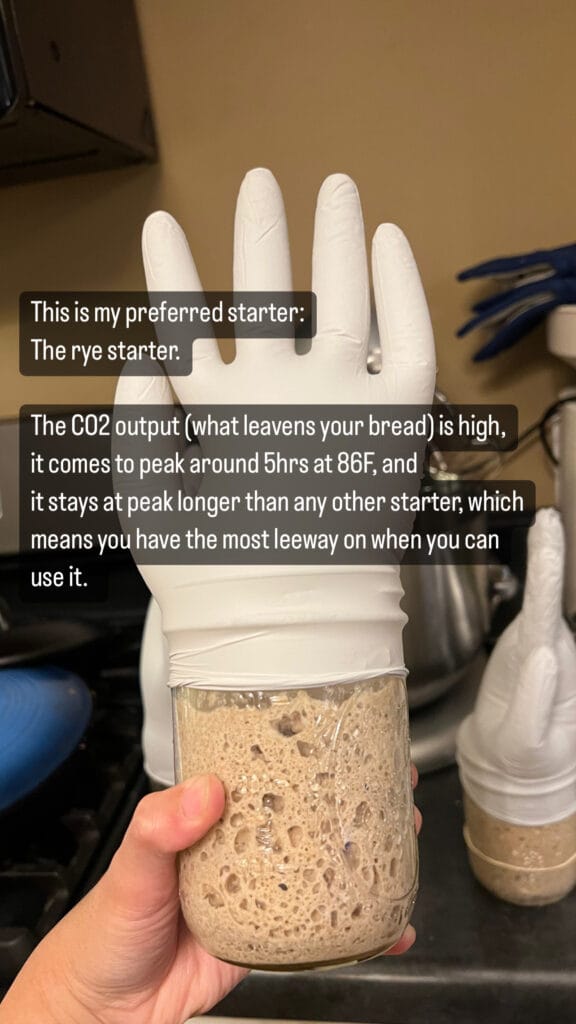
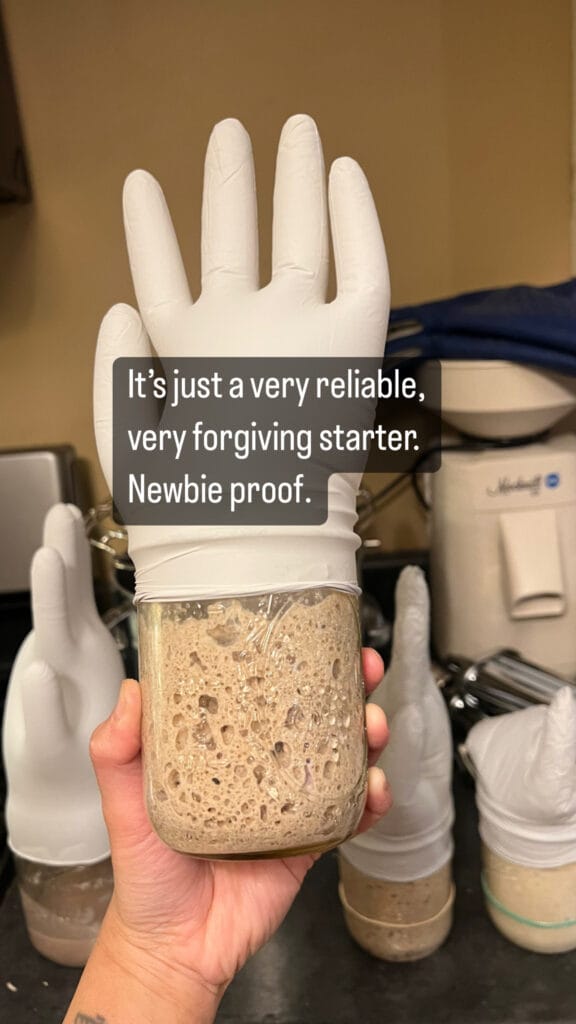
2) my 100% organic rye starter

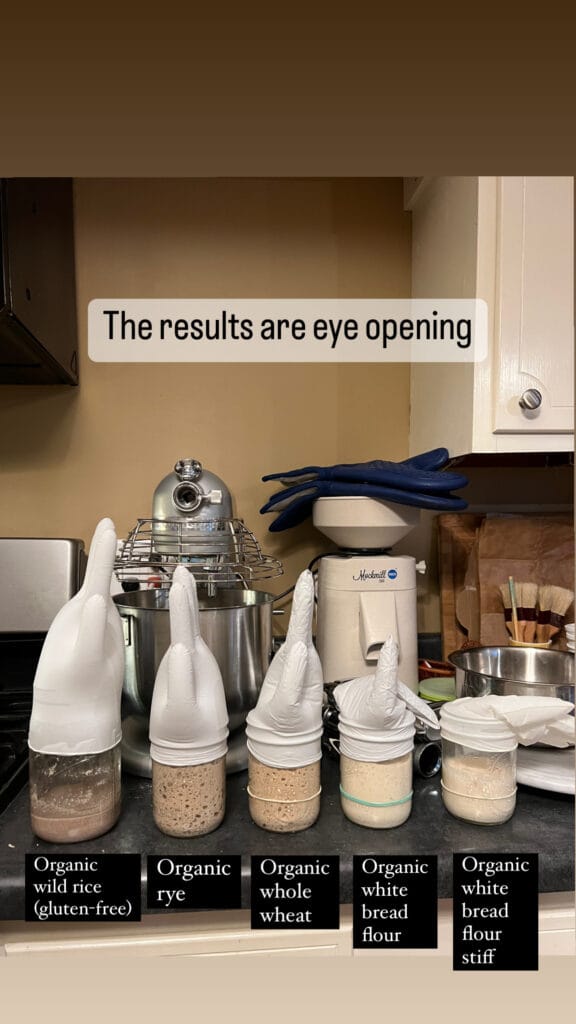
Well, color me surprised.

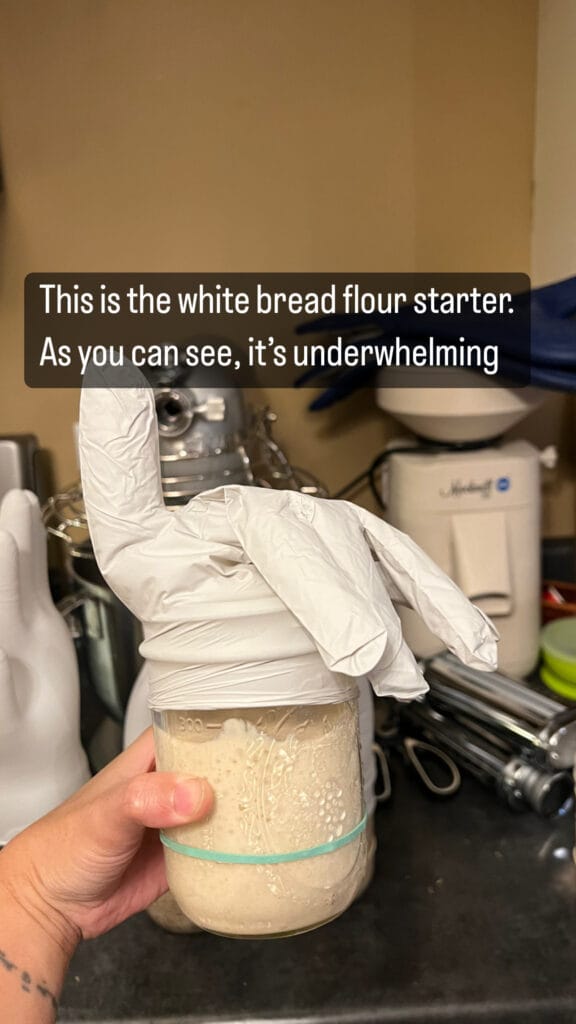
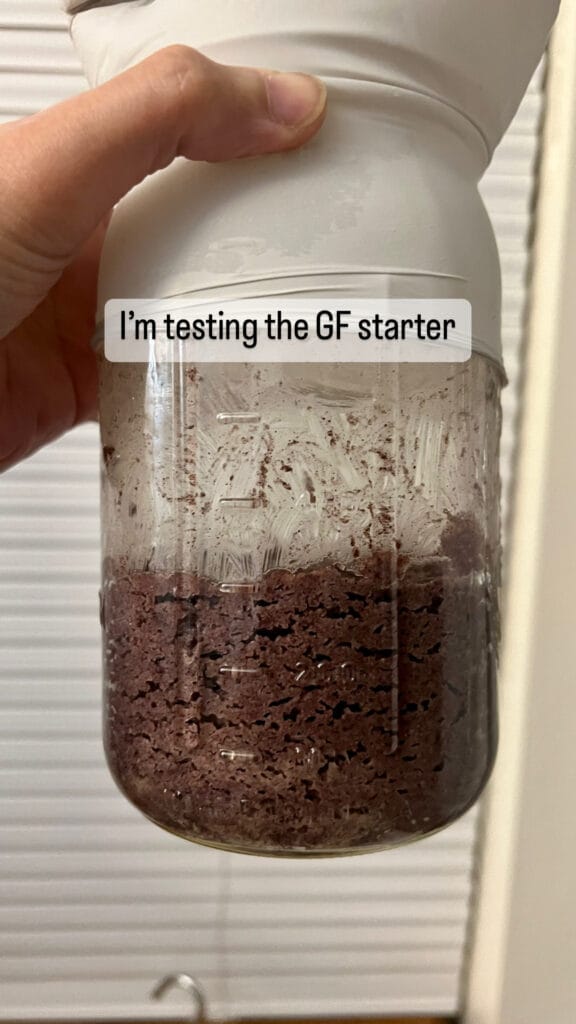
It didn’t look like or behave like the other starter, but the glove doesn’t lie.

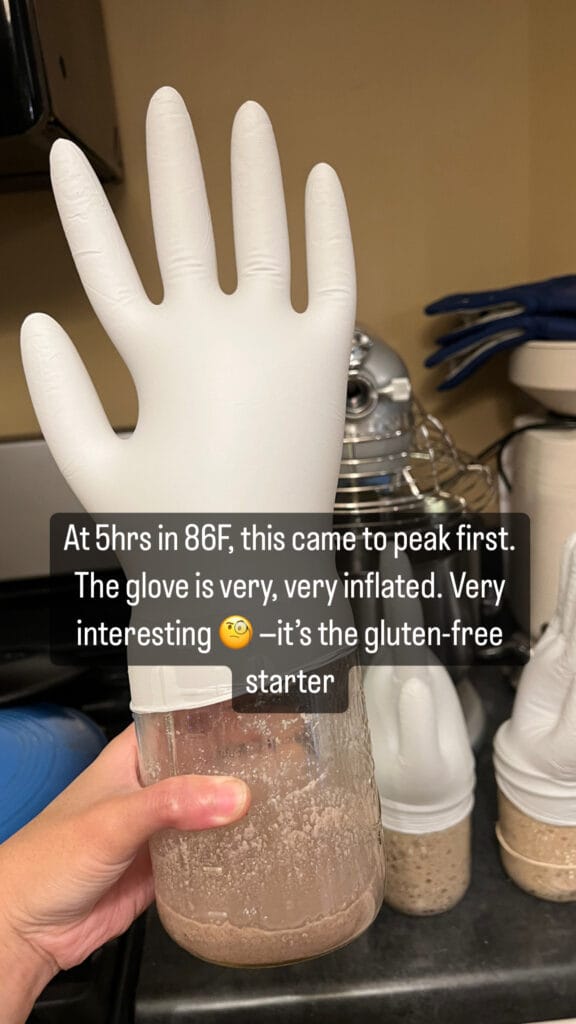
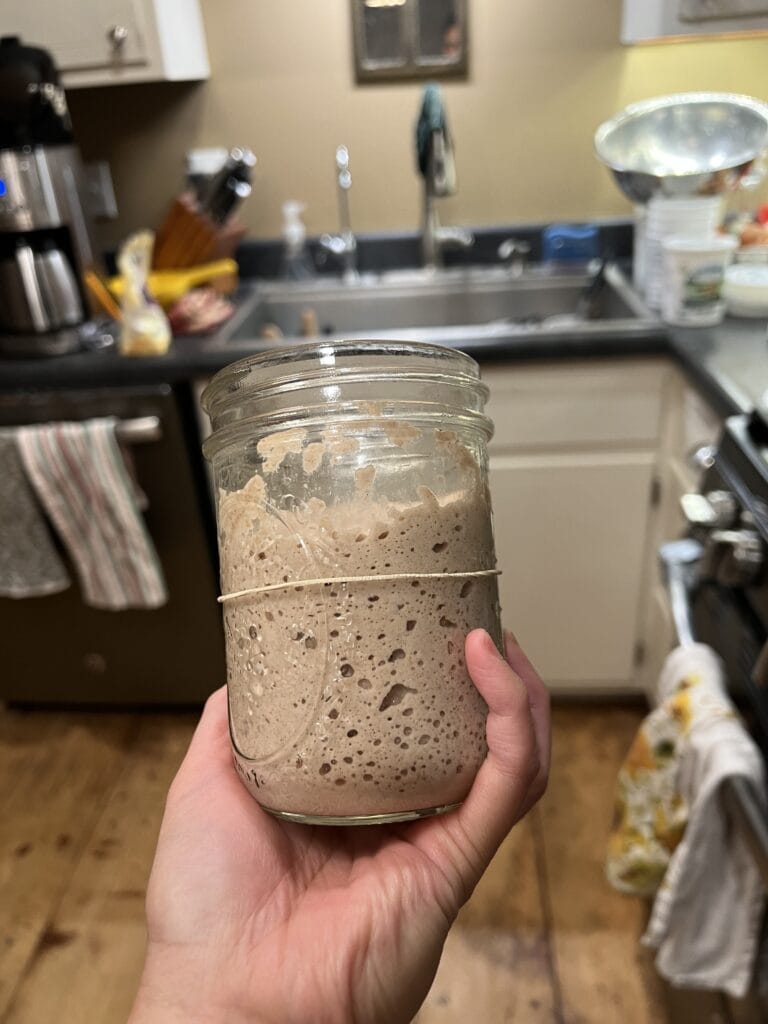
The GF stater was so inflated, so bloated, I couldn’t believe it.

I was intrigued by the gluten-free starter —I mean, I never would’ve thunk it.

It was the first to come to peak and the glove 🧤 was very very inflated, suggesting a very high CO2 output.

Using a GF starter for country sourdough.

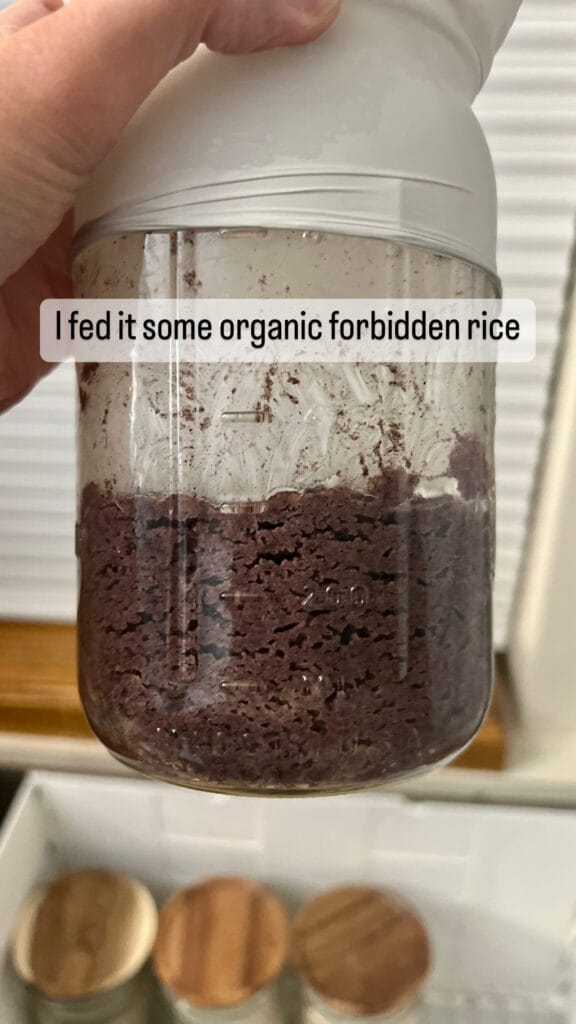
I fed my GF starter organic forbidden rice and used on a mini-loaf today and lo and behold, it leavened the bread really well.

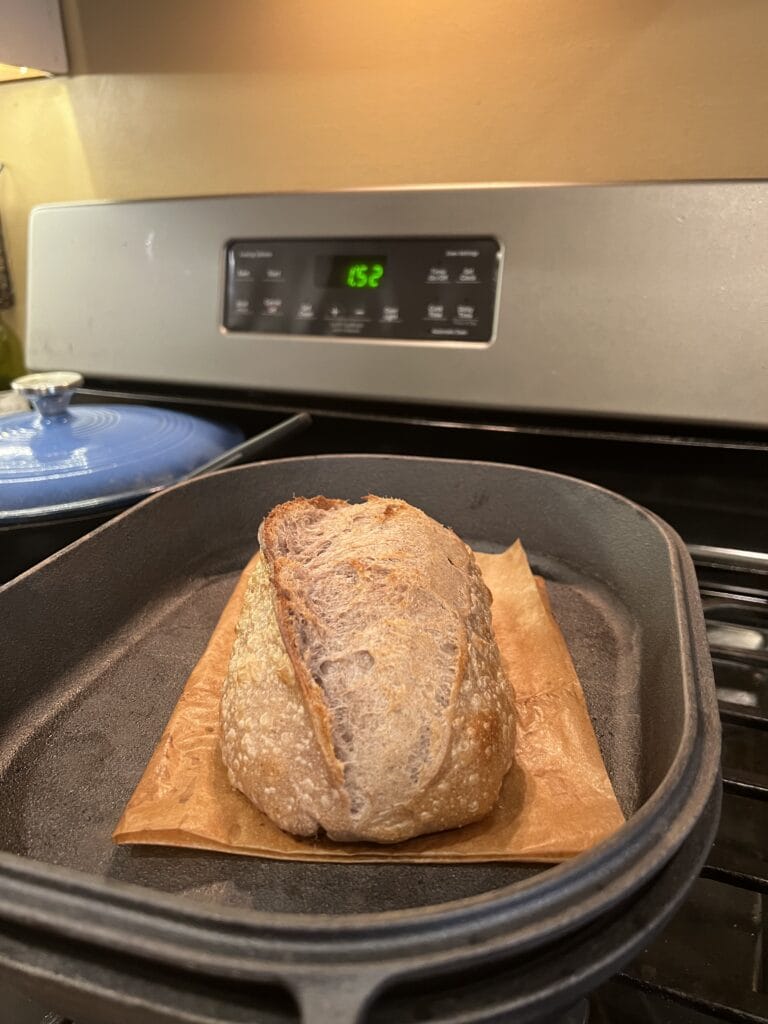
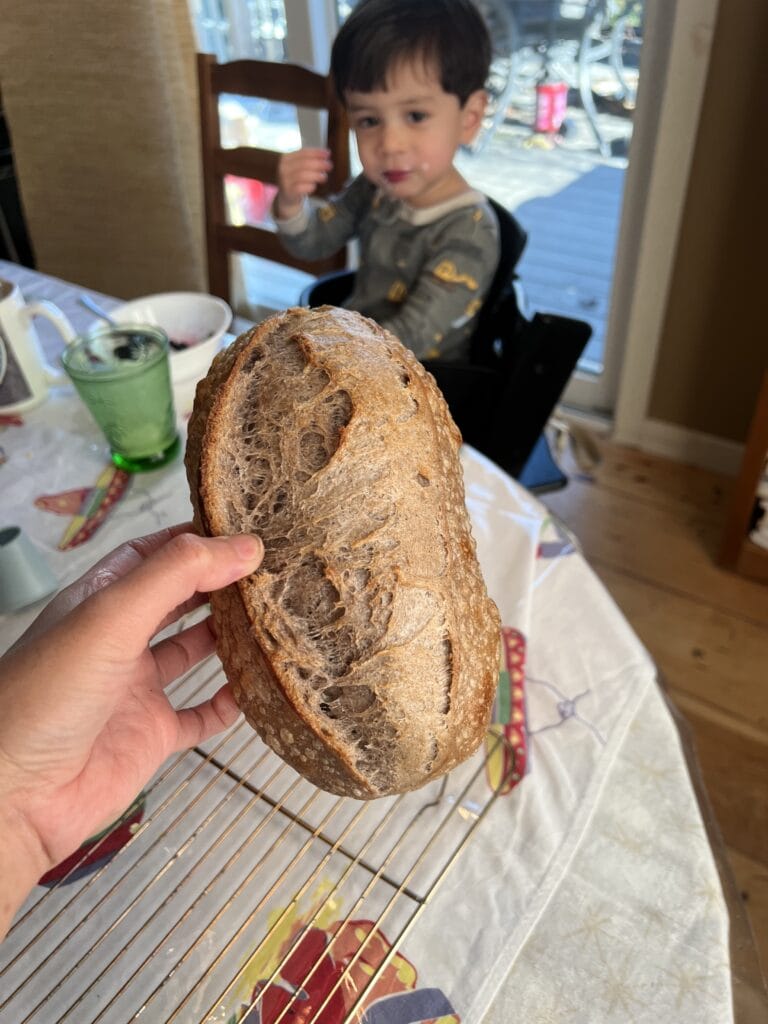
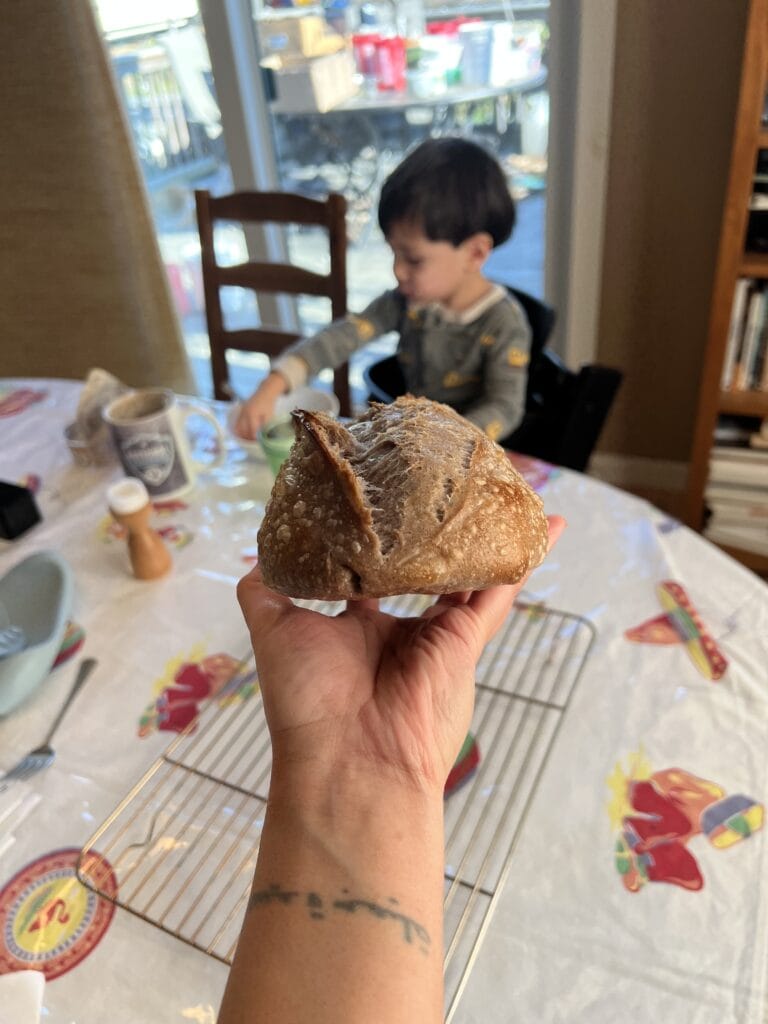
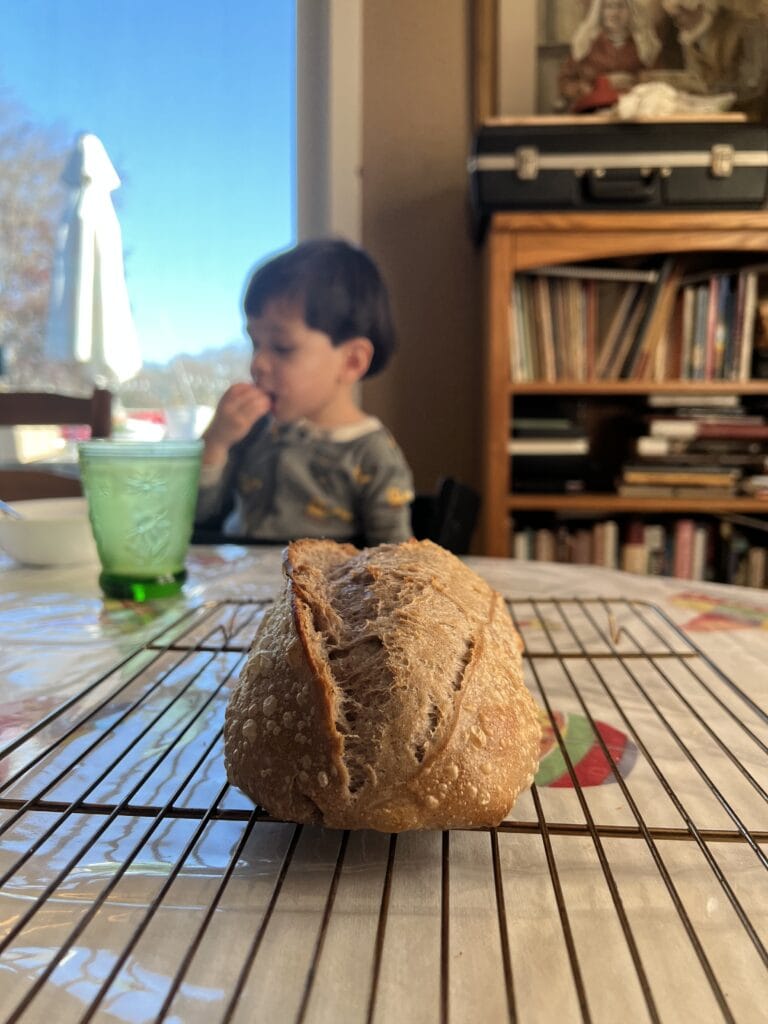
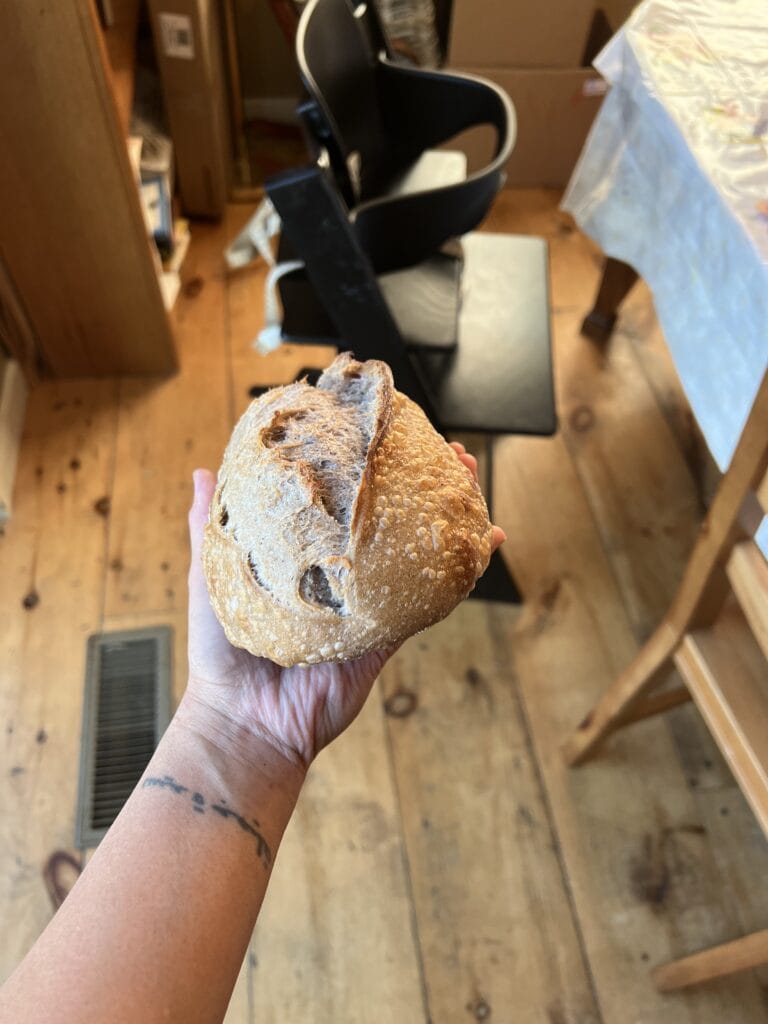
So there you go. A gluten-free starter will leaven a regular dough, not just a gluten-free dough.

It does a really good job at it too.

What can you you feed your Gluten-Free starter?

You can feed a starter anything you want. You can start/feed your GF starter with anything gluten free.

As a general rule, you want a really active/robust starter —which is even more important in GF baking since there is no gluten for the bacteria and yeasts to feast on.

You’re substituting the food source —instead of gluten, the bacteria and yeasts are eating quinoa, buckwheat, rice, potato starch, sugar, honey, etc.

I feed my Gluten-free starter whole-grain rice flour at 1 : 1 : 1 ratio.

I buy fancy organic rice from my local health food store and use my mill to grind it at home.

If you don’t have a mill, you can use a coffee grinder or just use already ground brown rice flour from the store —no big deal.

Rice Flour vs. GF all purpose flour

Wild Rice Starter no longer at peak —you can tell because you can see a line from where it started to sink back down.

I like to make my GF starter with organic wild rice, and not an “all purpose” GF flour blend. And that’s because the ideal characteristics and composition of your dough is different from what you want for your starter.

For example, whether it’s gluten free or not, you want to feed your starter the most nutrient-dense food source. This usually means the “whole” version of whatever you’re feeding it —whole wheat, rye, rice, etc. and extra points if you grind it yourself. Rice is easily ground in a coffee grinder.

If you feed your starter the “white” version of your flour, it will live, and it will leaven your bread, but it will never be as robust and active as a starter being fed the “whole” version of that flour.

But why don’t I just use a GF all purpose flour blend for my starter?

An all purpose GF flour blend is formulated to give you the right characteristics for airiness and fluffiness. It’s formulated to mimic white bread, which means it lacks the nutritional benefits of what I just covered above.

You would be much better off starting and feeding your GF starter the whole version of a naturally gluten-free product. I use organic wild rice only for my GF starter.

I buy it at my local organic health food store.

Here’s how I feed and keep my GF Starter:

Gluten-Free Starter Recipe / Starter Composition

starterflourwater
Feeding Ratio111
Brown rice flour50g50g50g

Filed Under: Sourdough Bread Tips, Sourdough Starter Recipes Tagged With: Gluten-Free

  • « Go to Previous Page
  • Page 1
  • Page 2

© 2026 How To Make Sourdough by Roselle Blore

About Contact Privacy Terms Refund