How To Make Sourdough
Beginner Path System
Start Here Starter First Loaf Troubleshooting Get Guided Version

Bake Sourdough Bread

Sourdough Starters Vs. Commercial Baker’s Yeast

August 14, 2024 by admin Leave a Comment

Who’s the winner?

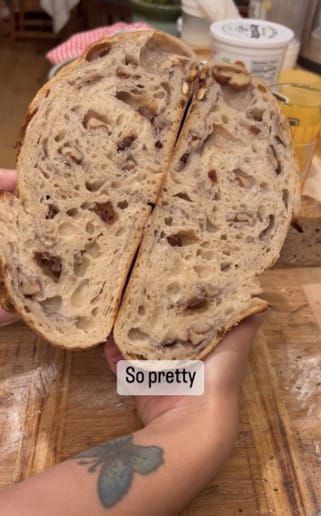
Good, the bad, and the ugly…

Everyone is doing their best —and I think bread baking is a spectrum.  Some people are used to yeast bread and some feel at home with sourdough baking.

So I think a better way to frame it is:

Good, better, best.

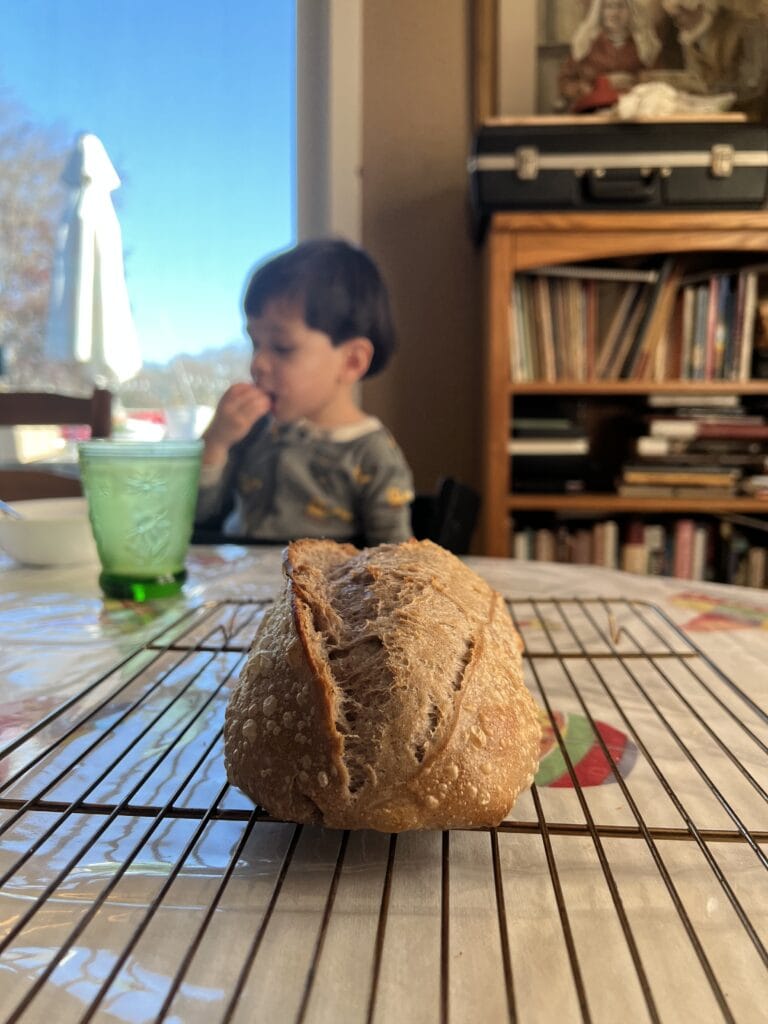
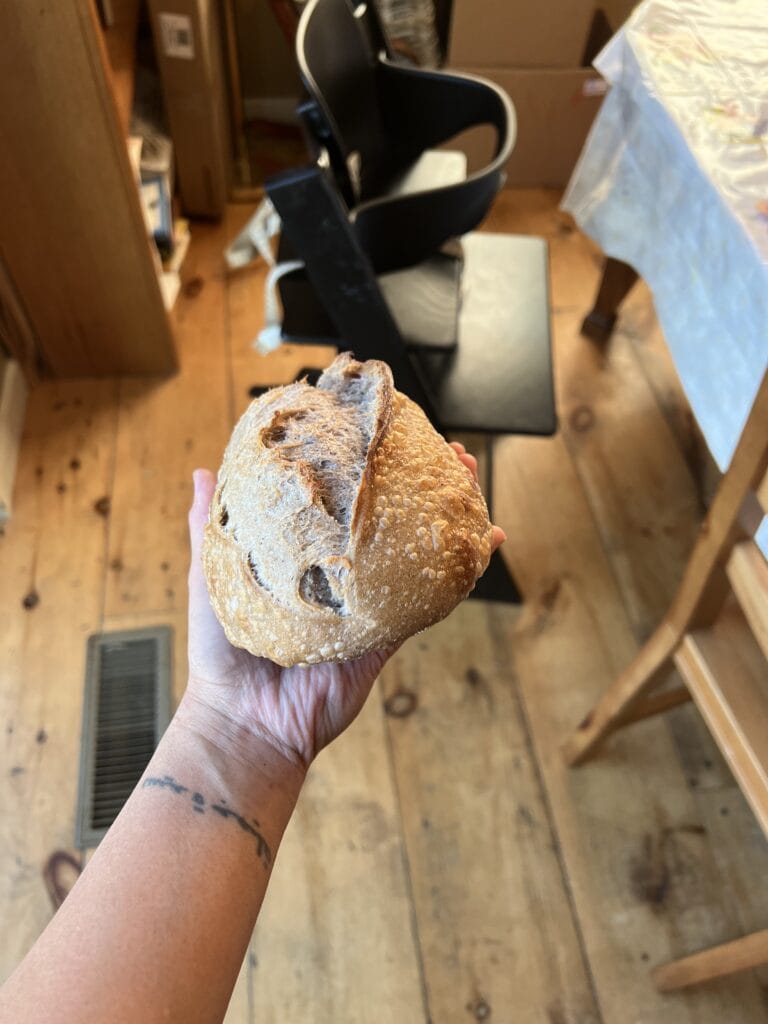
I always say that homemade bread is good, sourdough bread is better, and homemade sourdough bread is best.

Whichever you choose, I think we can all agree that the “ugly” is store-bought bread.  —the common enemy!

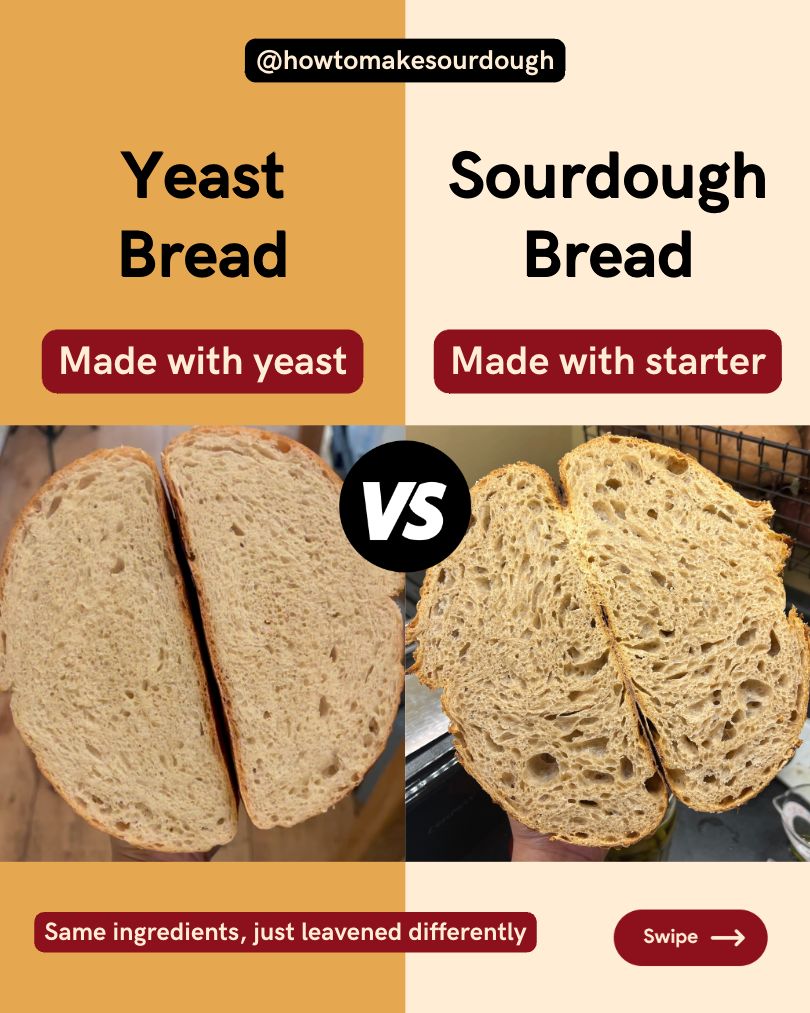
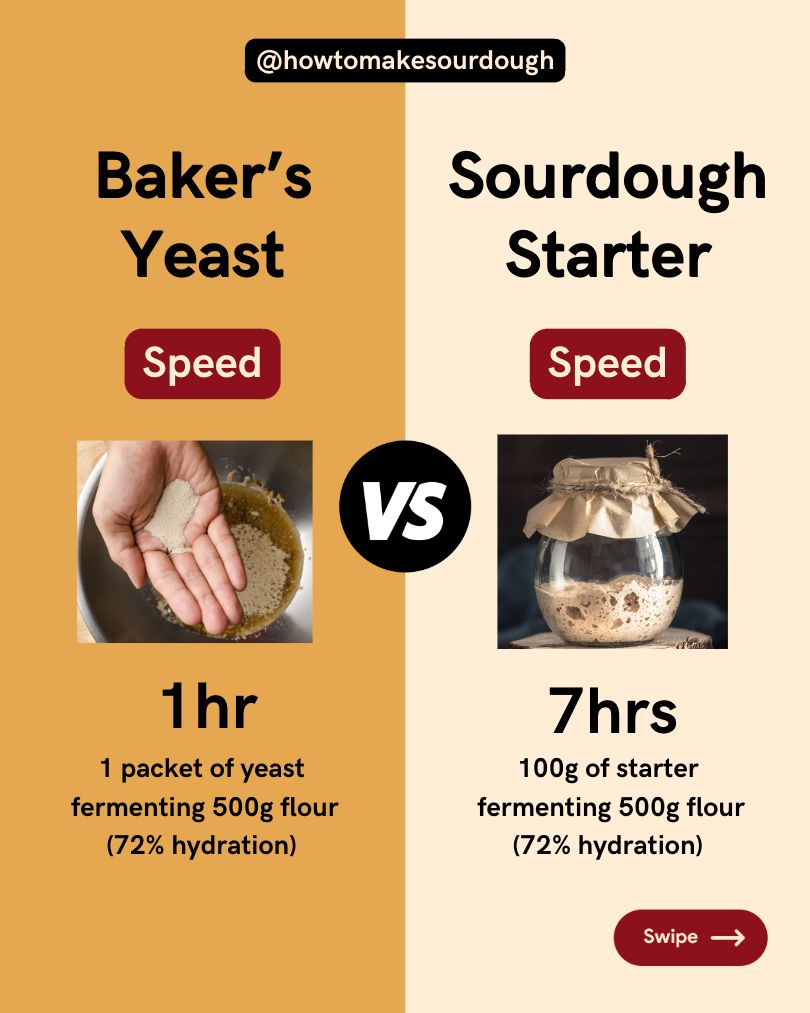
Slideshow Comparison

Check out the Yeast Bread vs. Sourdough Bread slideshow I made that summarizes the difference between the two…

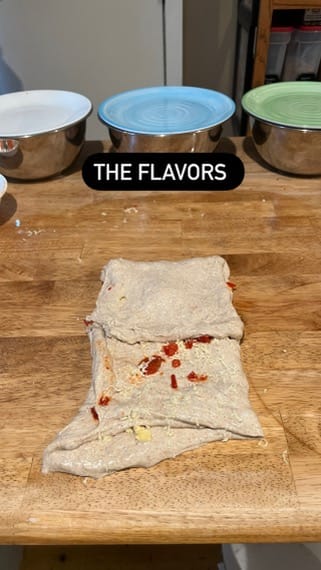
Difference in Flavor

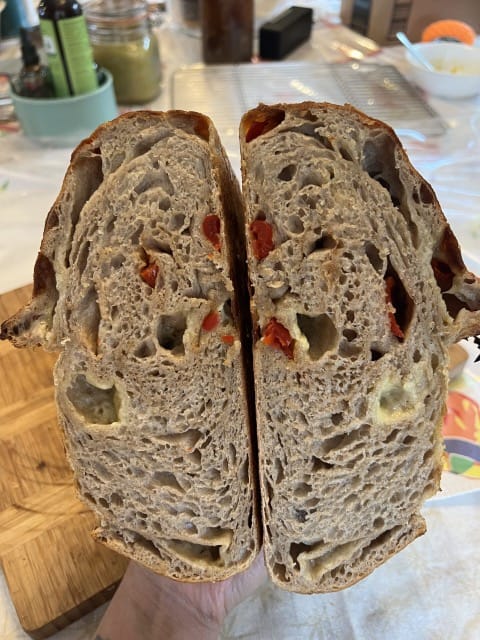
When you take a bite of sourdough bread and then taste a bread made with commercial baker’s yeast, you’ll notice a big difference.

Sourdough bread is richer in flavor and also boasts health benefits!

This is especially true when you taste fresh, homemade sourdough bread.

Compare that to bread made with commercial yeast –which often has a single, sweet, beer-like aroma that stands out in breads like brioche or a classic white loaf.

Using a sourdough starter can highlight other flavors, such as the caramel and earthy notes of whole wheat or the gentle sweetness of dairy.

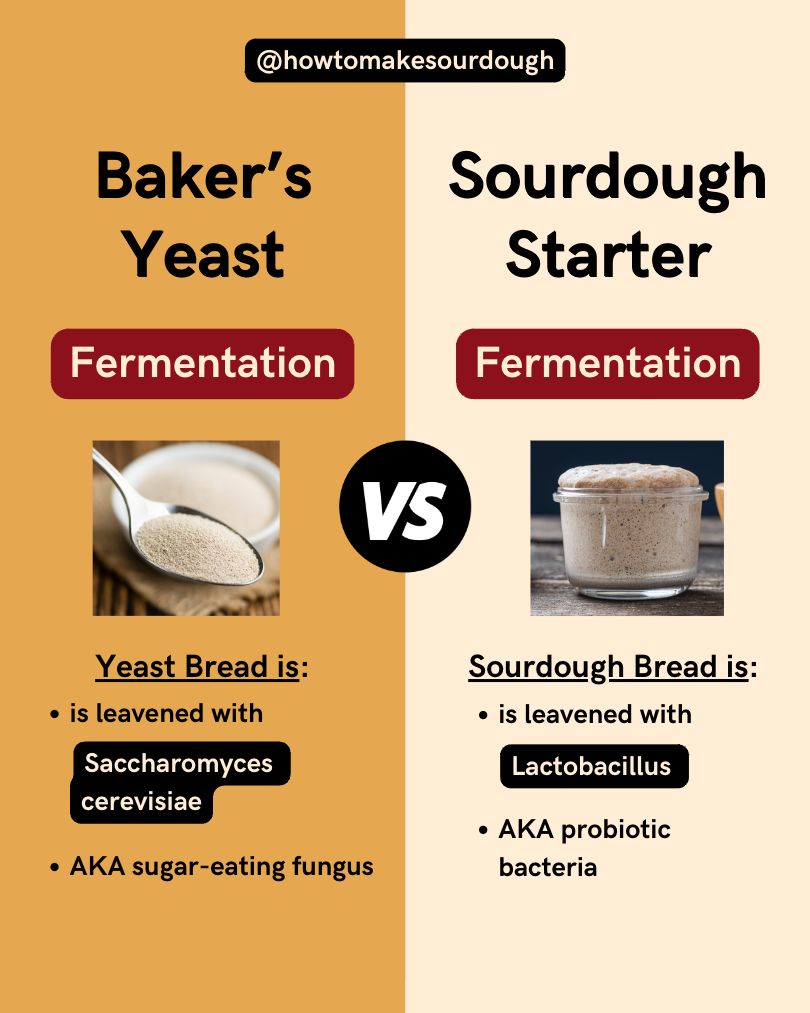
This enhanced flavor comes from the diversity of microbes in a sourdough starter, which is something you won’t find in commercial yeast.

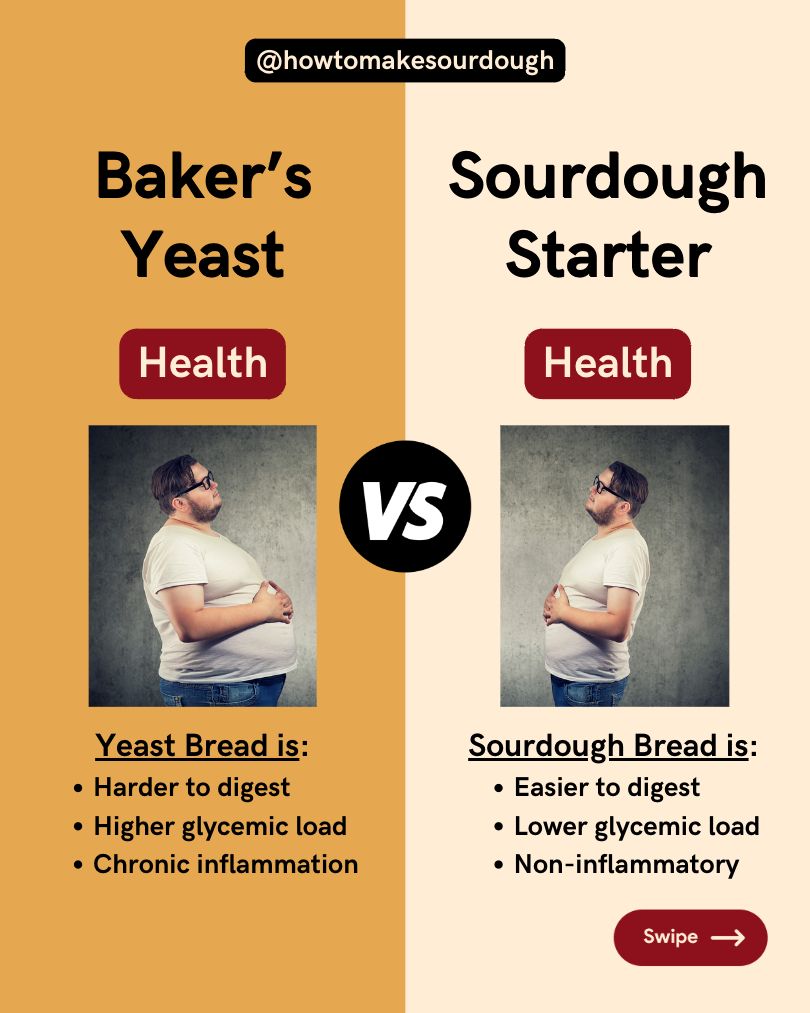
Sourdough bread is also often easier to digest, offers more bioavailable nutrients, and is generally better tolerated by people who have sensitivities to commercial yeast, sugars, or other additives.

That’s not to say that homemade bread made with conventional yeast are bad —they definitely have their place in home baking.

But sourdough is in a league of its own, with so many unique qualities that make it truly special.
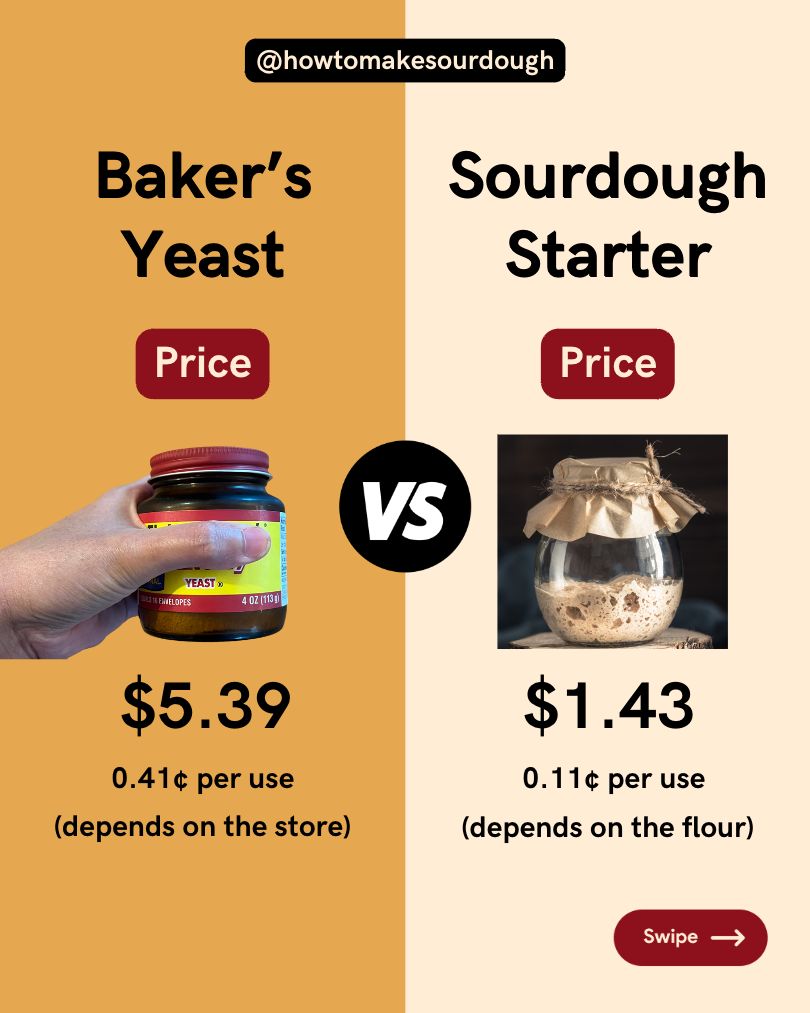
Cost Per Use

Yeast

When you compare the cost of using commercial baker’s yeast versus a sourdough starter, there are a few key factors to consider.

Commercial baker’s yeast is generally inexpensive and easy to find, usually sold in packets or jars that can last for several batches of bread.

And each packet contains a measured amount of yeast, making it simple to use with consistent results.

What’s the catch?

Well, over time, the cost of continually buying yeast really adds up, especially if you bake frequently.
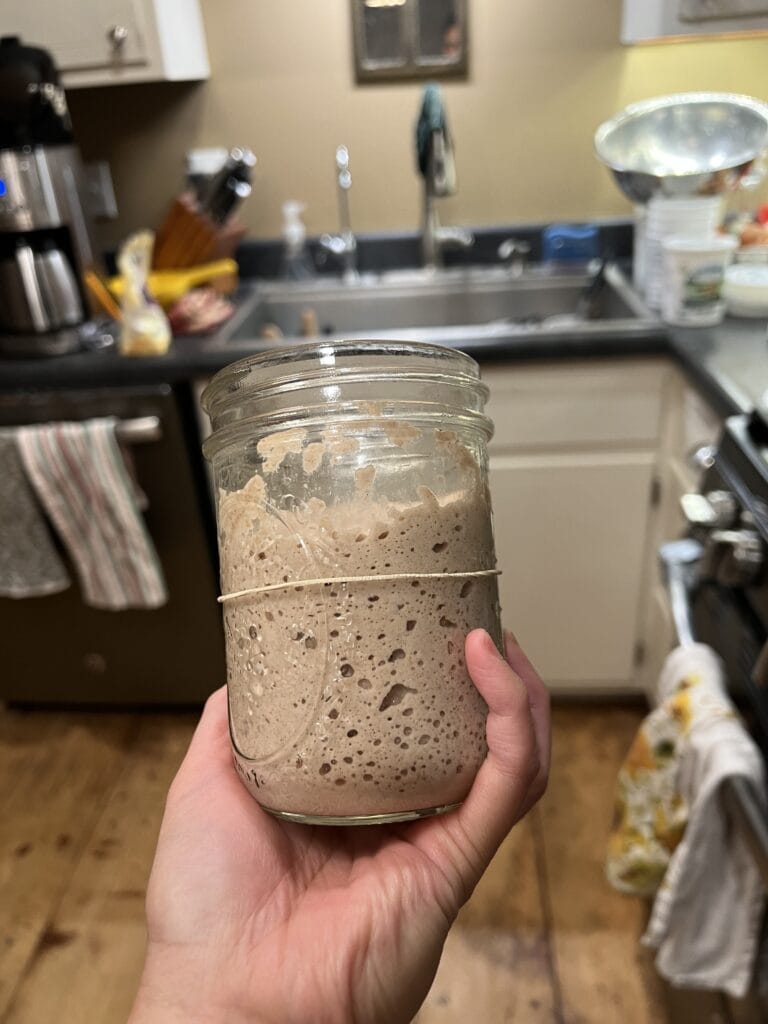
Sourdough Starter

On the other hand, a sourdough starter has a higher initial investment in terms of time and effort rather than money.

Once you’ve got your sourdough starter going, though, it can last indefinitely with proper care, making it essentially a one-time cost.

You only need to feed it regularly with flour and water, which are relatively cheap, and that’s it!

The longer you maintain your sourdough starter, the more value you get out of it, and you won’t need to keep buying yeast for every batch of bread you bake.

In the long run, using a sourdough starter can be more cost-effective than relying on commercial yeast, especially for frequent bakers.

While there’s an initial learning curve and a bit of daily maintenance involved, the benefits —both in terms of cost savings and the unique flavors you get —can make it well worth the effort.

Plus, there’s something special about having a living, thriving sourdough starter in your kitchen, ready to be used whenever you’re in the mood to bake.

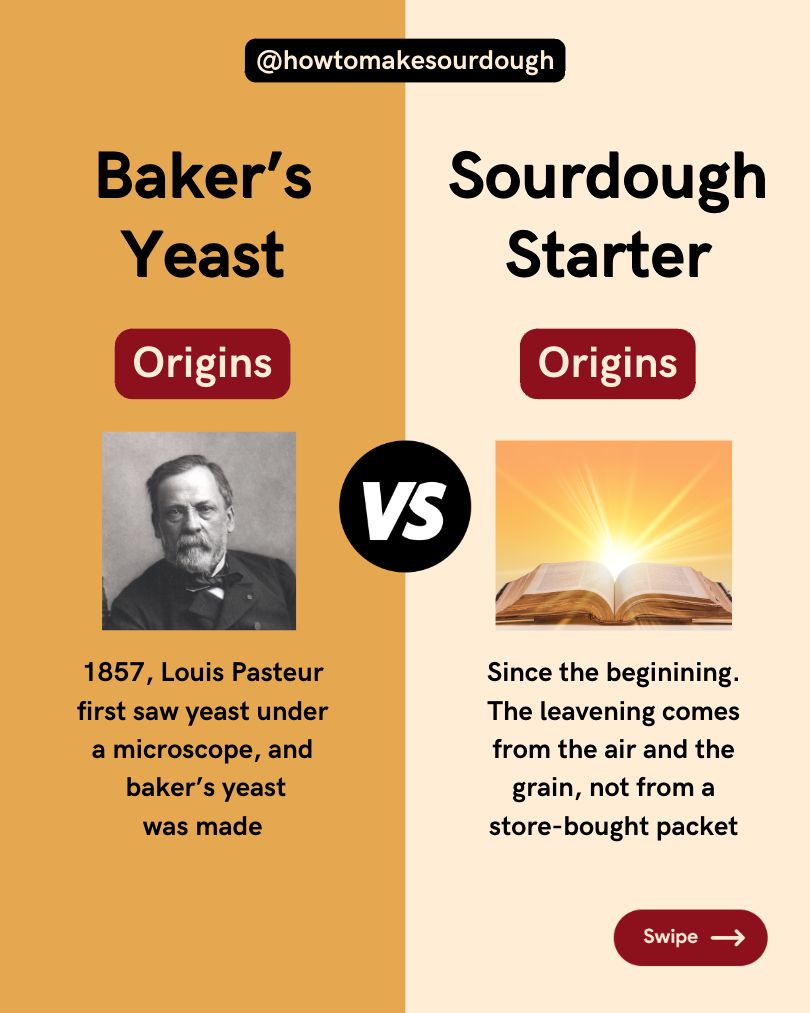
Modern vs Ancient Origins

Yeast

Commercial baker’s yeast has a relatively modern origin, developed for consistency and convenience in baking.

It was first produced on a large scale in the 19th century, when scientists isolated specific strains of Saccharomyces cerevisiae, the yeast most commonly used in baking today.

This yeast was cultivated and mass-produced to provide bakers with a reliable and fast-acting leavening agent.

The goal was to create a yeast that would perform the same way every time, giving predictable results and reducing the time needed for bread to rise.

Sourdough Starter

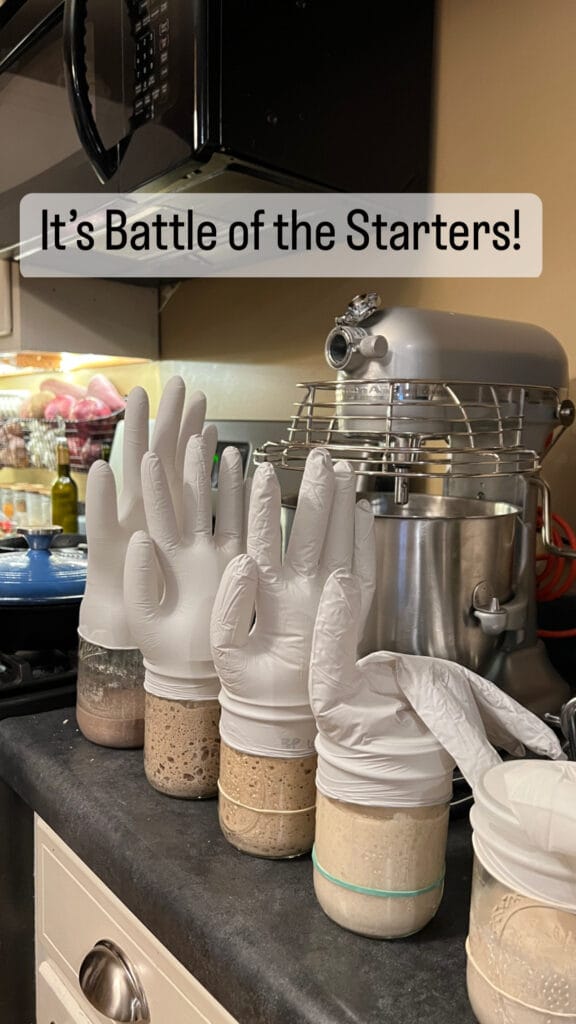
Sourdough starters have ancient origins, dating back thousands of years.

Long before commercial yeast was available, bakers relied on naturally occurring wild yeast and bacteria in their environment to leaven bread.

A sourdough starter is essentially a mix of flour and water that captures these wild microbes from the air, flour, and even the baker’s hands.

Over time, this mixture ferments and develops a unique ecosystem of yeast and lactic acid bacteria, which not only leavens the bread but also gives it its rich and robust flavor.

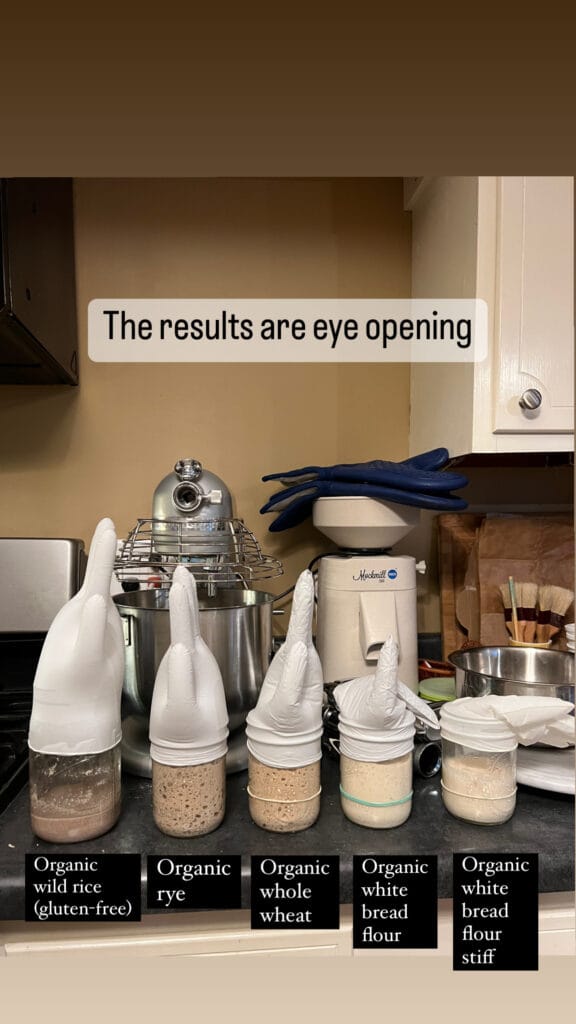
Every sourdough starter is unique, influenced by its environment and the ingredients used, making it a true reflection of local traditions and conditions.

While commercial yeast was developed for uniformity and speed, sourdough starters carry with them a sense of history and place.

Each starter is a living link to the ancient methods of bread-making, offering a connection to the past and a deep, rich flavor that can’t be replicated by commercial yeast.

For many sourdough bakers, the process of cultivating and maintaining a sourdough starter is as rewarding as the bread it produces, making it a cherished part of their baking routine.

Filed Under: Sourdough Bread Tips, Sourdough Starter Tips

Are Hydration Ratios Important? And How Does It Affect My Sourdough Bread?

August 12, 2024 by admin 3 Comments

Look the picture above

This is a whole wheat sourdough dough that doesn’t have the correct hydration ratio. Because of that the dough easily tears and doesn’t behave well for you.

The trick to becoming a better baker, not just a better sourdough baker is knowing

  1. Flour types (or more specifically, how much protein there is in the flour), and
  2. The right hydration ratio for that flour type

☝️ These two go hand in hand and they are VERY important to the structural make up of your sourdough bread recipe

If you change the flour in a recipe WITHOUT also changing the hydration ratio to account for the change in flour, then you run into problems

The Reason Why:

Flours have a minimum and maximum threshold of water. In other words,

  • Flours need a minimum amount of water to become dough, and
  • Flours have a maximum amount of water until it becomes gravy

To get a dough that will behave for you, you need to find out the “Min and Max hydration” for your flour.

When you work within this min and max hydration, you will get a sourdough dough that’s got a really nice texture, elasticity and pliability.

Because when you stay within the min and max hydration, you will ALWAYS pass the windowpane test.

It is within this hydration spectrum that you will find the windowpane sweet spot.

How to do it

So how do you find the min and max hydration for your flour?

IT’S REALLY EASY

Do test batches with your flour

For example:

  • Bowl 1 – 100g flour + 60g water (60% hydration)
  • Bowl 2 – 100g flour + 65g water (65% hydration)
  • Bowl 3 – 100g flour + 70g water (70% hydration)

And so on and so forth 

See how the dough feels like to you, see if it passes the windowpane test.

The bowl with the lowest hydration that can pass the windowpane test is your MIN.

The bowl with the highest hydration that can pass the windowpane test WITHOUT tearing is your MAX.

How to swap the flour in a sourdough bread recipe

Simply find the correct hydration ratio for the flour you want to use instead. Test your flour and find the MIN and MAX hydration. Once you have that, you can find your windowpane sweet spot.

Use the correct hydration for the flour you’ll be using instead of the flour from the original recipe and keep in mind that now that you’ve changed hydration ratios, you have now also changed the speed of fermentation.

The more water/hydration you use, the faster the fermentation will be. The less water/hydration you use, the slower the fermentation will be.

Recommended reading:

Is the type of flour I use important? And how does it affect my sourdough bread?

Filed Under: Sourdough Bread Tips

How Do You Feed Your Sourdough Starter in Cold Winter Temperatures?

August 10, 2024 by admin Leave a Comment

Winter sourdough starter tricks

What to do to speed up your sourdough starter so you can bake sourdough bread ASAP👇

Feed it flour that it loves

There are some flours that the starter loves because it has high amounts of a protein called amylase that helps the starter break down carbohydrates. 

These are: rye flour, sprouted barley flour, King Arthur white bread flour (includes the amylase enzyme and/or barley flour)

Add a little more water

The more hydration a starter/dough has, the faster it will ferment.  And the less water it has, the slower it will ferment.

Increase the temp

The higher the temp = the faster the fermentation.  So put your starter in a place where it will be super warm.  Like 88-98F warm.

Increase the humidity

Humidity will also increase your fermentation —but especially high temp + high humidity combined.

Put it in a proofer

If you have a proofer like I do, that would be the way to go.  You can control the temp and humidity at will.

Put it in the oven with the light on

The closer environment and heat source is enough to increase the temp to make your starter happy.

Leverage thermal mass

Here’s the absolute golden tip:

Boil water and put it in a big metal container —put this in small, enclosed area —your microwave/oven/closet and put your starter next to it.  Not touching, just next to it. 

Why?  Because water is good thermal mass (the ability of a material to absorb, store and release heat)

Doing all of this ☝️ has turbocharged my starter regardless of any winter temp.

📣 That being said, if you’d like the starter feeding schedule that I use to bake all my sourdough bread that I sell in my sourdough bakery, go here:

Roselle’s sourdough starter feeding schedule

Filed Under: Sourdough Bread Baking Q&A, Sourdough Bread Tips, Sourdough Starter Tips

The No-Waste Sourdough Starter Method

August 9, 2024 by admin 21 Comments

My Sourdough Starter Feeding Schedule

As a sourdough baker, I’m always on the lookout for techniques that can help streamline the process and reduce waste. That’s why I’m a big proponent of the “no-waste” or “no-discard” sourdough starter method.

Let me share with you how this approach can revolutionize the way you maintain and use your sourdough starter, whether you keep it at room temperature or in the refrigerator.

The Problem with Traditional Sourdough Starter Maintenance

Traditionally, when maintaining a sourdough starter, bakers are often instructed to regularly discard a portion of the starter before feeding it fresh flour and water. This helps keep the starter at a manageable size and prevents it from becoming overly acidic or stagnant.

Did You Know?

If you didn’t discard at all, a starter that’s 50g turns into 241lbs by the 7th feeding!

However, this process results in a lot of waste – all that discarded starter ends up in the trash or compost. Not only is this wasteful, but it means you’re constantly having to use extra flour to keep your starter fed and healthy.

The No-Waste Sourdough Starter Method

The no-waste method I use solves this problem elegantly. Instead of regularly discarding a portion of the starter, I maintain an incredibly small amount – just 10 grams – and scale it up as needed when it’s time to bake.

Here’s how it works:

Room Temp Storage

I bake everyday. So I keep a 10g starter on my counter, feeding it a 1:5:5 ratio right before bed and when I wake up.

I just feed this 10g of starter with 50g of flour and 50g of water (1:5:5 feeding ratio).

When the starter reaches its peak, I take 100g to make 1 sourdough bread. Then I simply feed the remaining 10g to continue the cycle.

Refrigerator Storage

If you prefer to store your starter in the fridge, the no-waste method can still be applied too! The key differences are:

I feed the refrigerated starter once a week, using a 1:5:5 ratio (same as a room temp starter)

If at any point during the week, I need to bake 1 bread, I simply take 100g from my starter and feed the remainder to continue the cycle.

The beauty of this approach is that I almost never have any sourdough discard to worry about. The small 10-gram starter I maintain is just enough to keep the culture thriving, and I only scale it up when I need it for baking.

The benefits of the no-waste method remain the same, whether you store your starter on the countertop or in the fridge. By maintaining a tiny amount and scaling up as needed, you’ll drastically reduce waste and simplify the overall starter maintenance process.

Benefits of the No-Waste Method

There are several key advantages to using the no-waste sourdough starter method:

Reduced Waste – No more discarding large amounts of starter, which means less flour and water being used and thrown away.

Simplified Maintenance – Keeping a tiny 5-10 gram starter is much easier to manage than a larger, more high-maintenance culture.

Increased Efficiency – When it’s time to bake, I can simply feed the starter at a higher ratio to get the amount I need, without having to deal with excess discard.

Cost Savings – By minimizing waste, I’m saving on the cost of flour and water that would have been discarded previously.

Whether you prefer to store your starter at room temperature or in the refrigerator, the no-waste method is a game-changer that makes the overall sourdough baking process simpler, more sustainable, and more cost-effective. Give it a try and experience the benefits for yourself!

Filed Under: Sourdough Bread Baking Glossary, Sourdough Starter Tips

Free Tutorial: How To Make Sourdough Bread

August 7, 2024 by admin 1 Comment

The Sourdough Baking Process

There is really no such thing as a “Sourdough Bread Recipe”.

There are

  1. the ingredients, and then there is
  2. the method —the process.

There are several stages and different steps that take a dough from a blob to a taught dough that holds its shape.

Once you wrap your head around the processes of sourdough bread baking, you can deconstruct any “sourdough recipe” online.

When you know the structure of a sourdough bread, any sourdough bread recipe will make sense to you.

In the most simplest explanation…

Sourdough bread baking is just

  • add your starter to your ingredients,
  • let the dough ferment until it’s almost double in size,
  • shape it and then,
  • bake it.

This is literally what the “no-knead” or “overnight” method is.

It’s the lazy man’s sourdough —where you mix everything and don’t do anything until the very end.

If you choose to make bread this way, that’s literally all there is —mix, wait, shape and bake.

Is it too good to be true? Lazy-man’s sourdough?

You can take your chances with the no-knead / overnight method. It’s worthwhile to do at least once.

But just like everything in life, nothing is as easy as it seams. There is no free lunch.

If you can make the “no-knead” or “over-night” sourdough method work for you —more power to you!

I would do it if you’re in a pinch and need bread but don’t have time to do all the steps.

If you want to know the full process in detail, keep reading…

Stage 1 – Preparation

Okay! Let’s make sourdough!

Note: This is the method of making sourdough. The process remains the same whichever sourdough loaf you are making, so any sourdough bread recipe will apply. The pictures in this tutorial were from me making Country Sourdough. So if you want to bake along with me, get the ingredients list for Country Sourdough here.

This stage takes roughly 4-5hrs at 70-72F.

You don’t have to be home during this time.

Step 1 – Prepare the sourdough starter

ATTENTION: If you do not have a sourdough starter yet, you have two options here:

  1. make a sourdough starter from scratch (takes 14 days), OR
  2. buy my sourdough starter (ready in 2-3 days)

We will need 100g of sourdough starter to leaven this dough

So in a new container, mix

– 50g of your active starter,

– 50g of flour

– 50g of water

Your starter’s peaked when it’s doubled in size and still has a dome on top. Once the dome has deflated, it’s no longer at peak.

If there is no dome and you can see a line where it started to sink back down, it’s definitely not at peak anymore.

You can still use a starter that’s not at peak, it just means your starter isn’t as active and might take longer to ferment. It will also taste very sour.

My starter at peak activity, notice the dome.
A glass jar lets you see the bubble activity. When the bottom looks like this, it’s a good sign.

While we are waiting for this to come to peak (~4hrs at 74F), let’s autolyse the dough.

Step 2 – Autolyse your dough for 2-4hrs (optional)

Mix your dry ingredients into your wet, leaving out the starter. We’ll mix that in later. Make sure everything is incorporated. Let the dough rest for 15 minutes.

After 15 minutes, your dough should be easier to work with. It should have developed enough gluten strength to develop a windowpane (you can see through it if stretched really thin).

Mix your dry ingredients into your wet. Doing it this way and not the other way around will give you an even mix.
Mix it well and then let sit for 15 minutes.
Stretch your dough to see if it has a windowpane. This is a sign of gluten development.


Start folding the dough into itself. Fold it as many times as the dough will allow without tearing. ⤵️

Then, let the dough rest for 2-4hrs. This is called autolyse. You’re letting the dough develop strength before you mix in your starter.

It gives your dough a head start.

That’s because as soon as your starter is mixed into your dough, the clock starts. Your dough will now start to ferment.

Autolysing helps us start our fermentation with an already-strong dough.

It is completely optional.

You don’t need to do this. You can just mix everything all at once.

Autolyse is especially helpful when you are making HIGH hydration doughs (anything over 72% hydration).

Stage 2 – Bulk Fermentation

Bulk fermentation starts once you mix your starter with your dough.

For “Country Sourdough”, you’ve got roughly 7 hours to turn your dough from a blob that spreads out, into a springy dough that holds its shape. Any more than 7 hours, you run the risk of over-fermenting.

Getting your fermentation times correct is a skill that will come with time and repetition. Once you’ve baked multiple loaves in a row, you will get the hang of it.

You will be able to guess your fermentation times pretty easily.

It’s wholly dependent on how active your starter is, how much starter you are using and the temperature of your dough.

Prepare to be at home during this time.

Step 1 – Combine your sourdough starter into your dough

Once your starter’s come to peak, gently combine it into your dough.

You are not mixing.

You are kind of just folding the starter into the dough and mushing it around with your fingers/spatula.

If you mix rapidly, you’ll tear all the gluten development you’ve built during autolyse.

You want to fold and mush, fold and mush, until the starter is completely absorbed by the dough. It takes me 5 or 7 minutes to do this by hand.

How do you know when you’re done?

It helps if your starter is a different color from your dough. My starter is a rye starter, so it’s dark brown/grey and it contrasts starkly against my dough. It’s a good visual aid.

If you don’t have this visual aid, you’re going to have to go by feel. Your starter has a different texture from your dough, so you will be able to feel it when it’s not incorporated enough.

The moment your starter is mixed with your dough, the bacteria and yeasts will start to ferment the dough. You are now on the clock.

Step 2 – Dough Strengthening/Folding

During this fermentation process, it’s the baker’s job to develop the gluten network and strengthen the dough.

You need to transform that dough from a blob that spreads out, into a springy dough that holds its shape.

Basically, you need to knead the dough.

You fold the dough as many times as it will allow before it starts to tear. Then, you let the dough rest for 30 min to 1 hr (it will spread out again).

Then you do your series of folds again. Careful to stop as soon as you feel the dough resisting. Careful not to tear.

Repeat this until you’re nearing the end of your fermentation time (roughly 5-7hrs at 74F —less time if warmer, more time if colder).

You might be able to get in 2-3 folding sessions before it’s time to shape the dough and put in a banneton (or any other round/oval bowl) for its final proofing.

There are many ways to knead dough, and the techniques differ depending on what you want to achieve. But generally speaking, they are all basically a form of folding the dough into itself. The more folds you get in, the stronger your dough is.

Here’s a few of my favorite folding techniques:

Stretch and Folds ⤵️

Stretch and folds are an oldie, but goodie type of dough strengthening.

Basically, you grab a corner, stretch it ’til it can’t, and then fold it on top.

Do it over and over, clockwise, until the dough starts resisting. Careful not to tear the dough.

Let the dough rest 20-30 minutes before you do another series of stretch and folds.

If the dough is sticking to your fingers, wet your hands. It helps if you do this next to your sink or bowl of water.

Coil Folds ⤵️

See how wet this dough is? This is a very high-hydration dough, 80%.

With high-hydration doughs, it’s even more important to develop dough strength because there is just so much water weighing the dough down.

Coil folds are a really good way to achieve that.

Stretch and folds give you 1 fold with each rotation, whereas coil folds give you double that.

Tuck and Roll Fold ⤵️

If you are doing multiple loaves at once, like I am here in this video, the tuck and roll fold is a good choice.

I like that it lets you get in A LOT of folds in one rotation. I didn’t count how many folds I was able to do in this video, but it’s a lot.

Watch how this dough transforms in just 2 minutes.

P.S. You can do this for single loaves too, especially if your dough is really extensible (stretchy but not strong)

Lamination ⤵️

This folding technique is when you stretch out your dough (as far and thin as it will allow before tearing) and fold as many times as it will allow you (without tearing).

You want to stretch from the center of the dough, and not the corners.

And make sure you lightly water your work surface and your hands. Otherwise, your dough will stick everywhere.

This folding technique is particularly helpful if you want to add toppings to your dough. It will distribute your toppings/flavors evenly with each and every fold.

For example, see how I added jalapeños and cheddar in the pics below:

Folding Techniques Recap

You can choose to do just one technique or a combination of techniques, it’s up to you. They are all fun to do and worthwhile to practice.

I used to do a combination of stretch and folds, then lamination, then coil folds —but lately, I’ve been really liking just doing tuck and rolls. So much easier and less time consuming. Plus, it’s what they do in professional bakeries, so if it’s good enough for them, it’s good enough for me!


Step 3 – Shaping

Okay, after the 6hr mark, it’s time to start shaping.

Shaping is what you need to do before you put the dough in a banneton (or any round/oval bowl) to do its final proof.

Shaping is just a series of rapid folding to make the dough super-taught. Then you put the dough in a bowl for the remainder of its fermentation process. In there, your dough will continue to double in size. By the time it’s ready for baking, you take it out of the banneton, and hopefully, you’ve built enough dough strength that it will hold its shape.

You can shape your dough into a boule (round) or a batard (oval). I prefer batards for daily bread and boules for bread bowls.

Here’s how I shape my bread:

 For high-hydration doughs, I like to do an envelope fold, then stitch, then tuck and roll. Pinch the sides to make a seam.

If envelope folds aren’t for you, here’s another technique:

Tri-fold, then tuck and roll. Pinch the sides to make a seam. 

Step 4 – Final Proofing

Hooray, we’re nearly there!

After shaping, it’s time for final proofing.

If you need to bake right away, let your dough final proof at room temp up until almost the end of fermentation (around the 7hr mark), then stick it in the freezer for 30 min to 1 hr.

Then, take it out of the freezer, flip it out of your banneton onto a parchment paper, score it, and then bake it.

If you go over 7hrs, you run the risk of over-fermentation. You will see your dough deflate and start to disintegrate into a sticky blob. It has essentially become a gigantic starter.

Cold Retard – preferred method

If you don’t have to bake right away, final proof your dough in the fridge for a 12-16hrs cold retard.

This is what I do.

Your dough will continue to ferment and double in size in the fridge, just really really slowly.

During this time, the dough will have some time to develop flavors. Just like how soup gets better in the fridge a few days later.

If you decide to do this, start shaping your dough at around 6hr mark (from the time you’ve mixed your starter with your dough) —making sure you get in as many folds before then. Put it in your banneton, and then place it in the coldest part of your fridge —away from the door and surrounded by other cold things.

Since we put it in the fridge at around the 6hr mark in the fermentation process, I’d say you can leave this in the fridge for 16hrs max.

Any longer than that, you run the risk of over-fermentation.

Doughs cold proofing in my fridge
Strong dough, holding its shape well

Stage 3 – Scoring and Baking

Okay, after final proofing your dough, whether it’s at room temp or in your fridge, there’s a few guidelines with baking the dough:

SCORING

The dough releases steam during baking. —and you know how water will always find the path of least resistance?

Well, the water in the dough will find where the gluten is the weakest (usually the bottom sides) and will blow out through there.

This is why you MUST score your dough before putting it in the oven.

There are two types of scores:

1) the expansion score (or functional score) —which is necessary, and

2) decorative scores —completely optional, but fun to do. If you decide to do this, make sure you still do an expansion score.

Expansion score
Decorative scoring with an expansion score down the middle

Expansion scores

When you do these scores, you can control where that steam vents. So instead of having an ugly blow out, you have this very nice expansion score that lets the dough rise in the oven evenly and beautifully (ovenspring), producing something called an ear.

When the ear looks good, it means you did your expansion score well.
If the ear is too thick, it means you scored too deeply and at a bad angle.
I like the ear on this one the best. The ear is thinner.
The ears on this mommy and me sourdough look so cute together!
Even with toppings, your ear can look good, like this ☝️
The expansion score is a main component for a good rise.

How to do your expansion score

To get an ear like in the pics above,

visually mark the middle of your dough.

You’re going to place your razor at the top of the dough, in the middle.

Hold your razor at a 45 degree angle, not straight down.

From top middle to bottom middle, use your razor to slice into your dough, at a curve (not a straight line), 1cm to 1 ½ cm deep.

Scoring angle

You’re going to score from the very top to the very bottom, at a curve, not straight down the middle, like this.

Technically, you can score at any angle.

But I prefer to score at a curve, because then you can get maximum ovenspring and you get a nice ear.

Decorative scoring

If you want to have a little fun and decorate your loaf, you can do intricate, artistic scores.

Here’s a few pics on some decorative scores I’ve done.

Watch me do decorative scoring

Now that you can see the different types of scoring possible, watch me do it in real time.

For today’s country sourdough, I decided to go simple and just do leaves. I love to watch the leaves expand —it’s so cool!

It took me 6 ½ minutes to do this, check it out.

BAKING

Okay, next step. Time to bake!

Sourdough bakes best in a Dutch oven and goes through 2 baking steps:

Step 1 – with steam (lid on)

Preheat your oven with your dutch oven inside for at least an 1 hr at 485F.

Flip out your dough on parchment paper, do your scores, and then place it in your dutch oven. Cover it with a lid and bake at 485F for 20 minutes.

The 5 minute score

If you are doing a lot of decorative scoring like I did for this loaf, you do things slightly differently.

Whenever I’m doing lots of detailed scoring, I like to do what’s called, the 5 minute score.

It just means that you let the dough cook 5 minutes in the oven before you do your expansion score.

Cover it with a lid and bake at 485F for the remainder of the 20 minutes.

Step 2 – without steam (lid off)

After 20 minutes, it’s the moment of truth.

Take the lid off your dutch oven and look at your bread. The insides are done cooking.

Now we bake it in our dutch oven uncovered for another 10-20 minutes at 440F to develop the crust. The longer you bake it, the darker and harder your crust will be.

Final Reveal

After 10 minutes at 440F, this is how my bread came out looking:

Country Sourdough Reveal

I like the golden crust color.

If you want a dark artisan loaf look, bake it uncovered for another 5-10.

Wait 2hrs before you cut into it

Just like how you would let steak rest before eating, let your bread set for at least 2hrs. It’ll continue to cook as it comes down to room temp, and dry out any excess moisture.

Baking Recap

When we bake our dough with the dutch oven cover on, we trap in the steam. The more steam, the bigger your rise will be. It also prevents the crust from cooking before the rest of the dough can. By the time your dough is baking in steam for 20 minutes, the bread is done cooking.

Then we bake with the cover off.

The second half of baking is to develop your crust. The longer you bake it, the darker and harder your crust will be.

Troubleshooting your bread

Wait at least 2hrs before slicing your bread.

If you want to see how you did, cut the bread in half, straight down the middle, so that you can inspect your crumb (how your bubbles look).

Your crumb gives you insight on how your fermentation went. And since fermentation is what you really want to get on point, it’d be good to take a closer look.

Big, uneven holes with no rhyme or reason suggest under-fermentation.

A flatter bread with tiny holes spaced tightly together suggest over-fermentation, or you used flours with almost no gluten (einkorn, spelt, rye, etc.) —those need special instructions.

I am chasing what is called an, “open crumb.” Bigger holes with a nice pattern. Here’s a compilation of my best crumbs:

The first open crumb I was proud of
I lost a lot of butter in these holes
Perfect open crumb pattern on whole wheat
Cranberry walnut open crumb
Great open crumb pattern too
Rosemary garlic parmesan sourdough
Another great whole wheat crumb, albeit a little tight
Cheddar jalapeno, big pockets, but that’s because I added so much cheese


Whatever the outcome, be proud, take pics and write notes.

Baking and leavening things naturally is a skill. And it’s fun!

Please take a moment to follow me on instagram: https://instagram.com/howtomakesourdough

And share with all your sourdough baking friends!

Thank you,

Roselle

Filed Under: Sourdough Tutorials

How To Make Sourdough Starter

August 4, 2024 by admin 7 Comments

Find out how to make a starter from scratch, what to feed it, how many times to feed it, where to keep it and how to use it in sourdough bread recipes…

We are going to build a sourdough starter from scratch. The more you feed a starter, the more active it will be.

We’re going to feed your starter once a day over the course of 7-14 days —but you can speed up the process if you feed your starter 2x or even 3x a day.

A a general rule of thumb, the more you feed it, the more mature it gets.

In other words, the longer you wait to use it to bake sourdough bread, the better your sourdough bread will be.

So buy enough flour. A 1lb bag should be more than enough to feed your starter this week.

What tools do you need?

Sourdough Starter Kit

Here are my #1 favorite and preferred tools for Sourdough Starters. These are the winners of three years of comparison shopping, research and testing.

Sourdough Starter

Thermometer and Hygrometer

My Favorite Kitchen Scale

Weck Jars

Off-set metal spatula 4.25″

Bread Flour

Dark Rye Flour

Brod & Taylor Proofer

Dough Mat

Use Code ROSELLE10 for 10% OFF

Rubber Bands

Dry Erase Marker

How To Make Your Starter From Scratch

Day 1 / Feeding 1

We’re going to begin with feeding at a ratio of 1 : 1 : 1.

Meaning that, when it’s all said and done, we will be feeding and maintaining your starter at equal parts starter, flour, and water.

starter

flour

water

total

Feeding Ratio

1

1

1

Day 1 / Feeding 1

50g

50g

100g

We don’t have a sourdough starter yet, we’re trying to build one.

So on Day 1, or rather Feeding 1, your are simply mixing 50g of flour and 50g of water in a glass jar.

Thoroughly mix everything, making sure there are no dry clumps of flour. When you think you’ve mixed everything really well, mix just a little more to be sure.

Now, with wet hands, clean the sides of the jar with your fingers and use your knuckles to lightly pound down the starter so that it’s level. Careful you don’t make it concave. You want the starter to be as straight of a level as possible.

Once you have that, put a rubber band over your jar and set it over the starter line, indicating the starting point.

Starters like it warm.

Starters thrive in warmer temperatures. They like it at 77F – 86F. The warmer the environment, the faster your starter will come to peak. Yeast will die if too hot (120-140F), though. So don’t put your starter near your stove or in your oven.

We now wait until it comes to peak.

Day 2 / Feeding 2

starterflourwatertotal
Feeding Ratio111
Day 1 / Feeding 150g50g100g
Day 2 / Feeding 2100g100g100g300g

Alright, it’s a day later. Depending on your flour, you may or may not have seen activity in your jar. You may have seen your starter come to peak and come back down, —or you may have seen zero activity.

It doesn’t matter. Time for feeding #2.

Your starter is now roughly 100g.

At this point, we’re still building up the activity, so we’re not going to discard any starter yet.

So Day 2 / Feeding 2 is simply feed the starter at a 1 : 1 : 1 ratio.

Simply add 100g of flour and 100g of water to your starter.

When it’s come to peak, it’s time to feed it again.

Day 3 / Feeding 3


starterflourwatertotal
Feeding Ratio111
Day 1 / Feeding 150g50g100g
Day 2 / Feeding 2100g100g100g300g
Day 3 / Feeding 3100g100g100g300g

Alright, it’s day 3, or nearly day 3.

Your starter has now built enough activity that we will need to discard starter before every feeding from here on out.

So today, take 100g of your starter (discard the rest) and mix equal parts flour and water.

Wait for it to come to peak before you feed it again.

You repeat this process until you’ve fed your starter a minimum of 7 feedings.

By the end of 7 feeding sessions, your starter is should be good to go.

It’s powerful enough to leaven a loaf of sourdough bread.

But only if the sourdough starter is rising and falling reliably and predictably by this point.

What if the sourdough starter stopped rising sometime between Days 3-7?

This will happen to some people and it’s what’s called the “dead phase” of making a sourdough starter.

The only recourse here is to “keep on keeping on” and continue feedings for 14 days.

You may even want to wait longer between feedings, perhaps 2 days instead of 1 so you can be sure you haven’t missed any activity.

Filed Under: Sourdough Bread Tips, Sourdough Tutorials

Baker’s Percentages Explained (with calculators)

August 2, 2024 by admin 11 Comments

What is Baker’s percentages?

Baker’s %s are most commonly used for bread baking.

It’s very easy –if you know how to ✖️ & ➗, you can do it.

It’s basically baker’s shorthand. It’s formulas that helps all bakers, not just sourdough bakers deduce ingredient amounts & hydration ratios –especially helpful for troubleshooting sourdough problems.

How to find percentages from ingredient amounts

There IS one very important switch you have to make in your head:

Baker’s %s is in relation to the FLOUR, not the sum.

The flour weight is always set to 100%.

For example, let’s look at this

Beginner sourdough bread recipe:

  • 500g white bread flour
  • 360g water
  • 100g starter
  • 10g salt

Here’s how that math looks:

white bread flour 500 = 100%

water = 360 ➗ 500 = 72%

starter = 100 ➗ 500 = 20%

salt = 10 ➗ 500 = 2%

Simply ➗ the other ingredients by the FLOUR amount. It’s that easy.

Need a calculator? Don’t worry, here it is…

[supsystic-tables id=1]

How to find ingredients amounts from percentages

There may also be times when you need to use baker’s %s to calculate the ingredient amounts.

Like when you see recipes like this:

  • 100% white bread flour
  • 72% water
  • 20% starter
  • 2% salt

This is how chefs & bakers talk to each other.

When I was in culinary school we’d use recipes written out as only %s!

How do you find out the bread ingredients amounts?

First decide how much flour you want to put in your recipe. A normal-sized sourdough bread is around 500g of flour.

When you have this number, simply ➗ the other ingredients by the FLOUR amount. Sound familiar? (see above)

I also made a calculator for this process for you to use if needed!

[supsystic-tables id=4]

FINAL HYDRATION OF DOUGH (don’t pay attention to this)

☝️ Not really that important, unless you really want to know OR you want to make your own sourdough bread recipes

When we talk about baker’s % –it’s always in relation to the FLOUR, not the sum.

This wont give you the final hydration of the dough, though.

That’s because your starter has water too.

Most sourdough starters are 100% hydration, meaning they are made up of equal amounts flour & water.

So when calculating your DOUGH hydration you will want to ➗ the amount of starter in your dough in half, & add that to the amounts of flour & water.

Then calculate the hydration the same way you calculate baker’s %s with the new totals for your flour & water.

In other words:

Final dough hydration formula

➗ the  starter in half, 

➕ that to the flour amount

➕ that to the water amount

Now, (water amount) ➗ (flour amount) = Final dough hydration

Again, finding the final dough hydration isn’t as important as knowing the hydration amount in relation to your flour.

Unless, of course, you are trying to match the final hydration of a recipe you are trying to convert into sourdough

I also made a calculator for this process for you to use if needed!

[supsystic-tables id=5]

Filed Under: Sourdough Baking Tools, Sourdough Bread Tips

How Roselle packages her bread

October 2, 2023 by admin Leave a Comment

Preferred packaging

Butcher paper and red/white twine

Links:

Butcher paper:

Amazon

Restaurant Store

Baker’s Twine

Restaurant Store

Amazon

Optional paper bag with handles (when customers buy more than one loaf)

Amazon

Runners up (will do the job, but less preferred)

Bread sleeves – no window

Bread sleeves – with window

90 second video on Instagram

View this post on Instagram

A post shared by Sourdough Tips & Tutorials For Beginners & Bakers, Roselle Blore (@rosellerie)

Filed Under: Sourdough Bread Tips

Sourdough Starter Tools

August 17, 2023 by admin 7 Comments

Here are all the tools I’ve researched, tested and used to maintain my sourdough starter

1) Starter container

Here are preferred containers, in order of preference:

For small batches of starter…

Plastic quart container

Weck jars (no shoulders)

Ball jars (wide mouth)

For large batches of starter…

KitchenAid 8qt Commercial Mixer (for mixing large batches of starter & doughs)

4qt Plastic Container (to hold starter while coming to peak)

8qt Plastic Container (to hold starter while coming to peak)

19qt Plastic bins (to hold starter while coming to peak)

2) A utensil to stir the starter ingredients

Here are the preferred utensils, in order of preference:

For small batches of starter…

Small offset spatula

Silicone Scraper Spatula (angled tip)

For large batches of starter…

Plastic bench scrapers

3) A kitchen scale

Here are the preferred utensils, in order of preference:

22lb Food Scale, big

11lb Food Scale, small

We are going to be measuring our ingredients by weight so a food scale is going to be a staple in your kitchen. That being said, you might as well get a good one like this since you will be using it to weigh your dough, and if you are operating a cottage bakery, you’ll be making large batches of dough, weighing 10+lbs.

4) A room thermometer & hygrometer

(optional, but very useful)

Thermometer & Hygrometer

This is a very helpful tool that lets you know the temperature and humidity in the room.

5) Rubber bands or dry erase marker

(optional, but extremely useful)

Rubber bands

Dry Erase Markers

These are very very helpful for the baker, as this will enable you to mark the starting point of the starter and will let you know how much the starter has risen.

You will want good rubber bands, big enough to stretch around a 32oz jar. If you don’t want to use rubber bands, you can just use a dry erase marker to mark the starting point of the starter, but that can easily be wiped off.

6) Proofer or Temp Control

(to control and manipulate starter temperature)

Brod & Taylor Proofer (for big starters)

Brod & Taylor Sourdough Home (for small starters)

Kombucha Heating Belt

Dough Mat – use code ROSELLE10 for 10% OFF

If you buy through my link, I get a little commission. These are ingredients and tools I use daily in my own micro-bakery, so I can personally confirm that they are the best tools for the job.

Once you have your ingredients and tools ready, it’s time to start making your starter.

Filed Under: Sourdough Baking Tools, Sourdough Bread Tips, Sourdough Starter Tips

How To Make A Sweet Stiff Sourdough Starter

December 17, 2022 by admin 8 Comments

Print

The Sweet Stiff Sourdough Starter Recipe

Print Recipe

5 Stars 4 Stars 3 Stars 2 Stars 1 Star

No reviews

Ingredients

Ingredients / Starter Composition

starterflourwatersugars
Feeding
Ratio
1130% – 50%16% – 50%
120g120g40g – 60g20g – 60g

When you want to leaven something you really don’t want to be sour (like, let’s say, burger buns or croissants), you need to transform for regular starter it into a sweet starter.

Most of you are using a liquid starter –which is a starter that’s fed equal parts flour and water.

A sweet stiff starter is something different –you use less water to flour and add sugar as well.

This has many benefits, bigger ovenspring, longer fermentation –but really, we use a Sweet stiff sourdough starter because it results in a sourdough bread that isn’t sour.

Let’s make a Sweet Stiff Sourdough Starter

Let’s use a starter feeding ratio that has the minimal amount of sugar. Once you get the hang of this, you can increase your sugar ratio if you want. The more sugar you add, the stickier and tackier your stiff starter will be

starterflourwatersugars
Feeding
Ratio
13.33.16
40g120g40g20g
Here’s a beginner friendly sweet stiff starter

REMEMBER:

With baker’s percentages, we are not comparing the ingredients in relation to each other, we are comparing it to the FLOUR!!!

How To Make The Sweet Stiff Starter

Simply combine all the ingredients and wait for it to triple in size. This takes 8-12hrs for me at 77F –longer if you are feeding a very small amount of starter.

A totally different kind of gluten-network

👀 Wow, just look at the gluten-network of this sweet stiff starter.

It’s totally different from the sourdough starter you would normally use to leaven an artisanal sourdough bread.

The gluten network of a sweet stiff sourdough starter looks exactly like the gluten network of an enriched dough. Because, that’s exactly what it is.

Take a moment and think with me here…

Your dough is essentially one gigantic sourdough starter. When you make a sourdough dough –what do you do? You mix the ingredients together to make the dough right?

Well another way to think about it is, that you are taking those dough ingredients and feeding the sourdough starter with it.

And so your dough is really one gigantic feeding.

And when you think about it that way, that the sourdough dough IS a sourdough starter, then it’s easy to think that, duh, the starter has the same gluten network as the dough.

In this case, the sweet stiff starter is so webby, so sticky, JUST LIKE an enriched dough (ie. sourdough brioche)

Normal Sourdough Dough

Flour, Water, Salt

Enriched Sourdough Dough

Flour, Water, Salt PLUS

  • Fats (eggs, milk, butter, yogurt, oil, etc.), and
  • Sugars (sugar, honey, syrup, juice, etc.)

This is the gluten network that makes brioche so fluffy and pillowy.

Sweet stiff starter
Sweet stiff starter

It’s so webby and sticky and cool to play with.

Kind of a hassle to scrape out.

Best to work with wet hands and wet tools.

How to use a Sweet Stiff Sourdough Starter in recipes

Generally, we use a Sweet Stiff Sourdough Starter for enriched doughs

But you can use a Sweet Stiff Starter in ANY sourdough bread recipe,

You can swap the regular sourdough starter and use your sweet stiff starter instead.

Why would you want to do it?

IF you really didn’t want that bread to be sour, you’d use a sweet stiff starter.

However much regular starter that bread recipe calls for, you would need to use the same amount of sweet stiff starter

Important:

Since we are using a STIFF starter, the fermentation time will be different. Pay attention to your dough. Here are some recommended readings that talk more about that…

How to really master baking sourdough bread

Why Are Flour Type and Hydration Ratios Important? And What Does It Mean For Your Sourdough Bread?

Filed Under: Sourdough Bread Tips, Sourdough Starter Recipes

  • « Go to Previous Page
  • Page 1
  • Page 2
  • Page 3
  • Go to Next Page »

Want this guided step-by-step?

Bread ASAP gives you video walkthroughs, checklists, and personal support — so you're never guessing what comes next.

Get Guided Version →

© 2026 How To Make Sourdough by Roselle Blore

About Contact Privacy Terms Refund