How To Make Sourdough
Beginner Path System
Start Here Starter First Loaf Troubleshooting Get Guided Version

Here, you’ll find important Sourdough Starter tips and recommended articles about baking sourdough starters.  Most of Sourdough Beginners’ questions are answered by reading these posts first.

How To Feed Your Sourdough Starter

August 20, 2024 by admin Leave a Comment

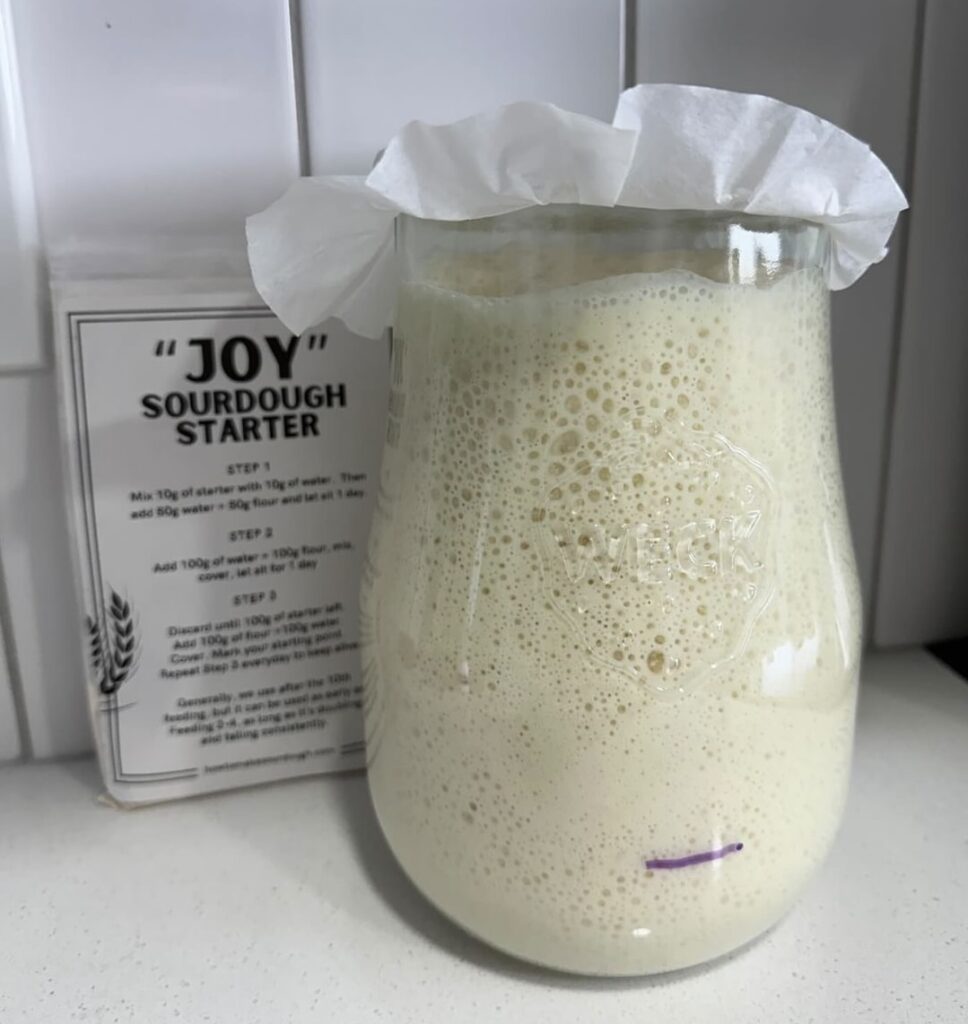
The key to exceptional sourdough bread is a strong, well-fed starter. At the heart of it all is understanding the relationship between your starter and its feeding regimen.

Your sourdough starter is a living, breathing organism that requires the right nourishment to thrive. It needs to be fed regularly to stay happy and vibrant. Skimp on the feeding, and your starter will become weak, sluggish, and unresponsive.

Sourdough Starter FeedingInstructions

Here’s a simple, step-by-step guide to feeding your sourdough starter like a pro:

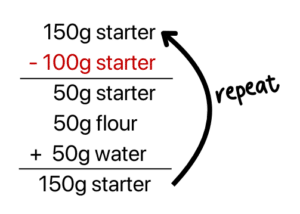
Before feeding, discard ⅔ of your starter. Keep ⅓.

Example: 150g starter → discard 100g → keep 50g

Feed what’s left with equal parts flour and water—same weight as your starter.

Example: To the 50g you’re keeping → add 50g flour + 50g water = 150g starter

After feeding, your starter will rise, peak, and fall back down. Repeat these steps to feed and keep your starter alive.

We can keep doing this indefinitely, see below:

What do we do with the discard?

Now, back to the 100g of starter we discarded –you have a few options on what to do with this:

  1. Use it right away to bake sourdough bread (using it as a leavening agent)
  2. Add it to a discard jar in the fridge to save for future baking (using it to add flavor/texture to recipes, but not to leaven it)
  3. Simply discard/throw it away if you don’t have an immediate use for it

What are starter feeding ratios?

A sourdough starter feeding ratio refers to the proportions of starter, flour, and water used when “feeding” or replenishing an active sourdough starter.

The 1 : 1 : 1 sourdough starter feeding ratio

1 part starter1 part flour1 part water
50g50g50g

The most common sourdough starter feeding ratio is 1:1:1. This means:

1 part starter
1 part flour
1 part water

For example, if you have 50g of active sourdough starter, you would feed it with:

50g flour
50g water

This 1:1:1 ratio provides the starter with the right balance of food (the flour) and water to keep it healthy and active. The starter consumes the flour, produces carbon dioxide, and becomes bubbly and ready for baking.

Other common sourdough starter feeding ratios include:

1:2:2 (1 part starter, 2 parts flour, 2 parts water)
1:5:5 (1 part starter, 5 parts flour, 5 parts water)

The 1:1:1 ratio is often recommended for general starter maintenance, as it keeps the starter at a manageable size. The higher flour and water ratios (like 1:5:5) can be used when you need to build up a larger volume of starter quickly for baking.

Regardless of the specific ratio, the key is maintaining a consistent, balanced approach to feeding your sourdough starter. This ensures it stays strong, active, and ready to leaven your homemade sourdough breads.

How often do you need to feed your sourdough starter?

For most home bakers, feeding the sourdough starter once a day is the sweet spot when storing it at room temperature (around 70°F). This keeps the starter active, healthy, and ready to use for regular baking.

At room temperature, the starter is consuming the available food (flour and water) fairly quickly, so it needs that daily refresh to maintain peak performance.

However, if you don’t need to bake with the starter very frequently, storing it in the refrigerator at around 36-40°F can work well. In the cooler fridge environment, the starter’s metabolism slows way down, so it only needs to be fed about once a week to stay viable.

Feeding a refrigerated starter just once a week is usually sufficient to keep it alive and ready for use. The cooler temps put the starter into a semi-dormant state, greatly reducing its need for frequent feedings.

This makes refrigerator storage a convenient option for bakers who don’t need their starter on a daily basis. It minimizes waste and upkeep while still preserving a healthy, usable starter for whenever you’re ready to bake.

Discarding Before Feeding

The reason why we discard sourdough starter before feeding it is because the starter needs to be fed its own weight in flour.

If we didn’t discard any of the existing starter, and just kept adding new flour and water on top of it, the total volume would grow exponentially with each feeding.

What would happen if we didn’t discard?

See This 50g Sourdough Starter Turn Into 241lbs In Just 7 Feedings (1:1:1)

Feeding 1Feeding 2Feeding 3Feeding 4Feeding 5Feeding 6Feeding 7
Starter50g150g450g1,350g4,050g12,150g36,450g
Flour50g150g450g1,350g4,050g 12,150g36,450g
Water50g150g450g1,350g4,050g 12,150g36,450g
Total150g450g1,350g4,050g12,150g36,450g109,350g

NOTE: If you’re viewing on your phone/tablet, you can use your finger to gently move the table left to right to see the entire table

For example, let’s say we start with a 50g sourdough starter. If we feed it 50g of flour and 50g of water, the total volume is now 150g.

Then for the next feeding, since we are not discarding, and we have to feed the starter at least its body weight it flour, now we add 150g of flour and 150g of water to the 150g starter. That makes it 450g total.

And if we continued this pattern without discarding, in just 7 feedings the 50g starter would balloon up to a massive 241 pounds!

That’s why the discarding step is so critical – it prevents the starter from growing out of control.

By removing a portion before each feeding, we can maintain the proper 1:1:1 ratio and keep the total volume at a manageable size.

What to do with discard

Discard is simply the portion of the sourdough starter that you remove before feeding the remaining starter. It’s the excess starter that you don’t need to feed at that particular time.

You have three options for what to do with the discard:

If the starter was just fed, use the discard to bake sourdough bread, adding leavening power

If the starter was not recently fed, store discard in a discard jar that lives in your fridge. Use occasionally in discard recipes, where it adds flavor but no leavening

Discard it completely and throw it away

Filed Under: Sourdough Starter Tips, Sourdough Tutorials

How To Use Roselle’s Sourdough Starter

August 19, 2024 by admin 1 Comment

Congratulations! You have received my sourdough starter in the mail. Now it’s time to activate it so you can have an active and mature sourdough starter in as little as 2-3 days.

Watch this video first so you get a quick overview on what you’re going to do the next few days:

Step 1 – Day 1

Feeding #1

  • Put 10g of dry starter into a jar
  • Then add 60g of water, mix
  • Then add 50g bread flour, mix
  • Cover, mark your starting point
  • Let sit 1 day in a warm place

Step 2 – Day 2

Feeding #2

  • Add 100g of water, mix
  • Add 100g bread flour, mix,
  • Cover, mark your starting point
  • Let sit for 1 day in a warm place

Step 3 – Day 3

By Day 3, your starter should look like this. You can now use this as-is to make sourdough bread. But if you’re not ready, proceed with Feeding #3

Feeding #3

  • Take 100g of sourdough starter,
  • Add 100g water, mix
  • Add 100g flour, mix
  • Cover, mark your starting point
  • Let it sit for 1 day in a warm place
  • Repeat this everyday to keep alive

ATTENTION

Generally, we use our starter after the 10th feeding, but it can be used as early as Feeding 2-4, as long as it’s doubling and falling consistently.

Instructions:

Very easy: Mix 10g of my dehydrated sourdough starter with 10g of water, mix that up.

This hydrates the starter.

Then add 50g of water and 50g of bread flour. This is your first feeding. Mix that up.

Cover, leave alone for 2 days. Done.

It will rise and reach peak state around 48hrs. Take 100g to make sourdough bread or discard. There will be around 20g left in your jar for you to feed and carry on your starter.

Sourdough Starters 101

Now that you have your copy of my sourdough starter, here are some very helpful links I recommend you go through:

How To Feed Your Starter

How To Use Your Starter In Recipes

Where To Keep Your Starter

How To Keep Your Starter Alive

Sourdough Starter Kit

Click on the links individually down below, OR see this kit as a collection on my Amazon Storefront: Sourdough Starter Kit – Sourdough Baking

Sourdough Starter Kit

Here are my #1 favorite and preferred tools for Sourdough Starters. These are the winners of three years of comparison shopping, research and testing.

Sourdough Starter

Thermometer and Hygrometer

My Favorite Kitchen Scale

Weck Jars

Off-set metal spatula 4.25″

Bread Flour

Dark Rye Flour

Brod & Taylor Proofer

Dough Mat

Use Code ROSELLE10 for 10% OFF

Rubber Bands

Dry Erase Marker

Filed Under: Sourdough Starter Tips, Sourdough Tutorials

How To Use Your Sourdough Starter In Sourdough Recipes

August 19, 2024 by admin 2 Comments

There are 2 ways you can use your sourdough starter in sourdough recipes: the Levain Method and the No-Discard Method.

Let’s explore the pros and cons of each approach to help you determine which one might work best for your sourdough baking needs.

The Levain Method

The Levain Method involves creating a separate starter culture that you’ll use specifically for your recipe. This involves taking a portion of your main sourdough starter and feeding it to create the levain.

Pros of the Levain Method:

Flexibility – The levain gives you the ability to create a starter that is tailored to the specific recipe. For example, if you have an all-purpose flour starter but the recipe calls for 100% whole wheat, you can make a whole wheat levain.

Starter Maintenance – By separating the levain from your main starter, you can keep your primary starter small and more manageable, making it easier to maintain.

Cons of the Levain Method:

Additional Steps – Creating the levain adds an extra step to your baking process, which can be time-consuming for beginner bakers.

Increased Dish Washing – The levain method requires an additional container and utensils, leading to more dishes to clean up.

Potential for Forgetting – If you’re not diligent, it’s easy to forget to maintain both your main starter and the levain, which can lead to issues.

For example:

Let’s say your regular sourdough starter is made with all-purpose or bread flour, but you want to make a 100% whole wheat sourdough bread. In this case, the Levain Method allows you to take a portion of your main starter and feed it into a 100% whole wheat levain specifically for that recipe. Here’s how that would work:

Suppose your recipe requires 100g of sourdough starter. Instead of using your regular starter directly, you would take 25g of that starter and feed it with 50g of whole wheat flour and 50g of water. This creates a 125g whole wheat levain that you can then use in your 100% whole wheat sourdough bread recipe.

The advantage here is that you get to maintain your original starter, while also customizing a levain that perfectly matches the needs of the specific recipe. This allows you to bake a truly 100% whole wheat sourdough bread, even if your regular starter isn’t formulated that way.

The Levain Method gives you this flexibility to create starter cultures tailored to the recipe at hand. Whether it’s a whole wheat, rye, or any other specialty flour blend, the levain can be dialed in to ensure your final bread has the desired characteristics.

This level of control and customization is a key benefit of the Levain Method, as it allows you to optimize the leavening agent for each unique sourdough recipe. It’s a versatile technique that expands the possibilities when baking with your sourdough starter.

The No-Discard Method

The No-Discard Method involves using your main sourdough starter directly in the recipe, without creating a separate levain.

Pros of the No-Discard Method:

Simplicity – This method is more straightforward, as it eliminates the need to create a levain, reducing the number of steps in your baking process.

Less Waste – When the starter reaches its peak, you feed it. What you discard goes straight into making dough

Fewer Dishes – With only your main starter to maintain, you’ll have fewer containers and utensils to clean.

Cons of the No-Discard Method:

Lack of Customization – You’re limited to using your main starter as-is, without the ability to tailor it to the specific recipe.

When deciding between the Levain Method and the No-Discard Method, consider factors such as your baking frequency, the complexity of your recipes, and your personal preferences. The Levain Method offers more flexibility and control, while the No-Discard Method is simpler and generates less waste.

Ultimately, the best approach will depend on your individual needs and experience level as a sourdough baker. Experiment with both methods and find the one that works best for you and your baking style.

Step By Step Instructions

Let’s dive deeper into the step-by-step process for both the Levain Method and the No-Discard Method when incorporating your sourdough starter into bread recipes.

The Levain Method:

Let’s say the recipe calls for 100g of sourdough starter.

Take a portion, like 20g, of your main starter.

Feed the 20g of starter with an equal amount of flour and water. For example, 50g of flour and 50g of water. This creates 120g of levain.

Let rise at room temp until it reaches its peak (approx. 4-8hr. at 70F)

Then measure out 100g to use in your bread recipe. Any remaining levain can be added back to your main starter, saved in a jar to use for discard recipes or thrown away.

Proceed with the rest of your bread recipe, using the 100g of levain as the leavening agent.

Maintain and feed your main sourdough starter as usual, keeping it separate from the levain used for baking.

The No-Discard Method:

Let’s use the same example, where the recipe calls for 100g of starter.

Take your existing sourdough starter, which let’s say is 50g.

Feed the 50g of starter with an equal amount of flour and water, creating 150g of fresh starter. The feeding ratio would be 1:1:1 (50g starter : 50g flour : 50g water).

From the 150g of fed starter, you will “discard” 100g by using it for your bread recipe.

The remaining 50g becomes your new standing starter, which you can now maintain and feed as usual.

The key differences between the two methods are the extra step of creating a separate levain in the first approach, versus directly using your main starter in the second method.

Both are valid techniques, and the choice will depend on your personal preferences, recipe requirements, and the size of your main sourdough starter.

Filed Under: Sourdough Starter Tips, Sourdough Tutorials

How To Keep Your Sourdough Starter Alive

August 19, 2024 by admin Leave a Comment

Consistent, Frequent Feedings

Feeding Frequency: If you’re keeping your sourdough starter at room temperature, the key is to feed it consistently, at least once per day, if not twice. The starter will likely rise and fall within 4-6 hours at room temperature, so frequent feedings are essential to keep it happy and active.

If the starter is being stored in the refrigerator, the feeding frequency can be reduced to once every 5-7 days, as the cooler temperature will significantly slow down its metabolism and consumption of the food.

But for starters maintained at room temperature, neglecting feedings is the quickest way for it to become sluggish and unresponsive. The starter needs regular replenishment of fresh flour and water to sustain its yeast and bacteria populations. Aim for at least one feeding per day, and potentially two if you notice it rising and falling rapidly.

Consistent, frequent feedings are the foundation of keeping a healthy, thriving sourdough starter, especially when it’s being kept out at room temperature.

NOTE: It’s okay to put your sourdough starter in the fridge indefinitely this is basically putting your starter in cold storage, for use someday. I have put my sourdough starter in the fridge, forgotten about it for months and it was still fine. All you have to do is get rid of the liquid on top, discard very heavily and feed at higher ratios, at least 1:5:5

Sourdough Starter Feeding Ratios

Use a baseline of 1 part starter : 1 part flour : 1 part water (by weight) as a starting point.

However, you can adjust the water amount as needed for your specific starter. The key is to feed it at least its own weight in flour. For example, see above. The starter weighs 100g, so you have to feed it at least 100g of flour. You can be flexible in how much water you feed it, but you have to feed the starter at least its own body weight in flour.

This 1:1:1 ratio provides a good balance of nutrients for the yeast and bacteria in the starter to thrive. However, you can experiment with adjusting the hydration levels by adding a bit more or less water as needed.

The most important thing is to make sure you’re feeding the starter at least its own weight in fresh flour. This ensures it has an adequate supply of food to consume and remain active.

The flexibility lies in the water amount, but the flour should always be at least equal to the starter’s weight.

Examples of different feeding ratios

1 : 1 : 1

1 part starter1 part flour1 part water
100g100g100g

1 : 5 : 5

1 part starter5 parts flour5 parts water
20g100g100g

1 : 10 : 10

1 part starter10 parts flour10 parts water
10g100g100g

Sourdough Starter Temp Control:

The temperature directly affects the speed of the starter’s fermentation. Cooler temperatures, around 60-70°F, will slow down the starter’s activity, causing it to take longer to consume the available food. Warmer temperatures, around 75-85°F, will speed up the fermentation, causing the starter to eat through its food more quickly.

Paying close attention to how your starter responds to different temperatures is key. The colder the environment, the longer the starter will take to reach its peak before running out of food. Conversely, the warmer it is, the faster the starter will consume its resources and begin to decline.

Controlling the temperature is an important lever you can use to adjust the pace of your sourdough fermentation to fit your schedule. Experiment with different spots in your kitchen and observe how the starter’s activity changes based on the ambient temperature.

Sourdough Starter Discard & Refresh

When feeding your sourdough starter, you can discard any amount of the old starter before adding fresh flour and water. Many bakers discard HALF of their starter. Or they prefer to do what I do, which is discarding heavily and feed at higher ratios, such as using a 1:10:10 or 1:50:50 ratio.

Why would you do this?

Well, discarding a larger portion of the existing starter and then feeding the remaining small amount with a much higher flour and water ratio serves an important purpose.

It helps provide the starter culture with an abundance of fresh, nutrient-rich food to consume. By retaining only a small percentage of the old starter and giving it a large volume of new flour and water, you are essentially “resetting” and rejuvenating the culture.

This can be especially beneficial if the starter has become sluggish/less responsive over time or if the starter has missed a few feedings and now it’s become too acidic.

The reasoning behind this heavy discarding approach is that it ensures the yeast and bacteria have ample resources to thrive.

Rather than just incrementally feeding the existing starter, the aggressive discard and high feeding ratio gives the microbes a boost of energy and food to work with.

So while the standard 1:1:1 feeding ratio is a solid baseline, don’t be afraid to experiment with discarding more and feeding at higher ratios like 1:5:5, 1:10:10 or even 1:50:50. This can help revive an underperforming or undesirable starter and keep it at peak activity.

What does a healthy sourdough starter look like?

A healthy, happy sourdough starter has a very distinct appearance and behavior. Here’s what you want to look for:

Appearance:

  • Smooth, creamy texture without any separation or dry edges
  • Lots of small, uniform bubbles dispersed throughout the starter
  • Doubles or even triples in volume after being fed

Aroma:

  • Pleasant, yeasty smell similar to freshly baked bread
  • No unpleasant or off-putting odors

Behavior:

  • Rapidly becomes very active and bubbly after being fed
  • Rises dramatically in the hours after feeding, then falls back down
  • Consistently exhibits this rise and fall cycle every time it’s fed


When you look at a healthy starter, it should appear vibrant, alive, and ready to work. The bubbles are an important sign – lots of tiny, evenly distributed air pockets indicate the yeast is very active and producing gas.

The dramatic expansion in volume after feeding also showcases the starter’s strength and metabolic power. Seeing it double or triple in size lets you know the microbes are consuming the new food sources rapidly.

And of course, that wonderful yeasty aroma is a telltale sign of a happy, thriving sourdough culture. Any funky, alcoholic, or unpleasant smells would be a red flag that something is off.

Overall, a healthy starter just exudes vitality. It’s lively, responsive, and consistently demonstrates the rise and fall cycle that indicates it’s well-fed and ready to go for baking. Pay close attention to these visual and olfactory cues to ensure your starter is in peak condition.

Troubleshooting Your Sourdough Starter

When it comes to troubleshooting your sourdough starter, there are a few common issues that can arise and some adjustments you can make to get it back on track. Let’s go through some of the most common problems:

Sluggish Activity:

If your starter is not rising and falling as dramatically as it should after being fed, that’s a sign it may need some adjustments. This could be due to:

  • Feeding too soon – Try waiting every two days to feed your starter. You are waiting for the starter to rise and fall. Sometimes it may take up to 2-3 days for a starter to do this. Especially starters that are being revived from cold storage or dry state.
  • Out of balance – If your starter has become funky, alcoholic, or smells unpleasant… then something is off. Discard heavily, perhaps discarding until you only have 10g of starter to feed. Then feed at a higher starter:flour:water ratio, maybe try a 1:10:10 feeding ratio or more.
  • Temperature too cool – Make sure the starter is being stored in a warm enough environment, ideally 70-80°F.

Unpleasant Aroma:

If you notice sour, alcoholic, or just generally off-putting smells coming from your starter, that indicates an imbalance in the microbial culture.

Discard most of the starter, and “wash” the remainder of the starter by adding some water into the jar, mixing it up and discarding half of that starter/water mixture. Then feed it at a high feeding ratio of at least 1:10:10, if not more, to help “reset” the culture.

Separation/Hooch:

Seeing liquid (hooch) forming on top of the starter or dry, crusty edges are signs it’s becoming too hungry between feedings.

If you see hooch forming on the surface of your starter, the first step is to carefully pour off the excess liquid before discarding and feeding the starter.

Pouring off the hooch helps remove the built-up alcohol and sugars that have separated out. This allows you to then discard and feed the remaining starter with fresh flour and water, providing it with the nutrients it needs.

Skipping the step of pouring off the hooch before discarding and feeding can reintroduce those undesirable byproducts back into the starter culture. It’s an important part of the process to get the starter back on track.

Signs Your Sourdough Starter Has Gone Bad

When diagnosing a sourdough starter that has developed mold, there are a few key things to look for and steps to take:

Visual Inspection

The first and most obvious sign of mold will be the visual appearance. Look for any fuzzy, colored growths on the surface of the starter – this is the telltale sign of mold. It may appear green, blue, white, or even black in color.

If you notice your starter taking on a pinkish or orangey hue, that could be an indicator of a bacterial contamination. The color is often a result of certain types of bacteria proliferating in the starter. This usually happens *right before* the starter starts to mold. So as soon as you see a pink or orange film on your starter, know that mold is just around the corner.

Smell Test

In addition to the visual inspection, use your nose to assess the starter. A moldy starter will often have an off-putting, musty or rotten smell that is distinctly different from the normal sourdough aroma.

Check the Environment

Consider the storage conditions of the starter. Mold can thrive in environments that are too warm, damp, or have poor air circulation. Make sure the starter is being stored properly in a clean jar at the right temperature range.

Discard and Start Anew

If you confirm the presence of mold through visual and olfactory cues, the best course of action is to discard the entire contents of the starter jar. Mold spores can easily contaminate an entire culture, so it’s not worth trying to salvage it.

Thoroughly clean the jar and any utensils that came in contact with the moldy starter. Then begin cultivating a brand new sourdough starter from scratch, being extra vigilant about maintaining proper feeding schedules and storage conditions to prevent future mold issues.

Catching mold early and reacting decisively is key. Don’t risk baking with a moldy starter, as that could introduce harmful mold into your final bread. It’s better to start over with a clean slate and rebuild a thriving, healthy sourdough culture either from scratch or when you buy my starter here.

How to properly reboot a starter

Mold is the only reason you would trash your starter and start anew. If there is no sign of mold, but your starter is still not performing great, then a reboot could be just the thing to get your starter back up and running! Rebooting a neglected or hungry sourdough starter is an important process to get it back on track. Here are the proper steps:

  • Carefully pour off the liquid hooch, careful to get most if not all of the hooch out.
  • Discard most of the existing starter, careful to get most of the discolored parts out, leaving just the sides of the jar with a thin coating of starter
  • Add some fresh water to the jar, perhaps 50g of water.
  • Cover the jar and shake the jar, this will “wash” the hooch covered starter.
  • Discard half of this starter-water mixture, leaving just the washed, diluted portion behind.
  • Feed that at a high ratio, such as 1:10:10 or even more. This high feeding will help “reset” the culture and rebalance the microbial activity.

By following this process – discarding the majority, washing the remainder, and then feeding aggressively – you can get a problematic, hooch-laden starter back on track. The high feeding ratio provides a surge of fresh nutrients to reset the culture.

Filed Under: Sourdough Starter Tips, Sourdough Tutorials

Where To Keep Your Sourdough Starter

August 19, 2024 by admin Leave a Comment

Temp Controls Where You Keep Your Starter

The warmer the temperature, the faster the starter ferments. At 70-80°F, the yeast and bacteria metabolize rapidly, causing the starter to rise and peak quickly – sometimes in just 8-12 hours. When the starter has reached its peak, that means it’s eaten most of its food source and is now going to slide back down as it runs out of food. To get it back to active his requires feeding the starter at least once a day, if not every 8-12 hours to keep it healthy.

On the other hand, storing the starter in the fridge at 40°F dramatically slows down fermentation. The cold temperature puts the yeast and bacteria into a dormant state, so the starter only needs feeding every 5-7 days.
The cool, controlled fridge environment allows for a very hands-off approach. The tradeoff is that the starter takes longer, 12-24 hours, to reactivate before baking.

So in summary, the warmer the temperature, the faster the fermentation – requiring more frequent feedings. The cooler the temperature, the slower the fermentation, allowing for much less maintenance.

Understanding this temperature-fermentation relationship is key to keeping your sourdough starter happy and healthy, no matter where you decide to store it.

The Fridge vs. Room Temp

Where you choose to keep your starter can have a profound impact on its health, activity level, and the ease of your baking routine. Let’s explore the two primary storage options – the refrigerator and room temperature – to help you decide what’s best for your baking lifestyle.

Fridge Storage

Many experienced sourdough bakers sing the praises of the refrigerator as the ideal home for their starter. And they’re not wrong – the fridge can be a great storage option, especially for those with busy lifestyles. However, it’s important to understand that the refrigerator is NOT a pause or stop button. It doesn’t put the starter into a state of complete hibernation or dormancy.

Rather, the cool 36-40°F (4°C) temperature of the fridge acts more like a “slow motion” button, dramatically slowing down the starter’s fermentation and metabolic processes. At these chilly temperatures, the yeast and bacteria that make up the starter go into a sluggish, lethargic state. They continue to feed and reproduce, just at a fraction of the pace they would at warmer room temperatures.

This allows bakers to get away with feeding a refrigerated starter just once a week, or even once every 5-7 days, rather than the daily feedings required for a counter-top starter. When it’s time to bake, simply remove the starter from the fridge a few days ahead of time and give it 1-2 feedings to wake it up and get it roaring back to life.

If you store your starter in the fridge at 40°F or below, the cooler temps essentially put the starter into a state of hibernation, dramatically reducing its need for frequent feedings. This makes the fridge an ideal storage location, especially if you’re an occasional sourdough baker who doesn’t bake bread multiple times per week, or if you don’t feel like doing a daily feeding schedule. The infrequent feedings required for a refrigerated starter make it much more hands-off and convenient to maintain.

Just be sure to take your starter out of the fridge and feed it at least once or twice before you use it to bake sourdough bread, to reactivate it and get it bubbling again. But the fridge is truly a baker’s best friend when it comes to sourdough starter storage and care.

Pros of Cold Storage:

  • Requires less frequent feedings – you can get away with feeding it just once a week
  • Uses less flour and water overall – the slower fermentation means less waste if you don’t bake frequently
  • Slower fermentation is more forgiving if you forget a feeding or two

Cons of Cold Storage:

Slower starter activity and responsiveness – the cold temperature makes the starter less lively

Longer ramp up time when baking – you’ll need to feed the cold starter several times to get it back to peak performance

Risk of stagnation if left unfed for too long – the starter can become weak and unresponsive

Room Temp Storage

On the other hand, if you’re a frequent sourdough baker – say, baking once or twice a week – keeping your starter at room temperature may be the better choice. Ambient kitchen temperatures, usually around 70-75°F (21-24°C), will maintain your starter in a continuously active state.

At warmer room temps, the starter’s yeast and bacteria will ferment and consume their food (flour and water) at a much quicker rate. This means you’ll need to feed it more often, typically once or even twice per day, to keep it healthy, bubbly, and ready to use.

The upside is that a room temperature starter is always primed and ready to go when inspiration strikes. You won’t have to wait days to reactivate it from the fridge. The downside is the increased maintenance, with more frequent feedings to keep up with its speedy metabolism.

The beauty of it all, is that IF you miss a feeding –let’s say you forgot to do it and now it’s the next day or 2 days later that you are remembering, all you need to do is feed it again or put it in the fridge and feed it later. For starters that are left out on the counter that aren’t fed consistently, I like to discard heavily and feed at higher ratios to maintain a pleasant and neutral flavor.

Pros of Room Temp Storage:

Faster fermentation and starter activity – the warmer temperature keeps the starter more lively and responsive

Starter can reach peak activity in as little as 4 hours after feeding

Quicker turnaround when it’s time to bake – the starter reaches peak activity faster at room temp

Cons of Room Temp Storage:

Requires more hands-on maintenance – you’ll need to feed it more frequently (every 12 hours)

Uses more flour and water to keep it fed – the higher feeding frequency means more waste if you don’t bake daily

Starter can become overripe/overly acidic if neglected – requires more active monitoring

Choosing the Right Storage Method for You

So, which storage option is the best fit for your sourdough baking lifestyle? It really comes down to your personal schedule and needs.

If you’re an occasional or infrequent sourdough baker, the refrigerator’s “slow motion” effect on your starter is likely the way to go. The reduced feeding requirements will save you time and effort, while still keeping your starter alive and ready for when you need it.

But if you bake multiple times per week, maintaining a room temperature starter may be preferable. The increased activity and faster fermentation will have your starter primed and ready to use at a moment’s notice, albeit with the trade-off of more frequent feedings.

Experiment with both approaches and see what works best for you. Your starter will adapt to its environment, so don’t be afraid to try different storage methods. With a little trial and error, you’ll discover the perfect home for your sourdough sidekick.

What do I do?

I usually keep my starter out at room temp and when I eventually miss a feeding because of my busy life, or just plain forgetfulness, then I just discard heavily and feed it again.

If I ever feel like life is too crazy and hectic to squeeze in any kind of bread baking, then I just put my starter in my fridge indefinitely, until I feel like baking again. At which point, I take it out, discard heavily and feed again.

Wherever you decide to stash your starter, remember to give it plenty of love and attention. After all, a happy, healthy starter is the foundation for truly magnificent sourdough bread.

Feeding Your Starter Around Your Busy Life

Here are several scenarios for feeding a sourdough starter (these are not the only ways to feed a starter, I am just giving you examples on how flexible you can be). Pick the one that is most like you and your schedule

Overnight Feedings

You could try feeding your starter right before bed, around 10-11pm.

By feeding it just before bed, the starter can work through the night while you sleep (on the counter, at room temp). In the morning, it should be nice and active, ready for you to either use it for baking or give it another feeding.

This allows you to fit in a starter feeding without having to worry about it during your busy workday evenings.

Weekend Feedings

Another option would be to put your starter in the fridge for the entire workweek, only feeding it on the weekends when you have more time.

On Friday evening or Saturday morning, you can discard most of the old starter and give it a fresh feeding. This will reinvigorate the culture and have it ready for any weekend baking projects.

Then you can put it back in the fridge for the following workweek and take it out and feed it again on Fri night or Sat morning.

Occasional Feedings

As a final option, you could take an even more hands-off approach and only feed your starter only when you know you’re going to bake.

In this scenario, we are going to keep the starter in the fridge indefinitely. When you want to make dough, take the starter out and feed it 1-3x to get it fully active again.

Use the starter for your recipe and feed any remaining starter in your jar, then put it back in the fridge.

If at any point you feel overwhelmed or too busy, you can always put your starter in the fridge. Next time you want to make bread, simply take in out and feed it again. When it reaches its peak, use it to make bread and feed the starter that’s leftover in your jar. Then put it back in your fridge.

This hands-off approach works great for bakers who don’t need a constant supply of active starter.

This would allow you to essentially forget about the starter in the fridge, then give it a thorough refresh (feed once or twice before using to make sourdough bread) when you have more availability.

Recap

The key takeaway is that there’s flexibility in how you feed a sourdough starter, as long as you keep it alive and wake it up before your next bake. Adjust the frequency as needed to fit your baking schedule and lifestyle.

The two main options are:

Room Temp

Keeping your starter at a typical room temperature of 65-75°F allows you to have an active, rapidly fermenting culture. However, this also requires more frequent feedings, typically every 8-12 hours in warmer 70-75°F conditions, or every 12-18 hours in the 65-70°F range.

The advantage of room temperature storage is that your starter is always ready to use, with a quick activation time. The disadvantage is the need for very consistent, hands-on feedings to keep it healthy.

Fridge

Storing your sourdough starter in the refrigerator at around 36°F dramatically slows down the fermentation. In the cold fridge, your starter may only need feeding every 5-7 days.

The advantage of fridge storage is the extremely low-maintenance required. You can essentially forget about the starter for days or even a week at a time. The downside is that it takes longer, 12-24 hours, to reactivate the starter before you can use it for baking.

Ultimately, the best storage option comes down to your personal baking schedule and availability. If you have the time and ability to tend to a rapidly fermenting starter with very frequent feedings, room temperature is a great choice.

But for those with busier lifestyles and less time to devote to starter maintenance, the hands-off approach of refrigerator storage may be the more practical solution. The slower fermentation allows the flexibility to fit sourdough baking into your schedule, rather than having to adjust your schedule around the starter.

Understanding the relationship between temperature, fermentation speed, and feeding frequency is the key to keeping your sourdough starter healthy, active, and ready to produce delicious homemade bread.

Filed Under: Sourdough Starter Tips

Can I use unfed sourdough starter, or discard, as-is, to make a sourdough bread recipe?

August 16, 2024 by admin Leave a Comment

Using Unfed Sourdough Starter Directly in Bread Recipes: Proceed with Caution

As a seasoned sourdough baker, I’ve been asked many times whether it’s possible to use sourdough starter that hasn’t been fed – what we call “sourdough discard” – directly in a bread recipe. The answer is yes, it is possible, but there are some important considerations to keep in mind.

The Fundamentals: Sourdough Dough as a “Gigantic Starter”

The premise behind using unfed sourdough starter in a bread recipe is actually quite sound. When you think about it, the dough itself is essentially a “gigantic starter” that we’re feeding with the flour, water, and other ingredients.

Just like a regular sourdough starter, this dough will go through the same fermentation process – it will rise, peak, and then begin to fall as the yeasts and bacteria consume the available nutrients. The key difference is simply the scale and ratios involved.

So yes, you can absolutely take that unfed sourdough discard and mix it right into your bread dough. The dough ingredients will act as a “feeding” for the dormant, unfed starter, kickstarting the fermentation all over again.

The Caveat: Fading Leavening Power

However, it’s important to understand that the more time passes since the sourdough starter was last fed, the more its leavening power begins to fade. Over time, the unfed starter develops characteristics that are less than ideal for bread baking – it becomes more acidic, more alcoholic, and more sour in flavor. This can result in a bread with poor ovenspring and an undesirable tangy taste.

Unpredictable Fermentation Timeline

Without the starter being at its peak of activity, the fermentation timeline for the dough becomes much harder to predict. It will take significantly longer to reach the desired rise, and the timing can be quite variable depending on how long ago the starter was last fed.

Difficulty for Beginners

This method of using unfed sourdough discard requires a high level of hands-on experience and the ability to assess the dough’s fermentation by feel. It’s generally not recommended for novice sourdough bakers who are still getting a feel for the process.

When to Consider Using Unfed Sourdough Starter Directly

There may be some situations where using sourdough discard directly in a bread recipe makes sense:

If the discard is relatively fresh, having been removed from the starter just recently, it may still have enough leavening power to work.

For more experienced bakers who can confidently gauge the dough’s fermentation progress by texture and appearance.

In recipes where a more pronounced, sour flavor is desirable, like rye or whole grain breads.

Recap

in most cases, it’s generally better to follow a more standard approach – either by creating a levain or by feeding your main starter before incorporating it into the dough. This will provide more predictable results and a better handle on the fermentation timeline.

The bottom line is that using unfed sourdough discard directly in a bread recipe is possible, but it does come with significant challenges and potential downsides. Approach it with caution, especially if you’re new to sourdough baking, and be prepared to make some adjustments to the process along the way.

Filed Under: Sourdough Bread Baking Q&A, Sourdough Starter Tips

Sourdough Starters Vs. Commercial Baker’s Yeast

August 14, 2024 by admin Leave a Comment

Who’s the winner?

Good, the bad, and the ugly…

Everyone is doing their best —and I think bread baking is a spectrum.  Some people are used to yeast bread and some feel at home with sourdough baking.

So I think a better way to frame it is:

Good, better, best.

I always say that homemade bread is good, sourdough bread is better, and homemade sourdough bread is best.

Whichever you choose, I think we can all agree that the “ugly” is store-bought bread.  —the common enemy!

Slideshow Comparison

Check out the Yeast Bread vs. Sourdough Bread slideshow I made that summarizes the difference between the two…

Difference in Flavor

When you take a bite of sourdough bread and then taste a bread made with commercial baker’s yeast, you’ll notice a big difference.

Sourdough bread is richer in flavor and also boasts health benefits!

This is especially true when you taste fresh, homemade sourdough bread.

Compare that to bread made with commercial yeast –which often has a single, sweet, beer-like aroma that stands out in breads like brioche or a classic white loaf.

Using a sourdough starter can highlight other flavors, such as the caramel and earthy notes of whole wheat or the gentle sweetness of dairy.

This enhanced flavor comes from the diversity of microbes in a sourdough starter, which is something you won’t find in commercial yeast.

Sourdough bread is also often easier to digest, offers more bioavailable nutrients, and is generally better tolerated by people who have sensitivities to commercial yeast, sugars, or other additives.

That’s not to say that homemade bread made with conventional yeast are bad —they definitely have their place in home baking.

But sourdough is in a league of its own, with so many unique qualities that make it truly special.

Cost Per Use

Yeast

When you compare the cost of using commercial baker’s yeast versus a sourdough starter, there are a few key factors to consider.

Commercial baker’s yeast is generally inexpensive and easy to find, usually sold in packets or jars that can last for several batches of bread.

And each packet contains a measured amount of yeast, making it simple to use with consistent results.

What’s the catch?

Well, over time, the cost of continually buying yeast really adds up, especially if you bake frequently.

Sourdough Starter

On the other hand, a sourdough starter has a higher initial investment in terms of time and effort rather than money.

Once you’ve got your sourdough starter going, though, it can last indefinitely with proper care, making it essentially a one-time cost.

You only need to feed it regularly with flour and water, which are relatively cheap, and that’s it!

The longer you maintain your sourdough starter, the more value you get out of it, and you won’t need to keep buying yeast for every batch of bread you bake.

In the long run, using a sourdough starter can be more cost-effective than relying on commercial yeast, especially for frequent bakers.

While there’s an initial learning curve and a bit of daily maintenance involved, the benefits —both in terms of cost savings and the unique flavors you get —can make it well worth the effort.

Plus, there’s something special about having a living, thriving sourdough starter in your kitchen, ready to be used whenever you’re in the mood to bake.

Modern vs Ancient Origins

Yeast

Commercial baker’s yeast has a relatively modern origin, developed for consistency and convenience in baking.

It was first produced on a large scale in the 19th century, when scientists isolated specific strains of Saccharomyces cerevisiae, the yeast most commonly used in baking today.

This yeast was cultivated and mass-produced to provide bakers with a reliable and fast-acting leavening agent.

The goal was to create a yeast that would perform the same way every time, giving predictable results and reducing the time needed for bread to rise.

Sourdough Starter

Sourdough starters have ancient origins, dating back thousands of years.

Long before commercial yeast was available, bakers relied on naturally occurring wild yeast and bacteria in their environment to leaven bread.

A sourdough starter is essentially a mix of flour and water that captures these wild microbes from the air, flour, and even the baker’s hands.

Over time, this mixture ferments and develops a unique ecosystem of yeast and lactic acid bacteria, which not only leavens the bread but also gives it its rich and robust flavor.

Every sourdough starter is unique, influenced by its environment and the ingredients used, making it a true reflection of local traditions and conditions.

While commercial yeast was developed for uniformity and speed, sourdough starters carry with them a sense of history and place.

Each starter is a living link to the ancient methods of bread-making, offering a connection to the past and a deep, rich flavor that can’t be replicated by commercial yeast.

For many sourdough bakers, the process of cultivating and maintaining a sourdough starter is as rewarding as the bread it produces, making it a cherished part of their baking routine.

Filed Under: Sourdough Bread Tips, Sourdough Starter Tips

How Do You Feed Your Sourdough Starter in Cold Winter Temperatures?

August 10, 2024 by admin Leave a Comment

Winter sourdough starter tricks

What to do to speed up your sourdough starter so you can bake sourdough bread ASAP👇

Feed it flour that it loves

There are some flours that the starter loves because it has high amounts of a protein called amylase that helps the starter break down carbohydrates. 

These are: rye flour, sprouted barley flour, King Arthur white bread flour (includes the amylase enzyme and/or barley flour)

Add a little more water

The more hydration a starter/dough has, the faster it will ferment.  And the less water it has, the slower it will ferment.

Increase the temp

The higher the temp = the faster the fermentation.  So put your starter in a place where it will be super warm.  Like 88-98F warm.

Increase the humidity

Humidity will also increase your fermentation —but especially high temp + high humidity combined.

Put it in a proofer

If you have a proofer like I do, that would be the way to go.  You can control the temp and humidity at will.

Put it in the oven with the light on

The closer environment and heat source is enough to increase the temp to make your starter happy.

Leverage thermal mass

Here’s the absolute golden tip:

Boil water and put it in a big metal container —put this in small, enclosed area —your microwave/oven/closet and put your starter next to it.  Not touching, just next to it. 

Why?  Because water is good thermal mass (the ability of a material to absorb, store and release heat)

Doing all of this ☝️ has turbocharged my starter regardless of any winter temp.

📣 That being said, if you’d like the starter feeding schedule that I use to bake all my sourdough bread that I sell in my sourdough bakery, go here:

Roselle’s sourdough starter feeding schedule

Filed Under: Sourdough Bread Baking Q&A, Sourdough Bread Tips, Sourdough Starter Tips

The No-Waste Sourdough Starter Method

August 9, 2024 by admin 21 Comments

My Sourdough Starter Feeding Schedule

As a sourdough baker, I’m always on the lookout for techniques that can help streamline the process and reduce waste. That’s why I’m a big proponent of the “no-waste” or “no-discard” sourdough starter method.

Let me share with you how this approach can revolutionize the way you maintain and use your sourdough starter, whether you keep it at room temperature or in the refrigerator.

The Problem with Traditional Sourdough Starter Maintenance

Traditionally, when maintaining a sourdough starter, bakers are often instructed to regularly discard a portion of the starter before feeding it fresh flour and water. This helps keep the starter at a manageable size and prevents it from becoming overly acidic or stagnant.

Did You Know?

If you didn’t discard at all, a starter that’s 50g turns into 241lbs by the 7th feeding!

However, this process results in a lot of waste – all that discarded starter ends up in the trash or compost. Not only is this wasteful, but it means you’re constantly having to use extra flour to keep your starter fed and healthy.

The No-Waste Sourdough Starter Method

The no-waste method I use solves this problem elegantly. Instead of regularly discarding a portion of the starter, I maintain an incredibly small amount – just 10 grams – and scale it up as needed when it’s time to bake.

Here’s how it works:

Room Temp Storage

I bake everyday. So I keep a 10g starter on my counter, feeding it a 1:5:5 ratio right before bed and when I wake up.

I just feed this 10g of starter with 50g of flour and 50g of water (1:5:5 feeding ratio).

When the starter reaches its peak, I take 100g to make 1 sourdough bread. Then I simply feed the remaining 10g to continue the cycle.

Refrigerator Storage

If you prefer to store your starter in the fridge, the no-waste method can still be applied too! The key differences are:

I feed the refrigerated starter once a week, using a 1:5:5 ratio (same as a room temp starter)

If at any point during the week, I need to bake 1 bread, I simply take 100g from my starter and feed the remainder to continue the cycle.

The beauty of this approach is that I almost never have any sourdough discard to worry about. The small 10-gram starter I maintain is just enough to keep the culture thriving, and I only scale it up when I need it for baking.

The benefits of the no-waste method remain the same, whether you store your starter on the countertop or in the fridge. By maintaining a tiny amount and scaling up as needed, you’ll drastically reduce waste and simplify the overall starter maintenance process.

Benefits of the No-Waste Method

There are several key advantages to using the no-waste sourdough starter method:

Reduced Waste – No more discarding large amounts of starter, which means less flour and water being used and thrown away.

Simplified Maintenance – Keeping a tiny 5-10 gram starter is much easier to manage than a larger, more high-maintenance culture.

Increased Efficiency – When it’s time to bake, I can simply feed the starter at a higher ratio to get the amount I need, without having to deal with excess discard.

Cost Savings – By minimizing waste, I’m saving on the cost of flour and water that would have been discarded previously.

Whether you prefer to store your starter at room temperature or in the refrigerator, the no-waste method is a game-changer that makes the overall sourdough baking process simpler, more sustainable, and more cost-effective. Give it a try and experience the benefits for yourself!

Filed Under: Sourdough Bread Baking Glossary, Sourdough Starter Tips

Sourdough Starter Tools

August 17, 2023 by admin 7 Comments

Here are all the tools I’ve researched, tested and used to maintain my sourdough starter

1) Starter container

Here are preferred containers, in order of preference:

For small batches of starter…

Plastic quart container

Weck jars (no shoulders)

Ball jars (wide mouth)

For large batches of starter…

KitchenAid 8qt Commercial Mixer (for mixing large batches of starter & doughs)

4qt Plastic Container (to hold starter while coming to peak)

8qt Plastic Container (to hold starter while coming to peak)

19qt Plastic bins (to hold starter while coming to peak)

2) A utensil to stir the starter ingredients

Here are the preferred utensils, in order of preference:

For small batches of starter…

Small offset spatula

Silicone Scraper Spatula (angled tip)

For large batches of starter…

Plastic bench scrapers

3) A kitchen scale

Here are the preferred utensils, in order of preference:

22lb Food Scale, big

11lb Food Scale, small

We are going to be measuring our ingredients by weight so a food scale is going to be a staple in your kitchen. That being said, you might as well get a good one like this since you will be using it to weigh your dough, and if you are operating a cottage bakery, you’ll be making large batches of dough, weighing 10+lbs.

4) A room thermometer & hygrometer

(optional, but very useful)

Thermometer & Hygrometer

This is a very helpful tool that lets you know the temperature and humidity in the room.

5) Rubber bands or dry erase marker

(optional, but extremely useful)

Rubber bands

Dry Erase Markers

These are very very helpful for the baker, as this will enable you to mark the starting point of the starter and will let you know how much the starter has risen.

You will want good rubber bands, big enough to stretch around a 32oz jar. If you don’t want to use rubber bands, you can just use a dry erase marker to mark the starting point of the starter, but that can easily be wiped off.

6) Proofer or Temp Control

(to control and manipulate starter temperature)

Brod & Taylor Proofer (for big starters)

Brod & Taylor Sourdough Home (for small starters)

Kombucha Heating Belt

Dough Mat – use code ROSELLE10 for 10% OFF

If you buy through my link, I get a little commission. These are ingredients and tools I use daily in my own micro-bakery, so I can personally confirm that they are the best tools for the job.

Once you have your ingredients and tools ready, it’s time to start making your starter.

Filed Under: Sourdough Baking Tools, Sourdough Bread Tips, Sourdough Starter Tips

© 2026 How To Make Sourdough by Roselle Blore

About Contact Privacy Terms Refund